Content may contain affiliate links. When you shop the links, we receive a small commission at no cost to you. Thanks for supporting my small business.
This is a simple tutorial on how to use a Cricut to make shirts. This easy project can transform plain t-shirts into personalized custom shirts for you and your loved ones. Below, I show you step by step instructions on how to use vinyl to make shirts with the best tips and tricks for the perfect application on your shirts (so they stay on after going through a wash cycle).
If you just got a new machine and are looking to use your Cricut to make a shirt as your first project, you are in the right place! This is the ultimate beginner’s guide for someone looking to explore what types of vinyl can be used to iron onto a shirt as well as ensuring that the transfer process goes smoothly. If you are new to working with heat transfer vinyl (HTV), I’m sure it can be overwhelming to even know what HTV is compared to other vinyl. I’m going to be breaking down all the things you need to know.

Perhaps you are here because you couldn’t find the exact shirt or outfit for the occasion, the tutorial below will show you how to make any shirt that you have ever wanted! Before getting a cutting machine like the Cricut Explore 2, with my four kids and various school and kid activities/outings, I’d be scrounging around online or at the stores for the perfect outfit or shirt for the theme for their classroom or field trip.
Since getting my Cricut, I have saved so much money and time! Not only is it economical, but it’s also one of my favorite ways to provide my friends personalized gifts! So if you want to invest in something that will be an investment in personalized gift giving, a Cricut machine will allow you to customize a new shirt, mug, sign that will be so personal, you’re loved ones will feel special that no one can find it anywhere else.

Commonly Asked Questions About Cricut and Making Shirts
Before we get started, here are the most common questions I about my Cricut machine with regard to making shirts for beginners. I wanted to address this so you had the right state of mind before getting ready to make your first shirt with your Cricut. I’ve put together my most frequently shared tips I’ve learned while using my machines below.
How easy is it to make custom t-shirts with it?
With a Cricut machine, it is super simple to make a shirt and it only takes knowing a few tips and tricks to make sure that the vinyl doesn’t come off and is adhered well to the shirt.
Where is your favorite place to buy t-shirts in bulk?
I purchase mine through Jiffy Shirts because they are pretty reasonably priced!
Which of the Cricut machines should I get to make a personalized shirt?
Any of the Cricut Maker or Cricut Explore machines can be used to make custom shirts really easily.
Does the Cricut machine pay for itself after a couple of shirts?
For us, I would say DEFINITELY. It will pay for itself because you’ll end up saving time in making the shirts instead of driving around to find the perfect shirt for any occasion. Not only that, you end up with a product that you actually customized and personalized for yourself.
What can I use heat transfer vinyl on?
You can use heat transfer vinyl on anything that you can use a super hot iron on. If you are looking for something that is durable and 100% fool proof, 100% cotton is a great option. Generally, I would recommend pre-washing your base material if it is something that will be going through the wash often. If you don’t, your material might shrink with the vinyl. I often recommend using cotton and canvas as my go-to material. Rayon or synthetic material is generally a more challenging material, but it is doable with practice.
What kinds of heat transfer vinyl material are there?
Heat transfer vinyl comes in many styles and finishes. In addition, there are a lot of brands that you can choose from for heat transfer vinyl. For most shirt crafters and makers, everyone will have their own opinion on what brands are best. To be honest, as long as you are using the right heat and the right time when ironing or pressing, the vinyl should apply perfectly.
There are different types of heat transfer vinyls, which means as a consumer you have a ton of available options. This includes matte, glossy, holographic, glitter, flocked, and neon. The beauty of these options is that you can layer the vinyl together to make some really amazing designs that have a lot of depth.
There are a lot of other extravagant heat transfer vinyls on the market as well. From ultra metallic, glitter flake films, GlitterSOFT, Siser Glitter, and EnduraTex bling. Some of these may be harder to weed this general heat vinyl, but with small challenges come great reward – you’ll have standout visuals with the impact of all the bling and metallics.
None of them are that difficult to use. If you follow the steps below, you’ll be able to manipulate the vinyl to your heart’s content. Again, more intricate designs may require you to layer vinyl, which isn’t difficult at all (just requires a little more effort and time).
What size heat transfer vinyl should I order?
While you can always find vinyl in various sizes all the way up to 18″ in width, I would recommend just paying a little more money for the 12″ width to save you from having to trim it down before using it in your machine. Time is money, and I’d rather spend that money to save me time on an emergency project!
How are the designs created? What type of software do you use with Cricut?
Cricut has software called Design Space that is loaded via a Internet Browser. It’s a free download that you can use. There is also an upgraded version (that you may not need starting out) that will include additional features. If you are just starting out, the free version will do you just fine.
They have so many options and cut files that you can choose from. You can also purchase designs from Etsy and import them into Cricut as well. I find that the design costs range from $1.00 to $5.00, which is still way less than buying a new premade shirt.
The user interface for Cricut Design Space is pretty intuitive.
What’s the most important part of making a shirt with a cutting machine?
Once you are ready to make it, make sure you flip and cut using the horizontal mirror image. The reason why this is important is because when you are cutting the vinyl, you are cutting the design on the backside of the heat transfer vinyl. It has a clear plastic carrier sheet that is on top of the vinyl, whereas the other side is where the adhesive that appends to the surface that you want to put on. The clear plastic carrier sheet holds the vinyl in place until it is appended to your shirt. So, it is VERY important to mirror the design.
Note that when you use vinyl where you are not transferring (think a mug or water bottle), you would NOT mirror the image. The vinyl transfer process is different, thus not requiring you to mirror the image.
What is a cut file? What is a SVG? What is a Cricut cut file?
In short, it is the design that you want to cut from your Cricut machine (or any machine). Generally, it’s a file that you cut your vinyl from.
When you see a “cut file” or “SVG” extension mentioned on blogs, it just means that it’s the design file that will be used in Cricut Design Space. SVG is a file extension that can also be used in various other programs, so it’s not proprietary to Cricut. Cut files can also come in .png, .jpg, .dxf, .png and .Studio depending on where you purchase the files.
SVG is typically the most common file extension that is compatible across cutting software.
Where can you find cut files for Cricut?
There are so many places, including Cricut’s own Design Studio. You can find them free on certain blogs as well as Etsy for purchase.
Now that we got all of the questions out of the way, it’s now time to get crafting to make your own personalized t-shirt with Cricut.
Step by Step Instructions on Making a Shirt with Cricut
Tools for Making a Shirt
Cricut Explore or Cricut Maker machine
Standard Grip Mat
Essential Tool Set
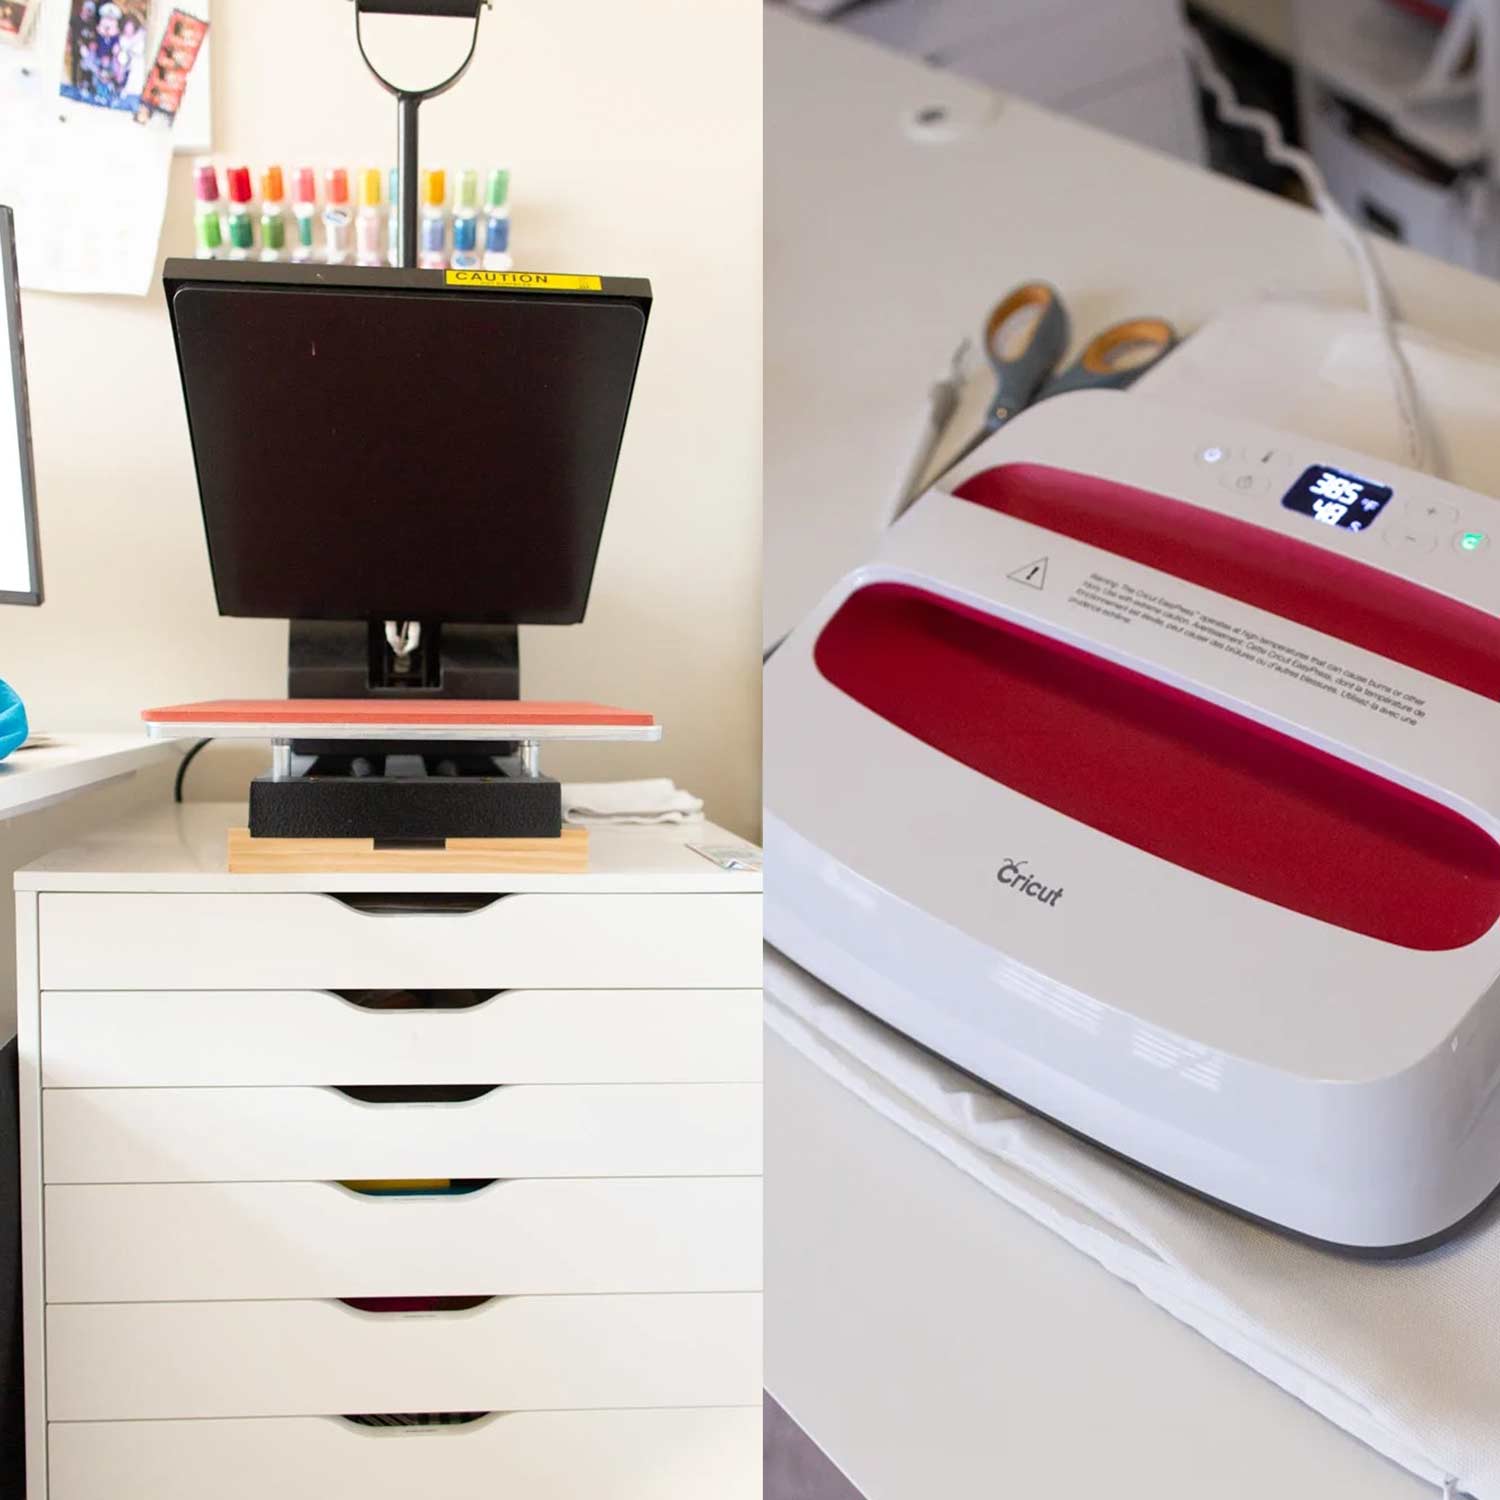
Cricut EasyPress 2 (you can use a iron as well)
Cricut EasyPress Mat (you can use a towel instead)
Thin Cloth (to iron over)
Supplies and Materials for Making Shirts
vinyl
cotton t-shirt

Step by Step Instructions for Creating Custom T-Shirts in Cricut
In general, at its most simplest explanation, creating your first t-shirt with vinyl summarizes into just a few steps: prepping the cutting file, cutting and weeding your vinyl, and transferring your vinyl.
Step 1 – Create Your Design
Use Cricut Design Space to design out your letters, shapes or sizes. With Cricut’s Design Space and a little creativity, there are SO MANY ideas that you can make to create a design that is uniquely your own. And the best part of it? You don’t have to start the design from scratch.
With its massive library, there are literally a ton of fonts, designs, images you can choose from to start with.

If you don’t like what you see (which I think will be impossible), you can always purchase pre-made designs on Etsy as well.
And if you can’t find something pre-made, you always have the option to create one yourself in Design Space if you have an idea of what you want. You can also upload an image that you already have and modify it from there to cut in Design Space as well.

The best part about creating in Design Space is that you can share the project with anyone! If you are part of a close group of crafters or even family that also have a Cricut, you can share the file and they can make it themselves. This is especially great if you are planning a family reunion and have matching shirts that everyone will have. Sending the file over is easier than making the shirts for everyone.

For your first project, I would recommend starting with a phrase that uses a basic font that doesn’t have a lot of distress or wearing.
After creating your design, my pro tip is for you to create a box around your design. It will make weeding your vinyl a LOT easier (trust me on this).
Step 2 – Select Your Vinyl and T-Shirt Material
You’ll want to make sure you understand all the options I listed above. I would recommend getting some vinyl that is easy to weed for your very first project.
As far as the shirt, I would stick with the recommendation of choosing something that is 100% cotton. The shirt will adhere to the heat transfer vinyl a lot better than that of a shirt that is synthetic like rayon. While rayon is doable, it will might be challenging as your first shirt.
Step 3 – Place Your Heat Transfer Vinyl on Cutting Mat and Cut Your Vinyl
Measure the space that you want the design on your shirt. When you take the measurement, account for how your shirt wraps AROUND the chest. You don’t want to make the design that goes all the way from the left to the right. Trust me, I made that mistake once, and it was not pretty.

Set the size of the design by highlighting the entire design, then using the arrow anchors in Design Space to align the design the way you want it to be. You’ll want to scale your design to fit your surface.

In order to mirror your heat transfer vinyl design, in Cricut’s Design Space, you select the entire design, and click “Flip > Flip Horizontally” and your design is now flipped. It should be ready to cut because it is now scaled and mirrored.

Use the Cricut Maker or Cricut Explore to cut your vinyl based on the directions that the “Make It” button guides you to do. This button will light up telling you to feed the carrier sheet with the vinyl in.

If you are not using a Cricut machine, the process varies between each cutting machine. I would ensure that the settings for each type of HTV is set up correctly. If you don’t know, you can always do a small sample cut. I would highly recommend this when you are using new material.

Step 4 – Weed Your Vinyl
While designing is a fun step, weeding is also part of the fun. Weeding basically means removing the extra vinyl around your design that you don’t want on your shirt.
Pro tip: If you are wanting to avoid wasting expensive vinyl when weeding, my box tip around the design will definitely help in this space. You’ll be able to see where the design is and use scissors to cut around the box that includes your design. You can save these smalls craps for a future design.
The tool that you use for weeding vinyl is a weeding hook. It reminds me of the tool that dentists use when cleaning your teeth. If you don’t have one, that’s okay. In the interim of getting one, you can use tweezers, a craft knife and even a fork!
If you have really dark or light material, chances are you may not be able to see all of the cutlines. Holding your vinyl by a bright light may help you see the lines better.
Remove the excess vinyl around the cut area, taking care of not removing designs that are inside of cut lines. You’ll want to take your tool and grab one of the edges of the part that won’t be transferred to your shirt and remove that vinyl. It will lift up on your tool, you can then grab it and peel the vinyl.
Once all the negative pieces from the vinyl are gone, flip it around to make sure the design is how you want it.

Step 5 – Pre-Iron Your T-Shirt
You’ll want to use an iron or the Cricut Easypress to prep the surface of the t-shirt for ironing. This will allow it to adhere a little better to the shirt. I would set it to 350, and press on the shirt for at least 15 seconds.
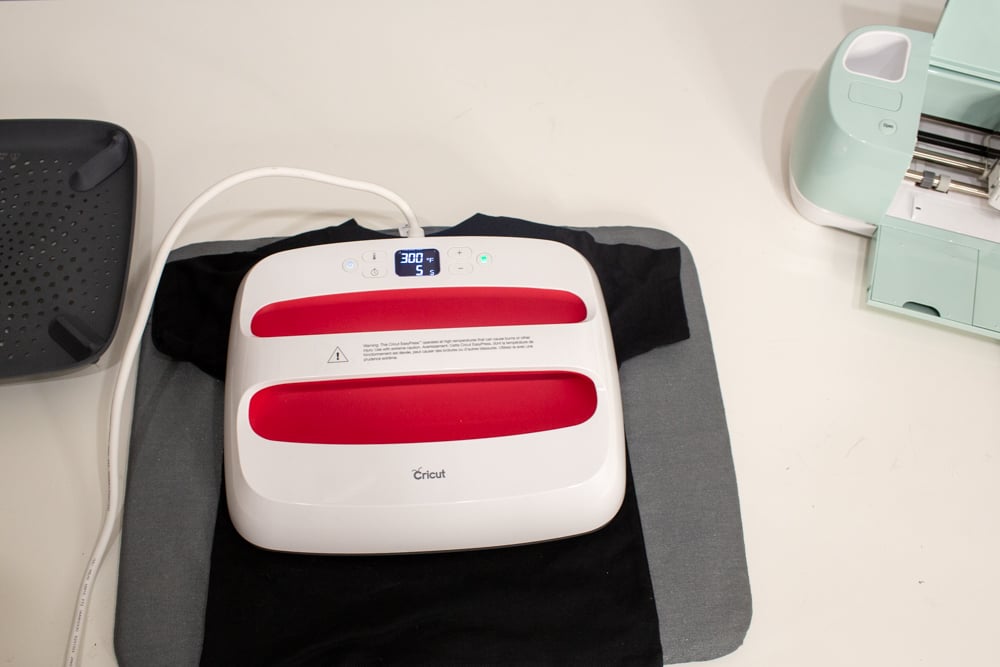
Step 6 – Iron on the Vinyl to the Shirt
The important takeaways for ironing, which is the key step to making sure your design stays put on the shirt, is heat and pressure. They are BOTH important. Too cold, the vinyl won’t transfer. Too hot, the vinyl sticks to the carrier sheet.
If you are using the Cricut EasyPress 2, below is a screen of what you’ll be able to see for the Heat Guide.

As you scroll down, Cricut asks you what your pressing material is, which is great! It then guides you on the supplies and preparation for ironing.

It then also provides your heat settings so that you don’t have to go looking for it!

Where to Iron Your Vinyl and Shirt
I would not recommend using an ironing board, I would recommend using a flat surface with a towel OR the Easypress Mat to allow you to get really good pressure. Pressure is SUPER important to ensuring that your design stays (and will maintain integrity through a wash cycle).

What to Use to Transfer Vinyl to Shirt
Grab a thin plain cloth. You are going to use this as a protector between the plastic on the vinyl to the Easypress. It is really important to create a barrier between the vinyl and the iron because you want to prevent the clear carrier sheet that holds the vinyl from melting. If the vinyl gets really close to the heat, it begins puckering and adhering to the vinyl itself. Teflon is my go to barrier.
Place your t-shirt on the Easypress Mat (or towel). Next, place your iron-on vinyl, vinyl side down towards the shirt, where you want it on the shirt. On top of that, you’ll place a pressing cloth on top of the plastic so that you don’t melt the plastic off.
Note: My favorite thing to use is actually a Teflon sheet. It’s been AMAZING on my shirts turn out. You don’t need this for your first project, but as you start using your Cricut more, you’ll want to invest about $10 on one of these sheets.
Temperature and Time to Transfer Vinyl to Shirt
Next, use Cricut’s guide on the Heat Transfer Vinyl to figure out the temperature setting and time to add to the vinyl. It’s typically 350 degrees for 15 seconds. Here’s a link to all of the temperature settings if you are using the Easypress machine.
How to Iron on Vinyl to Shirt
Once your design and shirt are set up, you’ll want to take the protective sheet or Teflon and press down with the Easypress for around 10-20 seconds (depending on what the link above said).
HTV material and types may require lower or higher heat settings or less or more time. Just make sure you stick with the settings because you may end up runing the shirt or the adhesive if you add more or less time!
You’ll do the same thing on the other side of the shirt to reinforce the design in front of the shirt.

How to Peel Vinyl Carrier Sheet from Shirt
After that, the following step is to peel off the plastic from the vinyl while it is still hot. Another Note: As you start working with other types of vinyl, you’ll find that some of them will say “peel hot” or “peel cold” – make sure you pay attention to this. The plastic should remove from the vinyl with a small tug. If it is not, do another press repeat. After removing the clear carrier sheet, flip the shirt inside out to ensure a really good adherence. One good way you can find out whether or not it stuck really well is if you can see the pattern and texture of your shirt through the vinyl.
If you want to check to see if your iron-on transfer has bound to your shirt, check a corner of your design to see if it is easily peeling up. I think of it as those kid tattoos that use water moisture. If it peels up like that, then it’s perfect.
I like to flip my project upside down or inside out and apply some more heat to the backside to ensure a really good application. With smooth heat transfer vinyl, you can see that you have a good application when you can see the weave of the fabric through the vinyl (see the image below).
The last step is to do another press with the press cloth now that the plastic is off of the vinyl so that you know it’s on there really, really well!

Last Tips and Summary of Making Shirts with a Cricut Machine
With this simple Cricut tutorial, I hope you are prepared to make your first one with heat transfer vinyl! Creating your own custom design in Design Space using a Cricut machine is really easy to do. I hope this is helpful for you as you journey on your first shirt with heat transfer vinyl with your Cricut machine.
Making a shirt is so simple, especially with a Cricut machine. Check out my other post on my first impressions of the Cricut here where I create an easy stencil design!
Creative Cricut Project Ideas and Inspiration
- Cricut Home Organization Project Ideas
- Make Pantry Labels with Cricut
- Cricut Infusible Ink Project Ideas
- How to Use Cricut Markers and Pens
- Cricut Infusible Ink Pens Tutorial
- Make a Vinyl Shirt with Cricut
- How to Make a Stencil with Cricut
- Cricut Throw Pillow Tutorial
- Earrings Made with Cricut
- Make Binder Labels with Cricut Machine for School Organization
- Make Earrings with Cricut
- How to Cut Chipboard with Cricut

How to Make a Shirt with Cricut Simple Tutorial

The best tutorial for how to make a shirt with a Cricut! Everything you need to know from how to design, to cut Cricut iron on vinyl, to ironing it onto a t-shirt!
Step by Step instructions on how to use heat transfer to create t-shirts and custom projects with tips and tricks for perfect application.
Dress up plain t-shirts inexpensively using vinyl decals. This easy project is great for making team jerseys, family reunions, or just covering a stain on your favorite shirt.
Learn how to create custom shirts with your Cricut Machine and Cricut Design Space.
Materials
- Heat Transfer Vinyl
- 100% Cotton T-Shirt
Tools
- Cricut Explore or Cricut Maker
- Standard Grip Mat
- Cricut Essential Toolset
- Cricut Easypress
- Cricut Easypress Mat
- Teflon or Thin Towel or Cloth
Instructions
- Create Your Design - Use Cricut Design space to design out your letters, shapes or sizes.
- Select Your Vinyl and T-Shirt Material - You'll want to make sure you understand all the options I listed above. I would recommend getting some vinyl that is easy to weed for your very first project.
- Cut Your Vinyl - Use the Cricut Maker or Cricut Explore to cut your vinyl based on the directions that the "Make It" button guides you to do.
- Weed Your Vinyl - Remove the excess vinyl around the cut area, taking care of not removing designs that are inside of cut lines.
- Pre-Iron Your T-Shirt - You'll want to use an iron or the Cricut Easypress to prep the surface of the t-shirt for ironing. This will allow it to adhere a little better to the shirt.
- Iron on the Vinyl to the Shirt - Ad here the weeded heat transfer vinyl to your t-shirt.
Recommended Products
As an Amazon Associate and member of other affiliate programs, I earn from qualifying purchases.
-
 HTV Heat Transfer Vinyl: 20 Pack 12" x 10" Sheets for Iron On T-Shirts - 18 Assorted Colors- Black, Brown, White, Gold, Silver & Neon for Silhouette Cameo or Cricut- Heat Press Machine with Teflon
 -
 Cricut 2004475 Easy Press EasyPress Mat 12"x12", 12x12-Inches, Gray
 -
 Cricut Easy Press 2 - Heat Press Machine For T Shirts and HTV Vinyl Projects, Raspberry, 12" x 10"
 -
 Cricut Explore Air 2, Mint