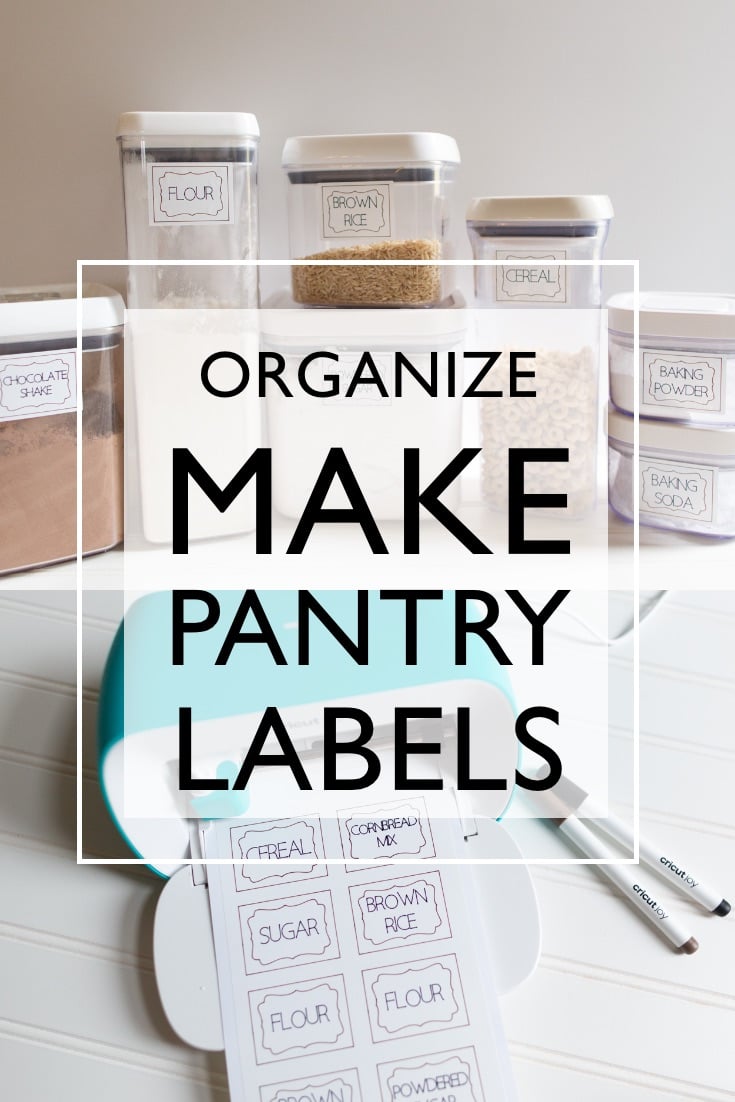
Do you want to learn how your Cricut Joy can be used to make pantry labels to beautify the space using the Smart Label Writable Vinyl? I'm going to share with you how to make pretty labels quickly and easily!
Pantry labels for food containers are without a doubt the best thing since sliced bread! When you have some commonality between all of the storage containers in your kitchen pantry, it just seems to bring everything together (you might checkout this basement tote labeling idea as well).
Here's the rub though: It seems like you have to figure out and coordinate the right size labels for each of your containers. Not only that, ensuring that you order enough is also something you have to contend with.
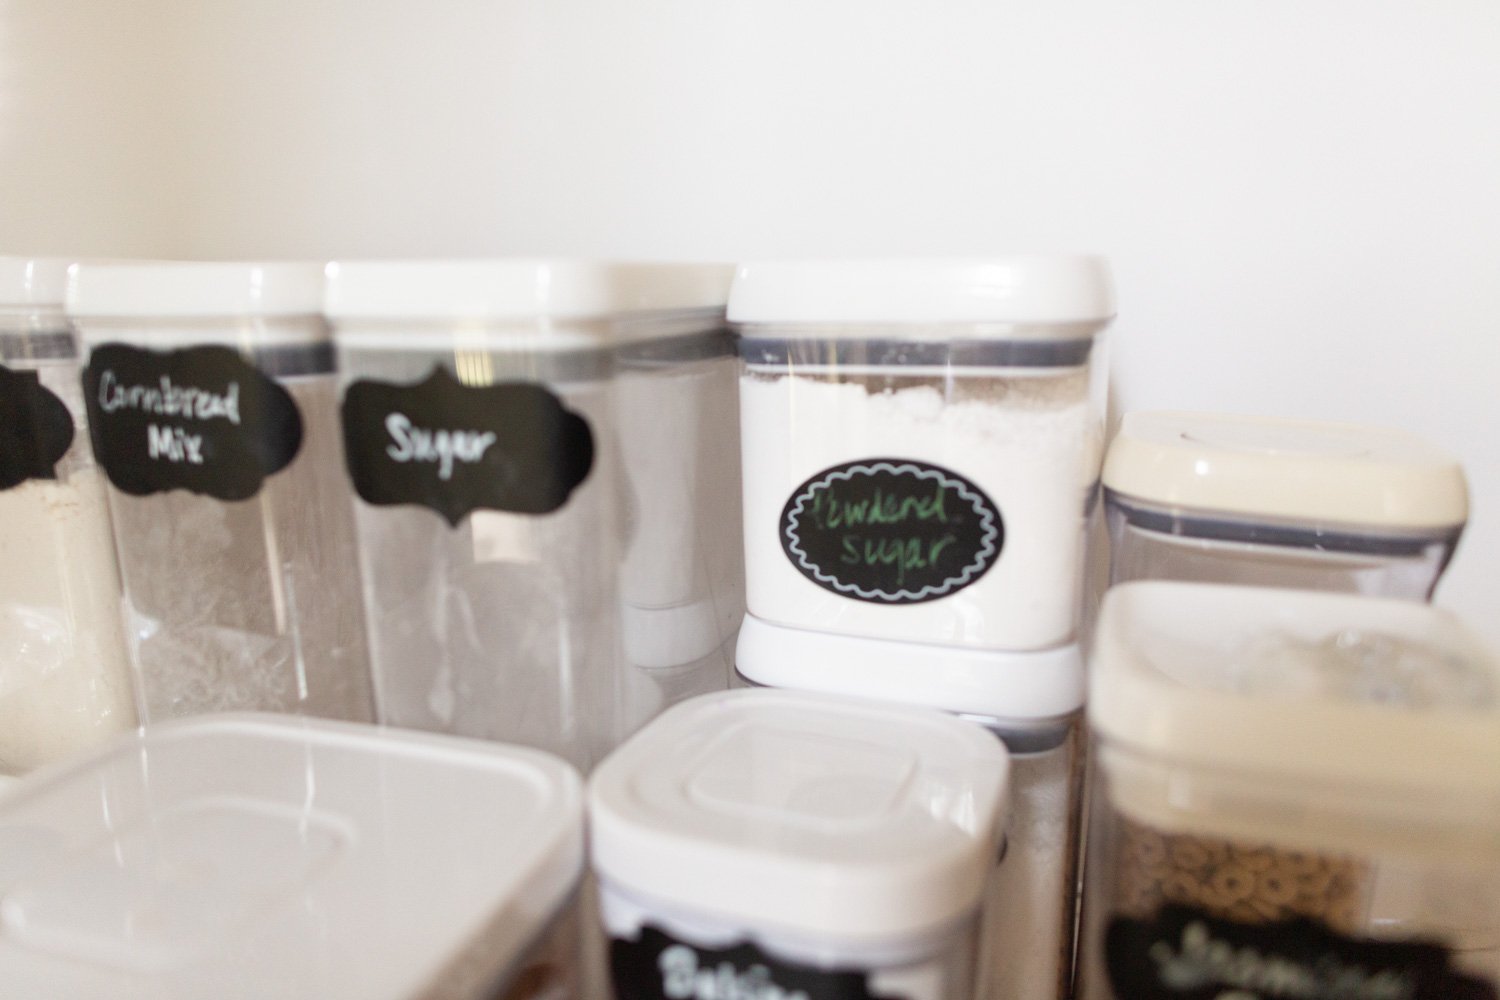
Here's a photo of a time when I thought that chalk labels that you could rub off were amazing. It just turned out to be a disaster in terms of getting the right sizes, getting them re-stocked for the right size, finding chalk pens. As you can tell from the photo below, my pantry labels during the first iteration didn't go over well.

The smudging of the labels just took it over the top for me, I had to do something about it.
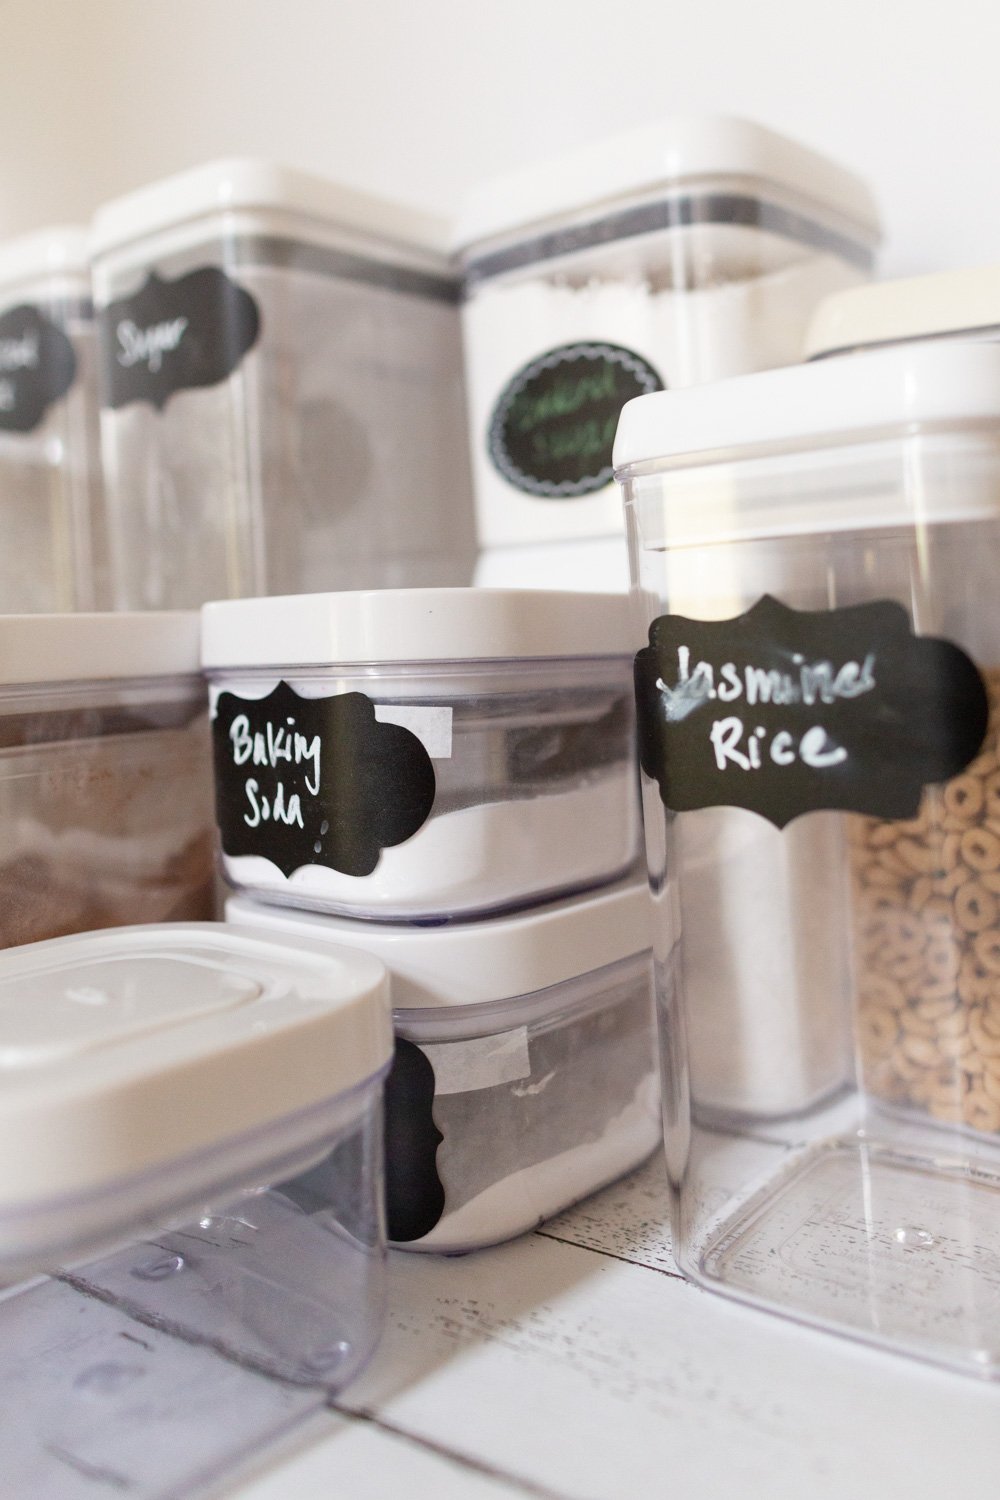
Finding the same labels (even using Amazon order history) proved to be a challenge, especially getting the right sizes!
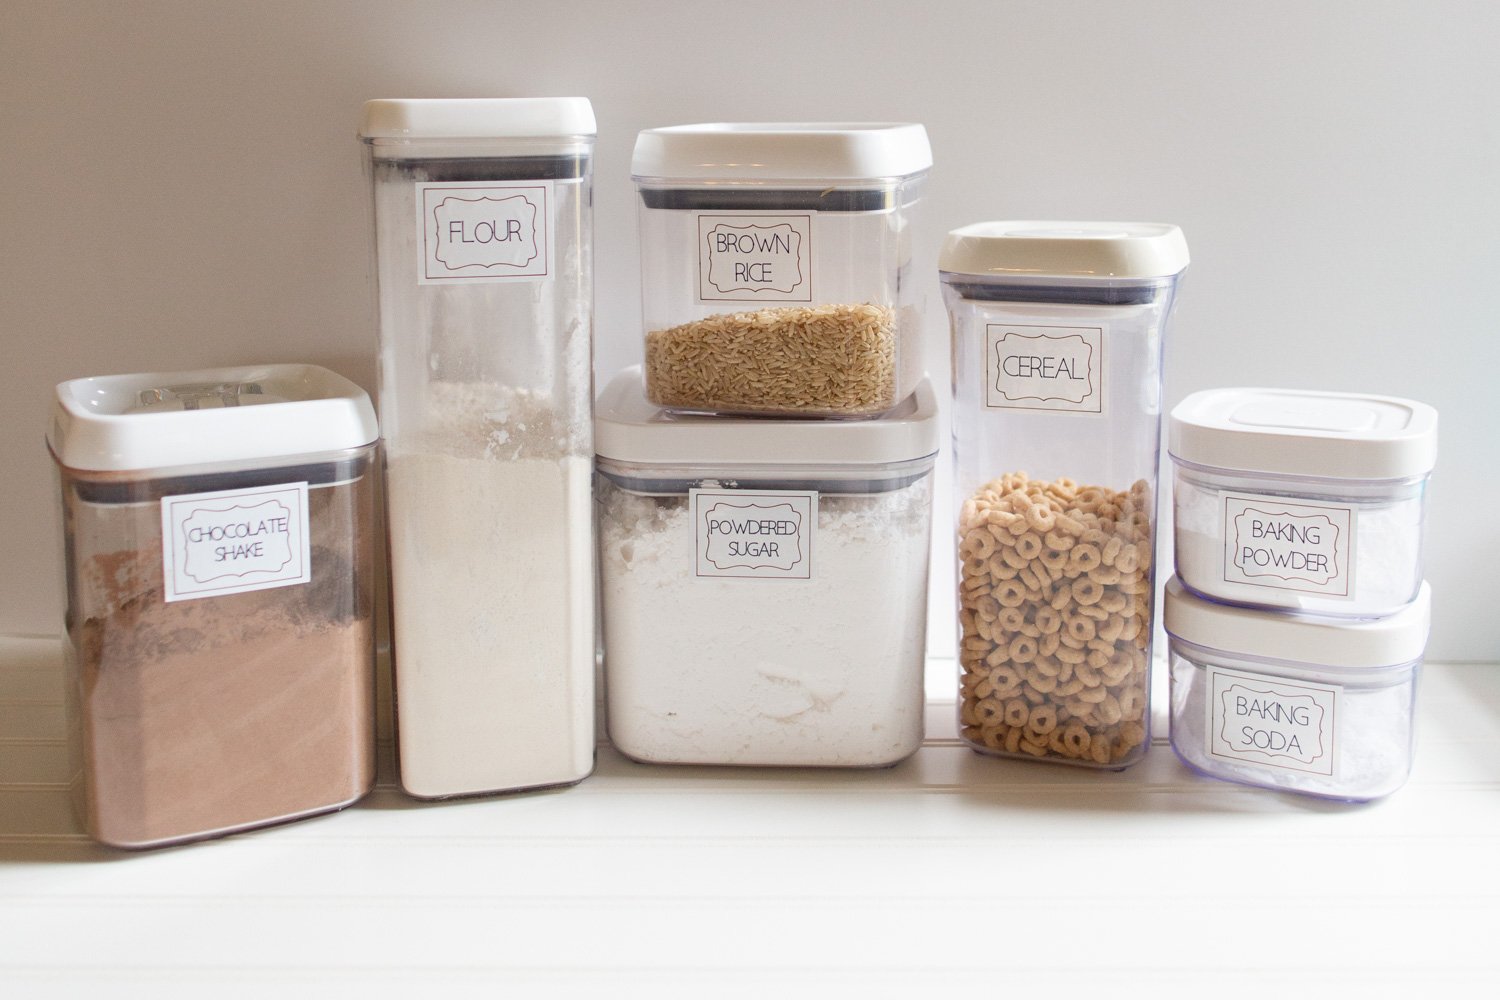
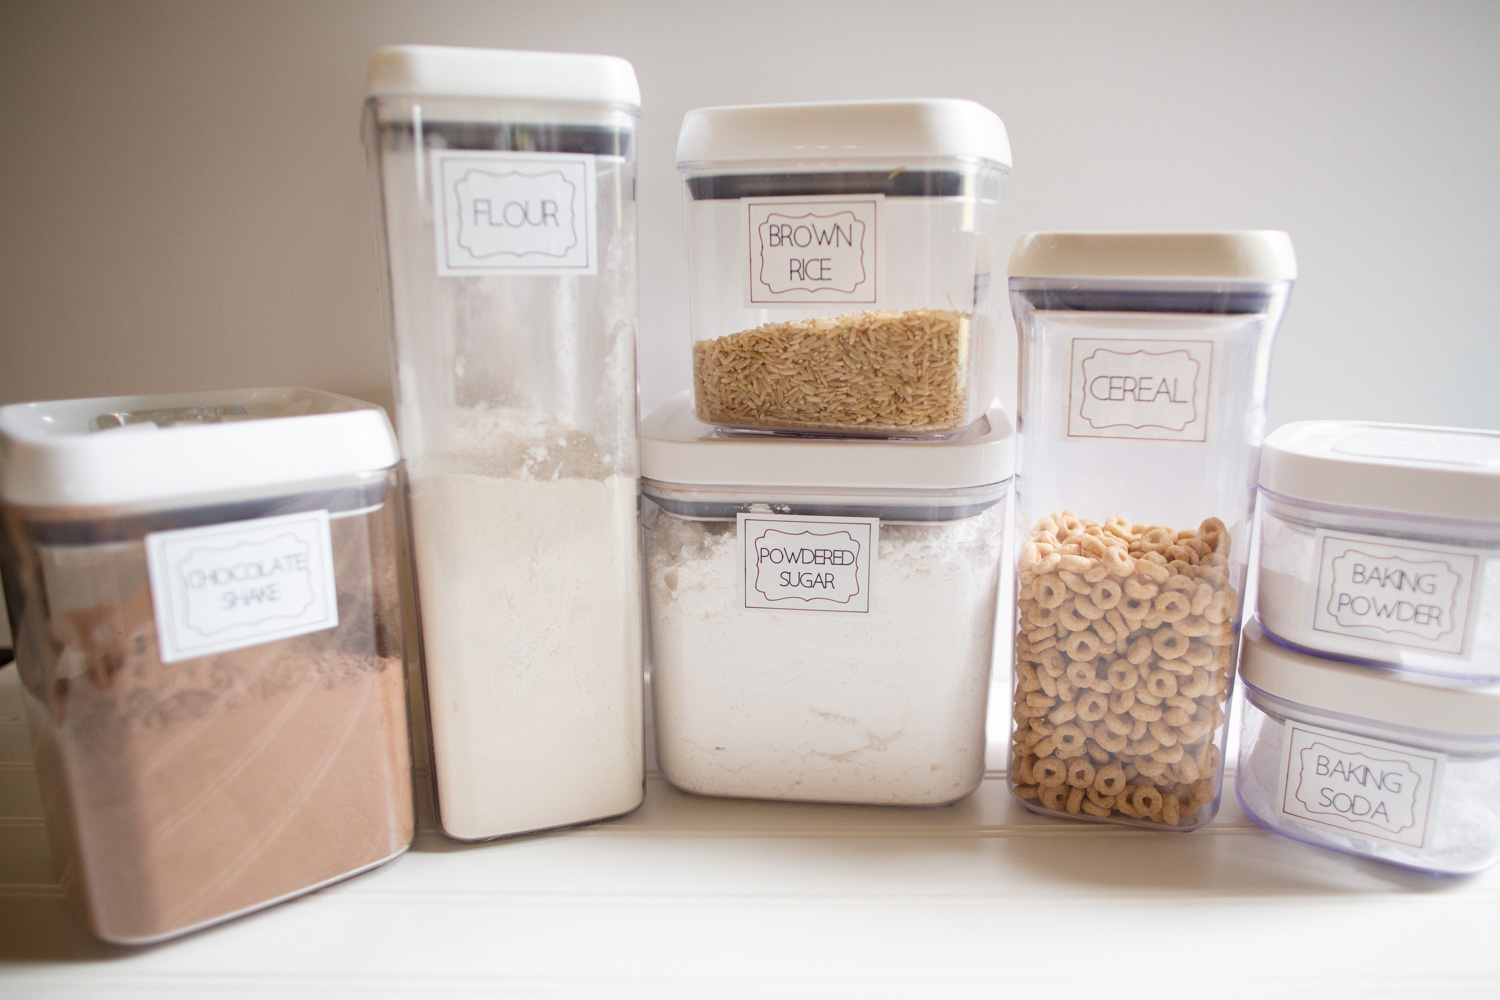
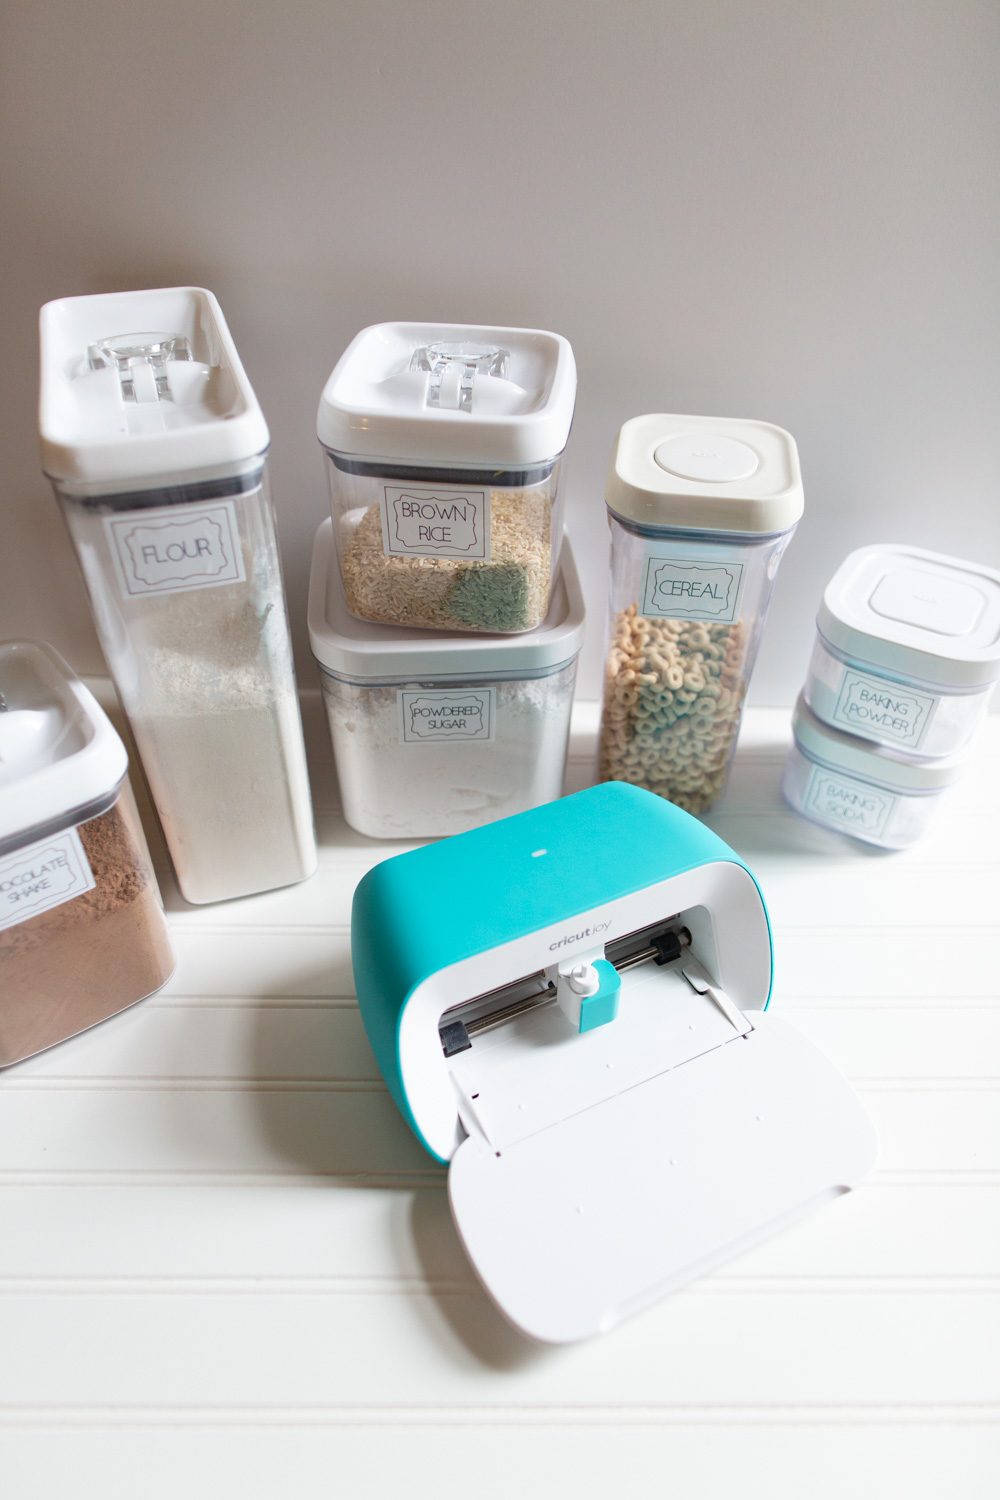
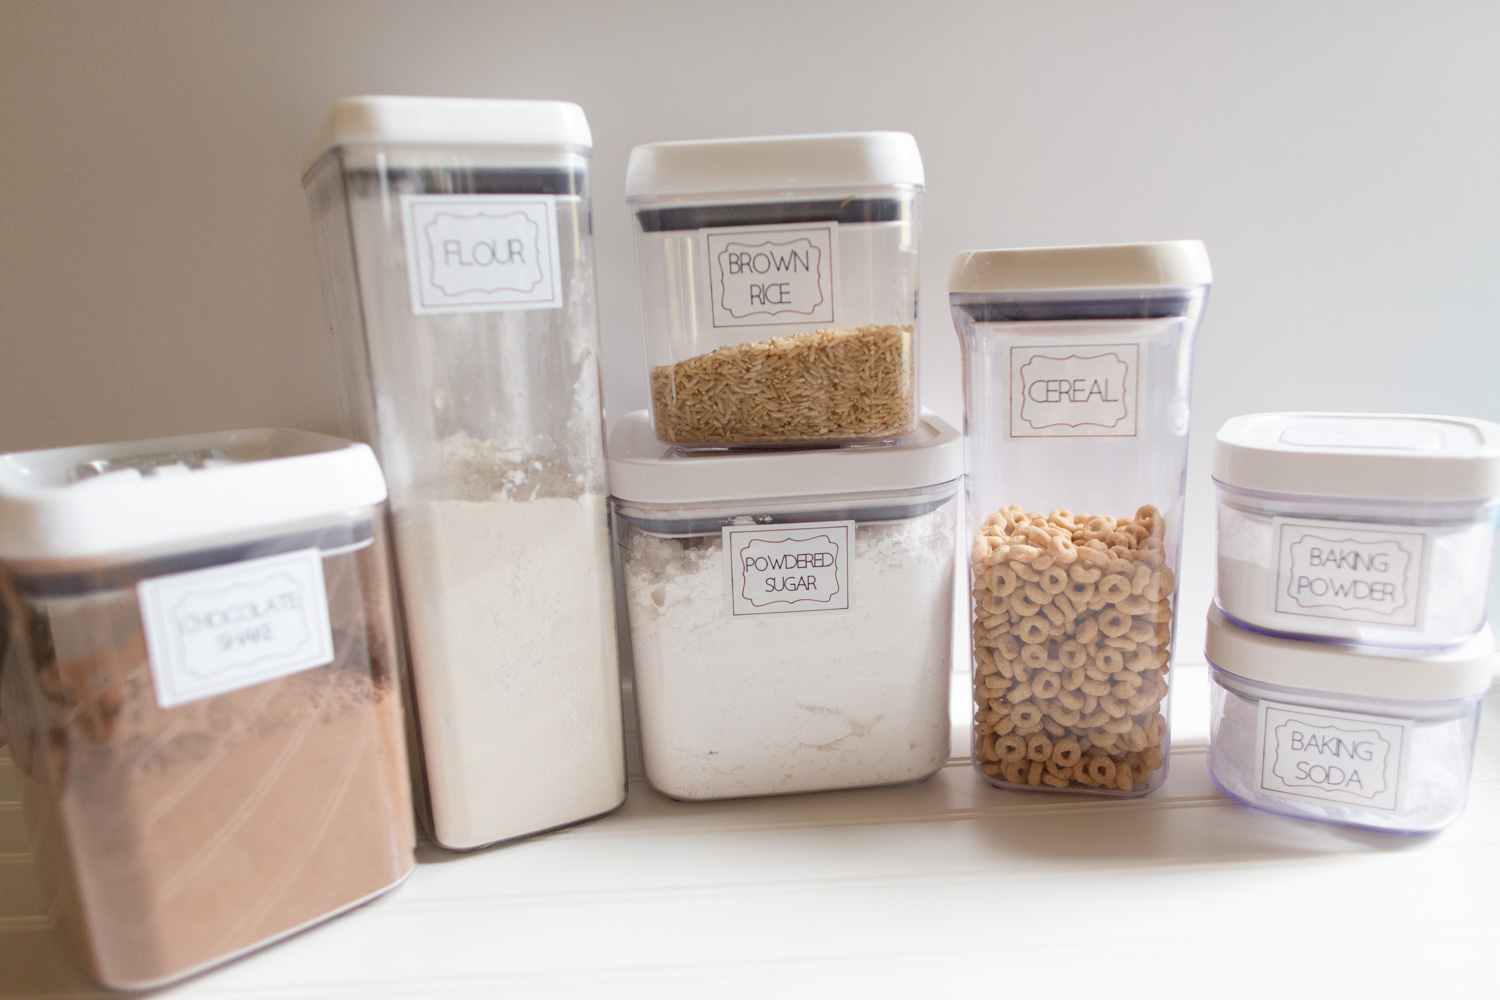
Here's the after photo, much cleaner and streamlined (and no smudging):
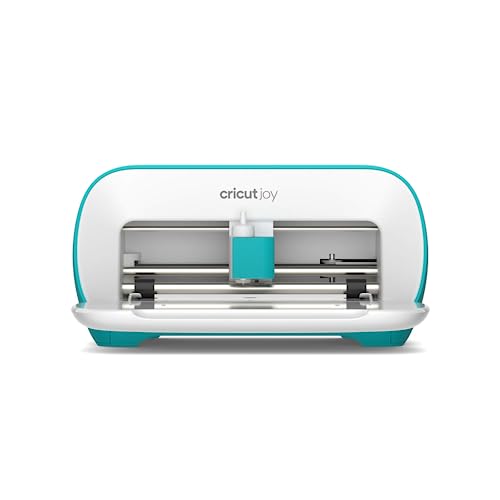
Now that the Cricut Joy has been introduced, it's been a game changer, especially in terms of home organization projects. As you guys know, I have a lot of cutting machines in my craft room, but they've always been relegated for projects that take more than 30 minutes or when I bundle a bunch of projects together to make it worthwhile.
With the Cricut Joy, this adorable and portable machine makes it quick to move anywhere around your house to accomplish all the small, organizational projects you want to complete easier and faster than you ever dreamed of.
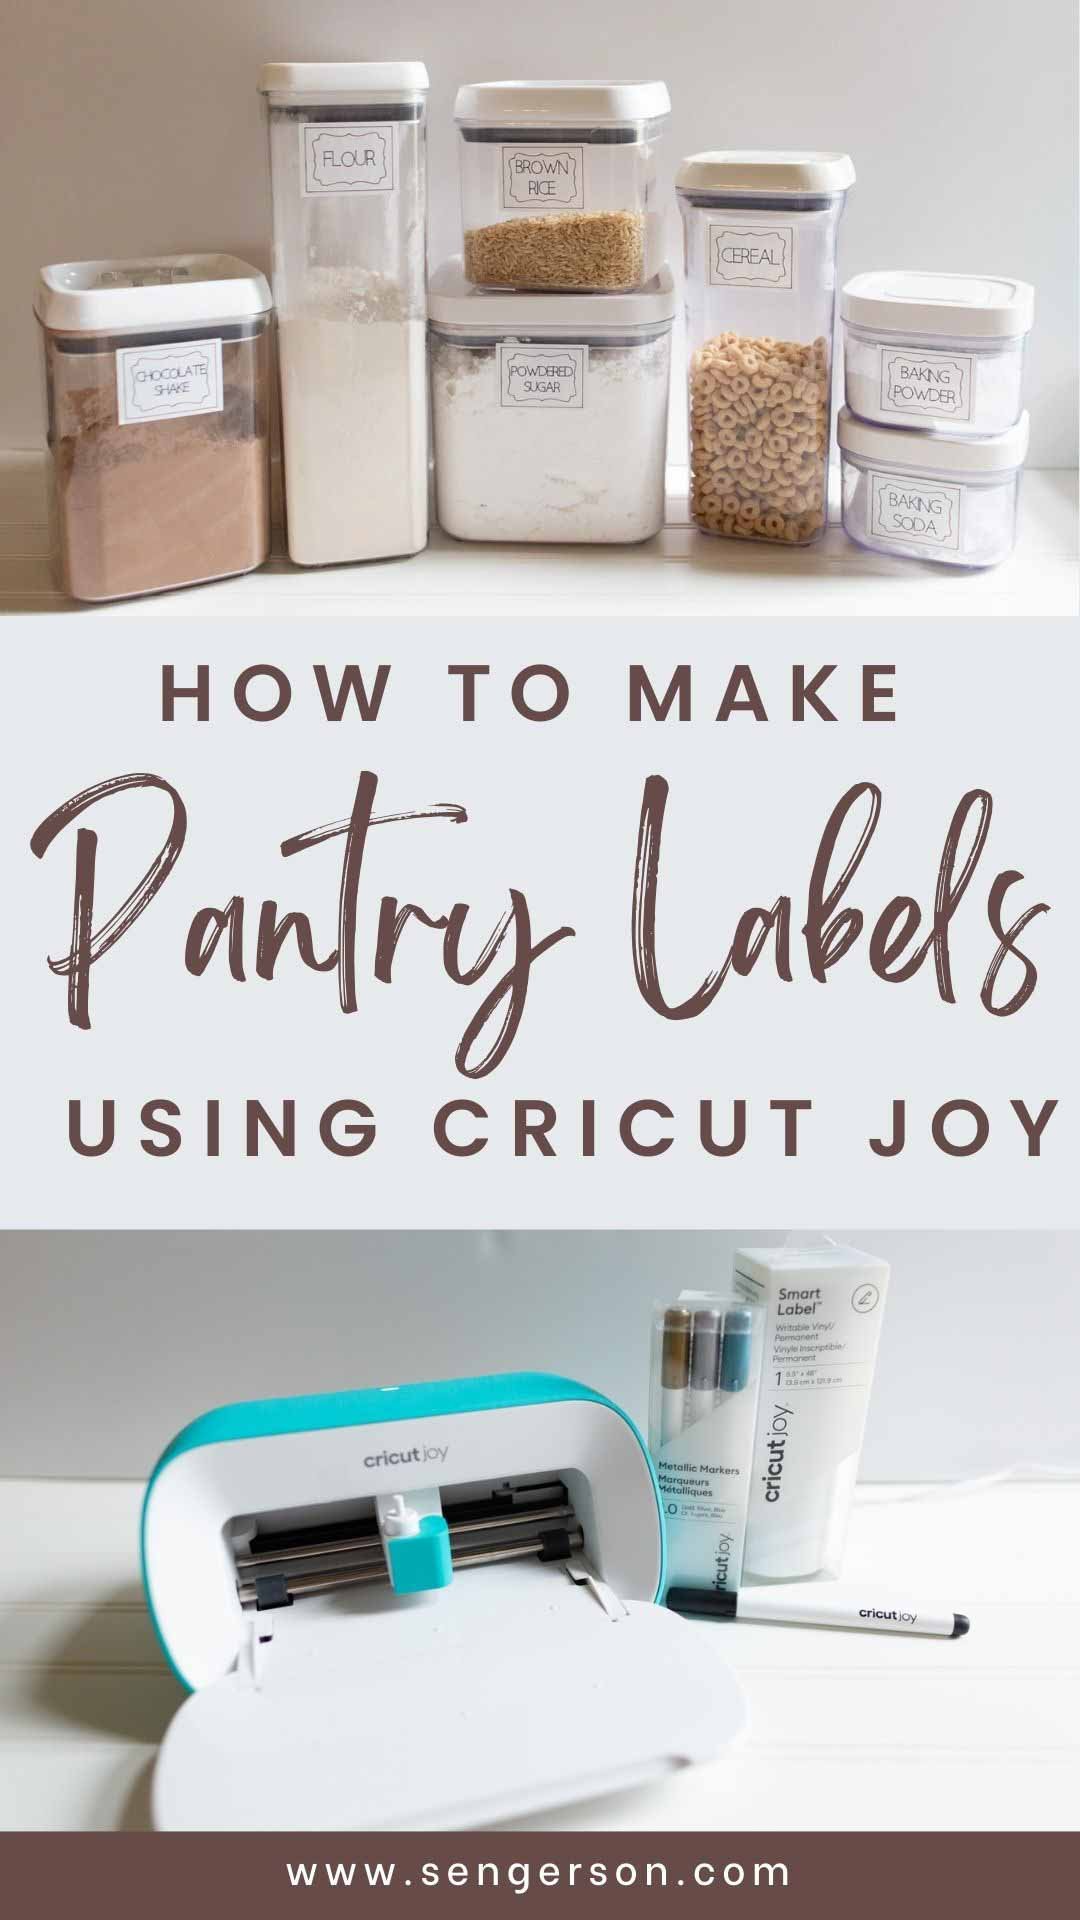
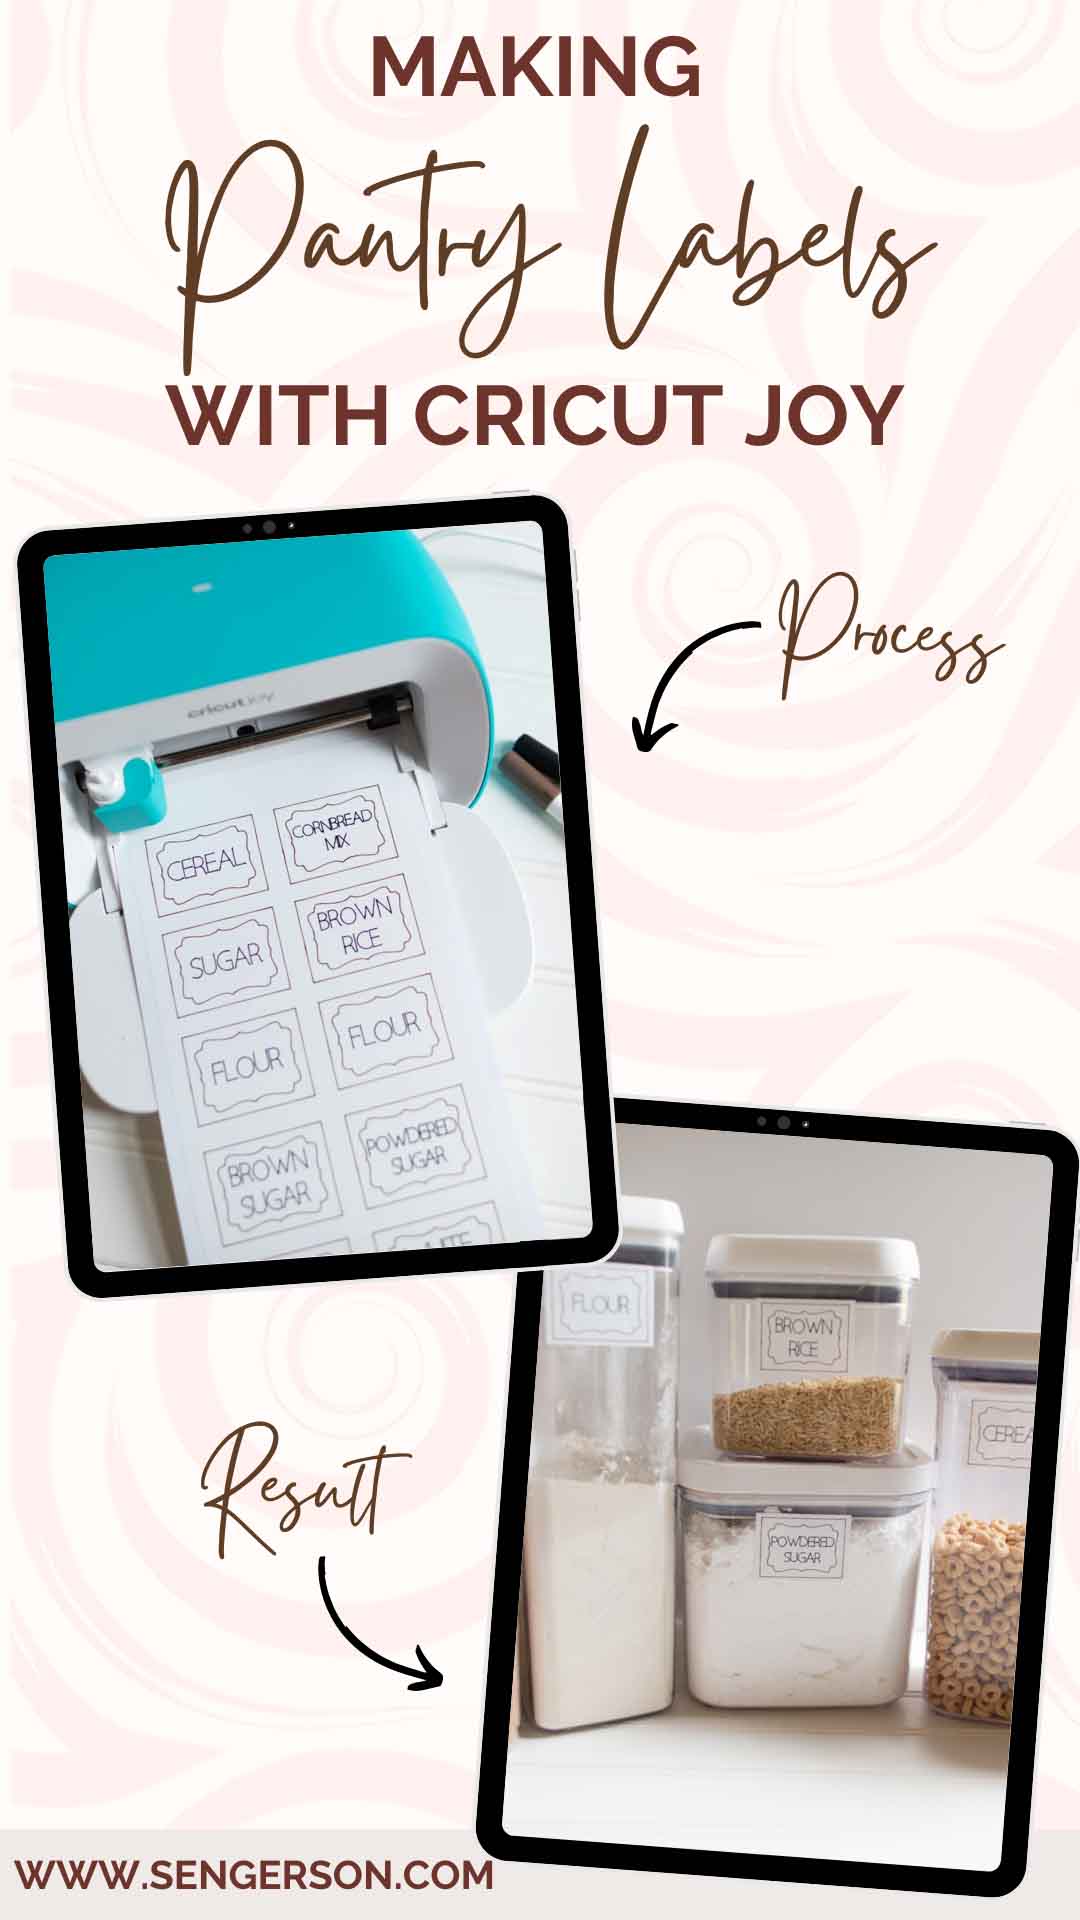
In this post, I'm going to show you how to make labels with the Cricut Joy and sharing with you three ways you can make kitchen pantry labels for those beautiful canisters and jars in your pantry. Check out my post on everything the Cricut Joy can do before checking out the tutorial below to get the highlights of the breadth of things it can accomplish in one mighty little package.

Making Pantry Labels with Cricut Joy
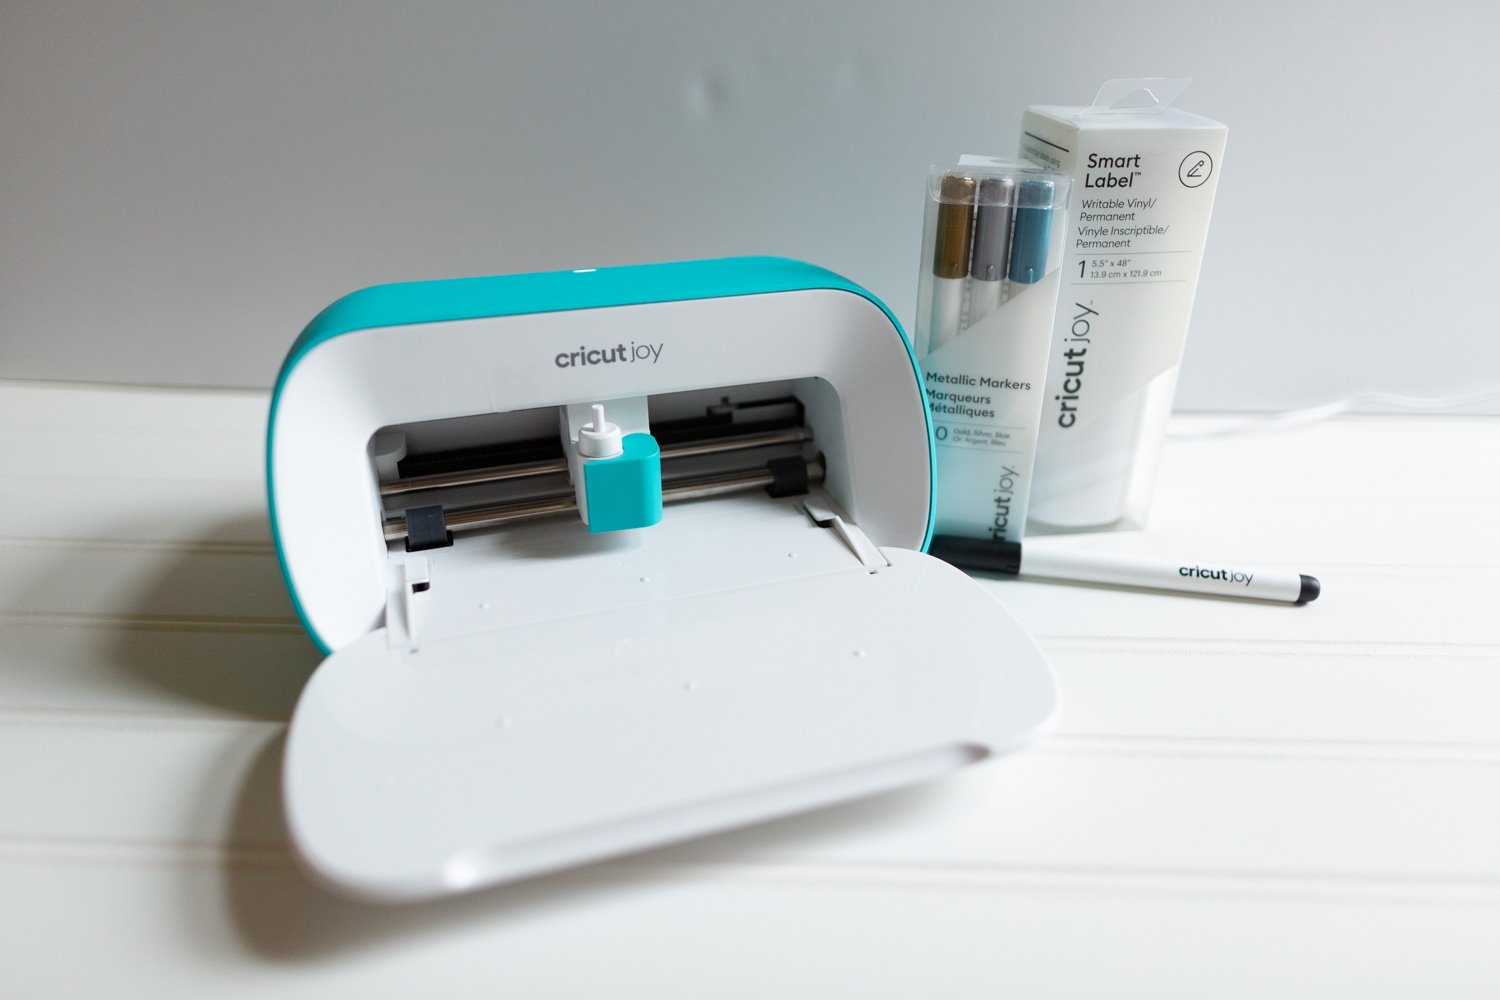
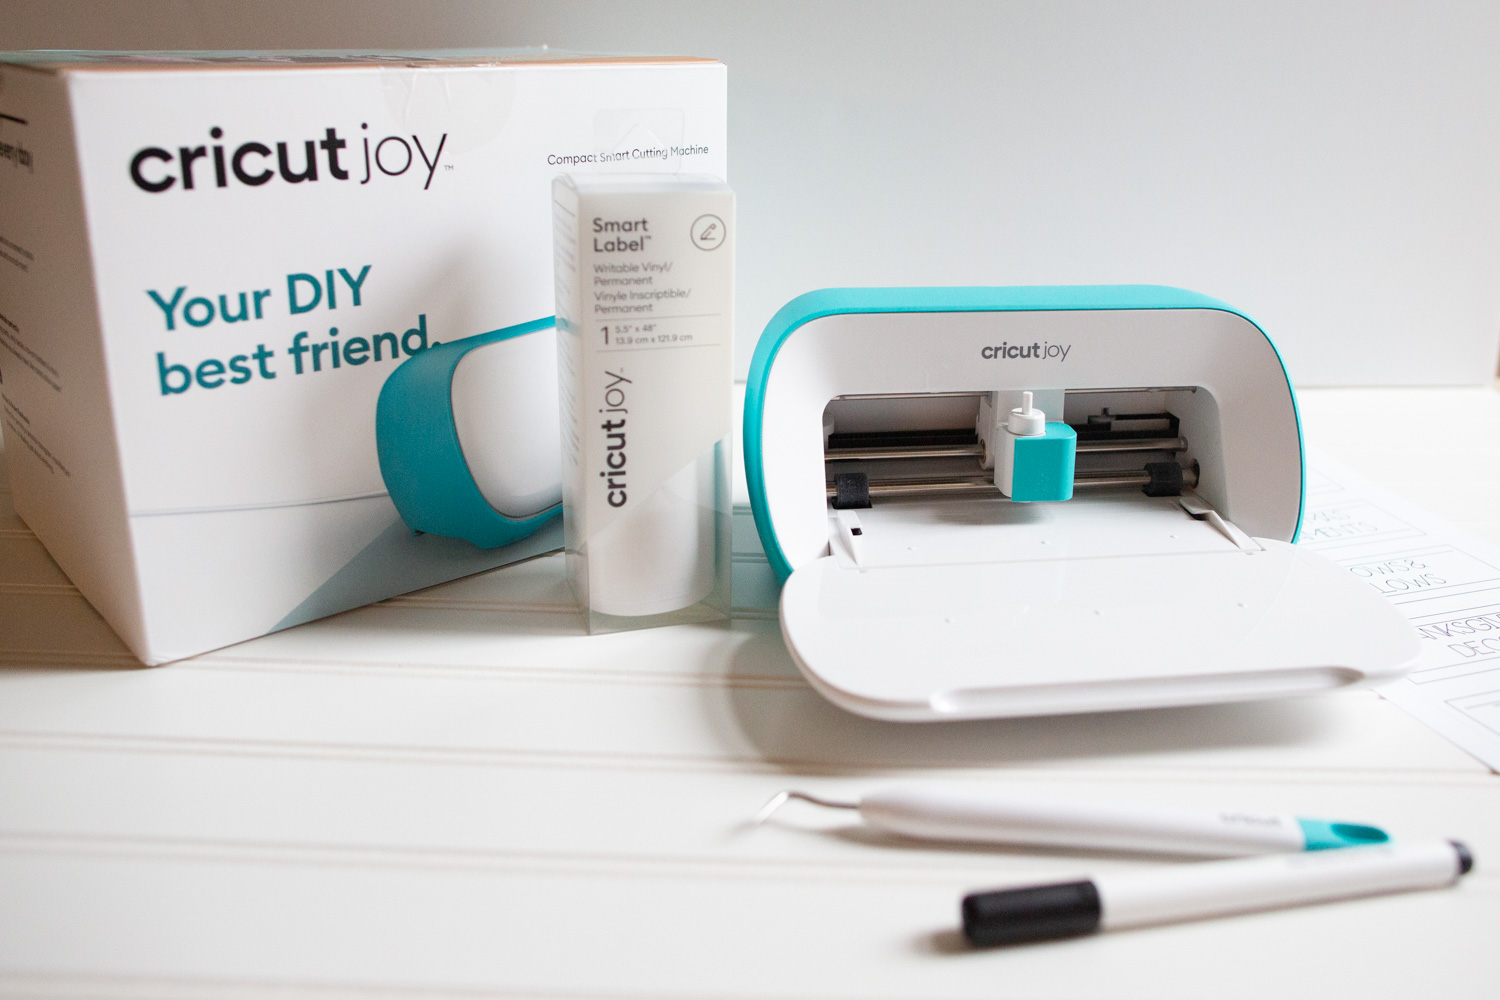
With the introduction of the Cricut Joy, Cricut has also released a suite of products to be used with this small, portable machine.
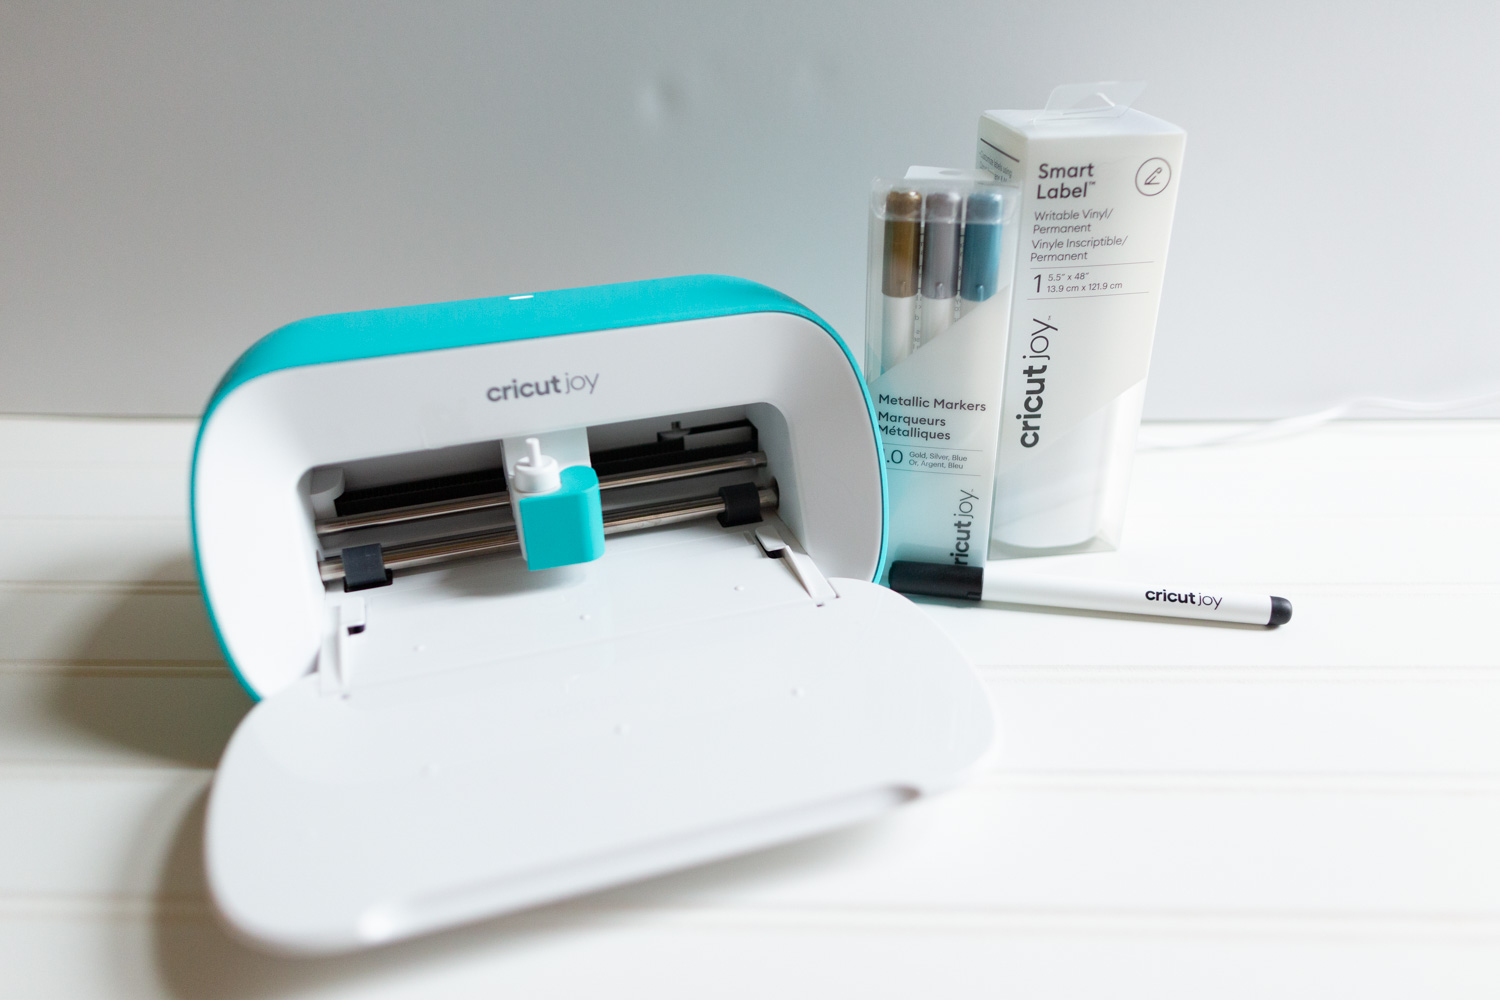
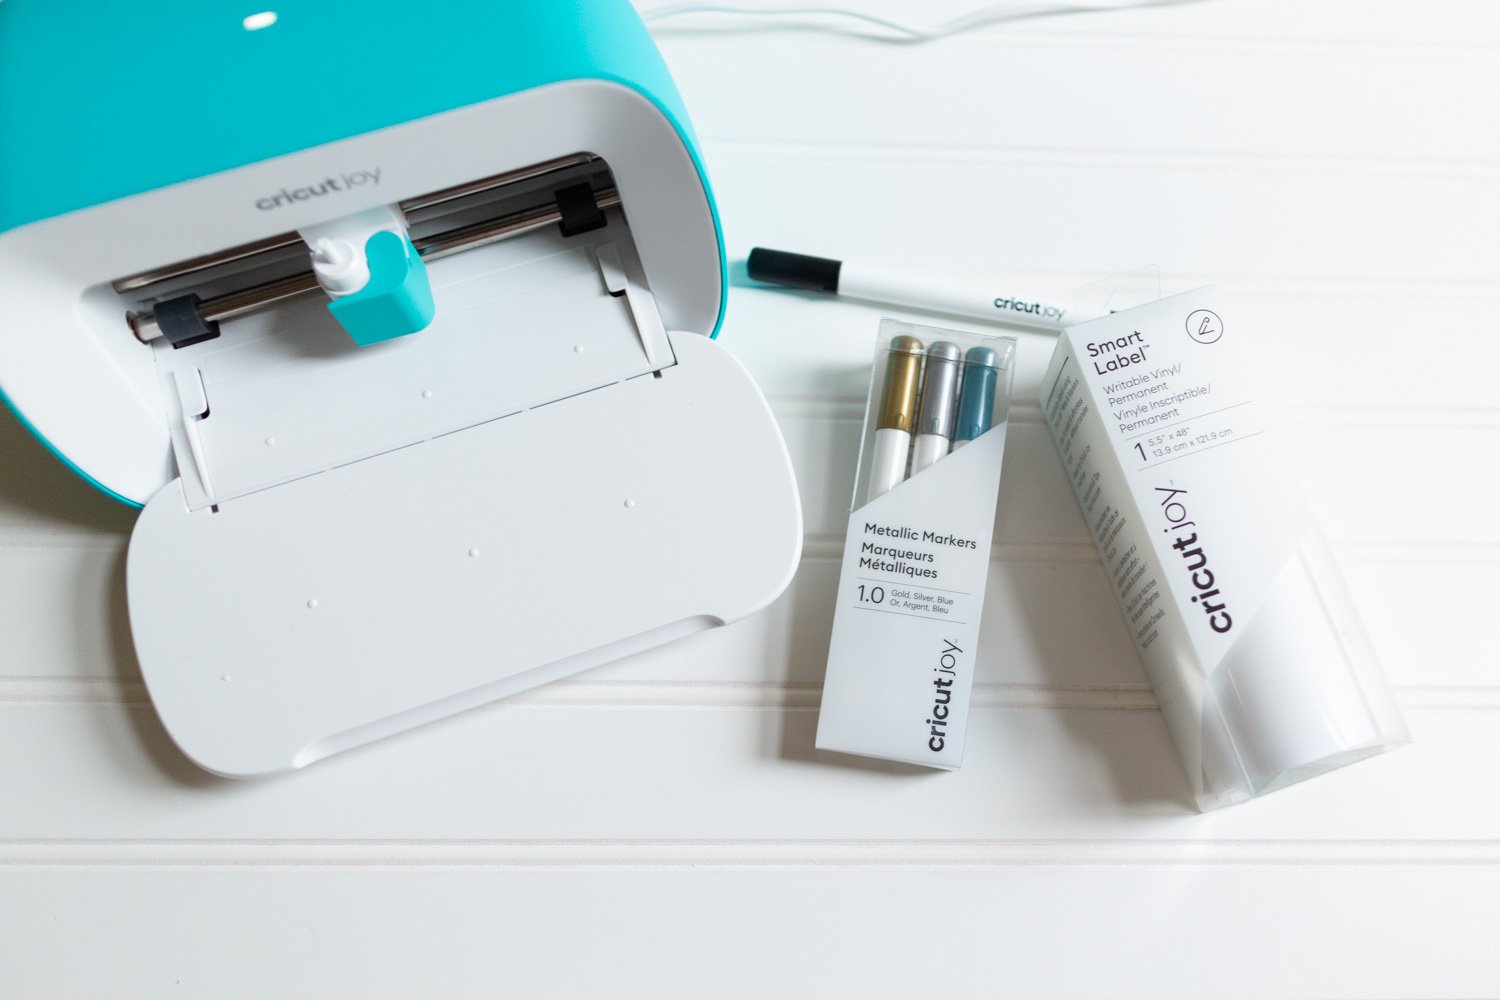
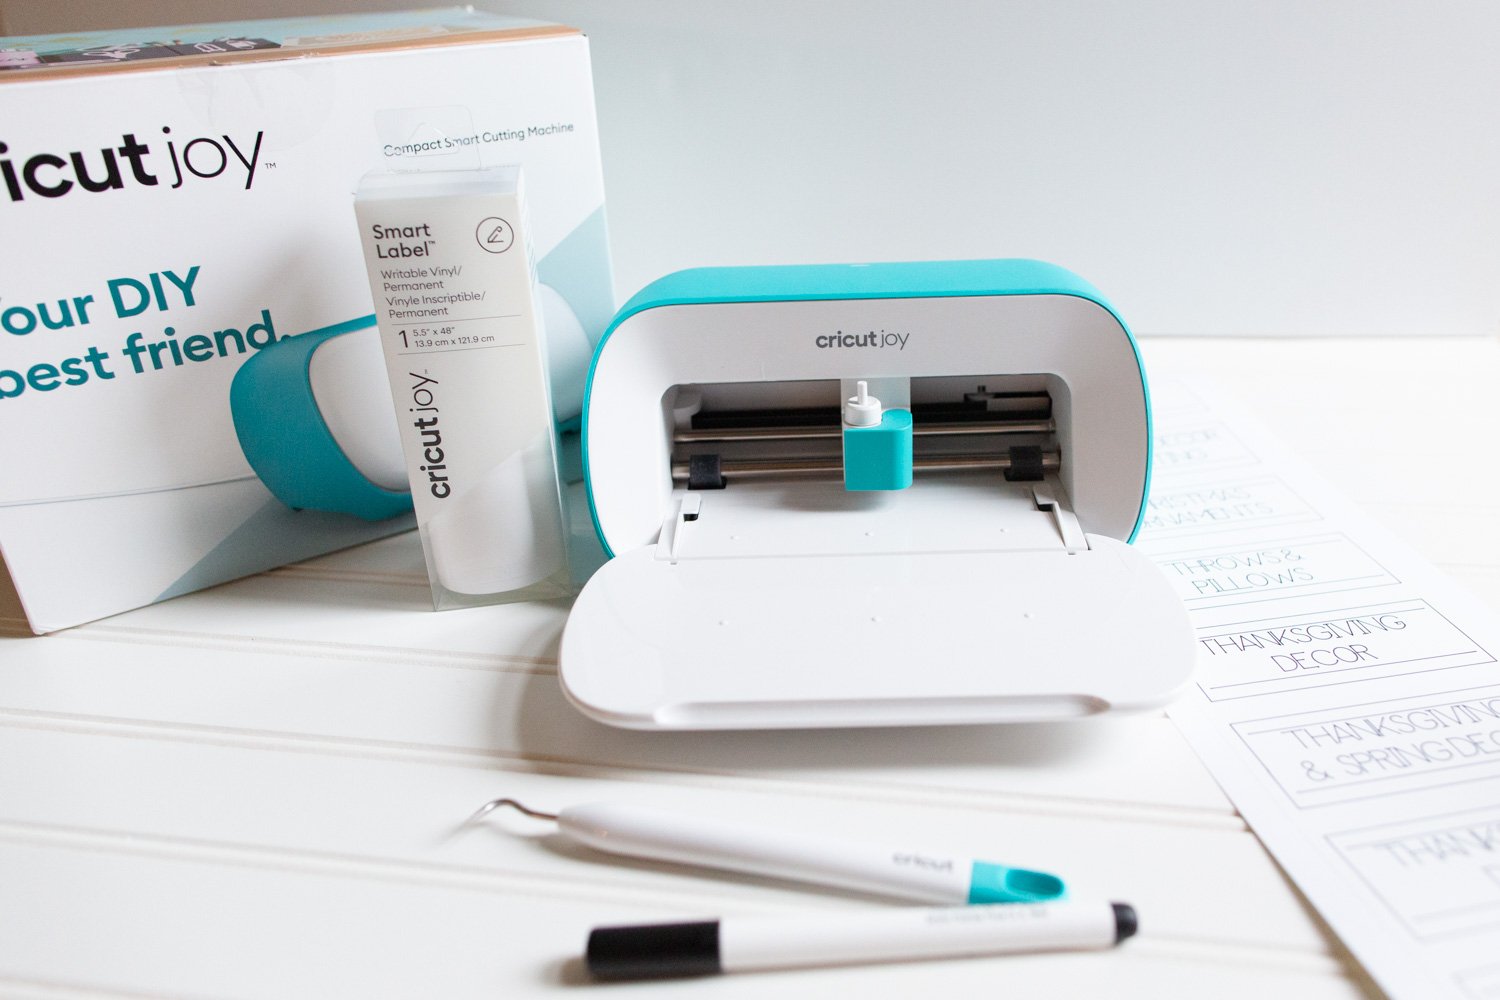
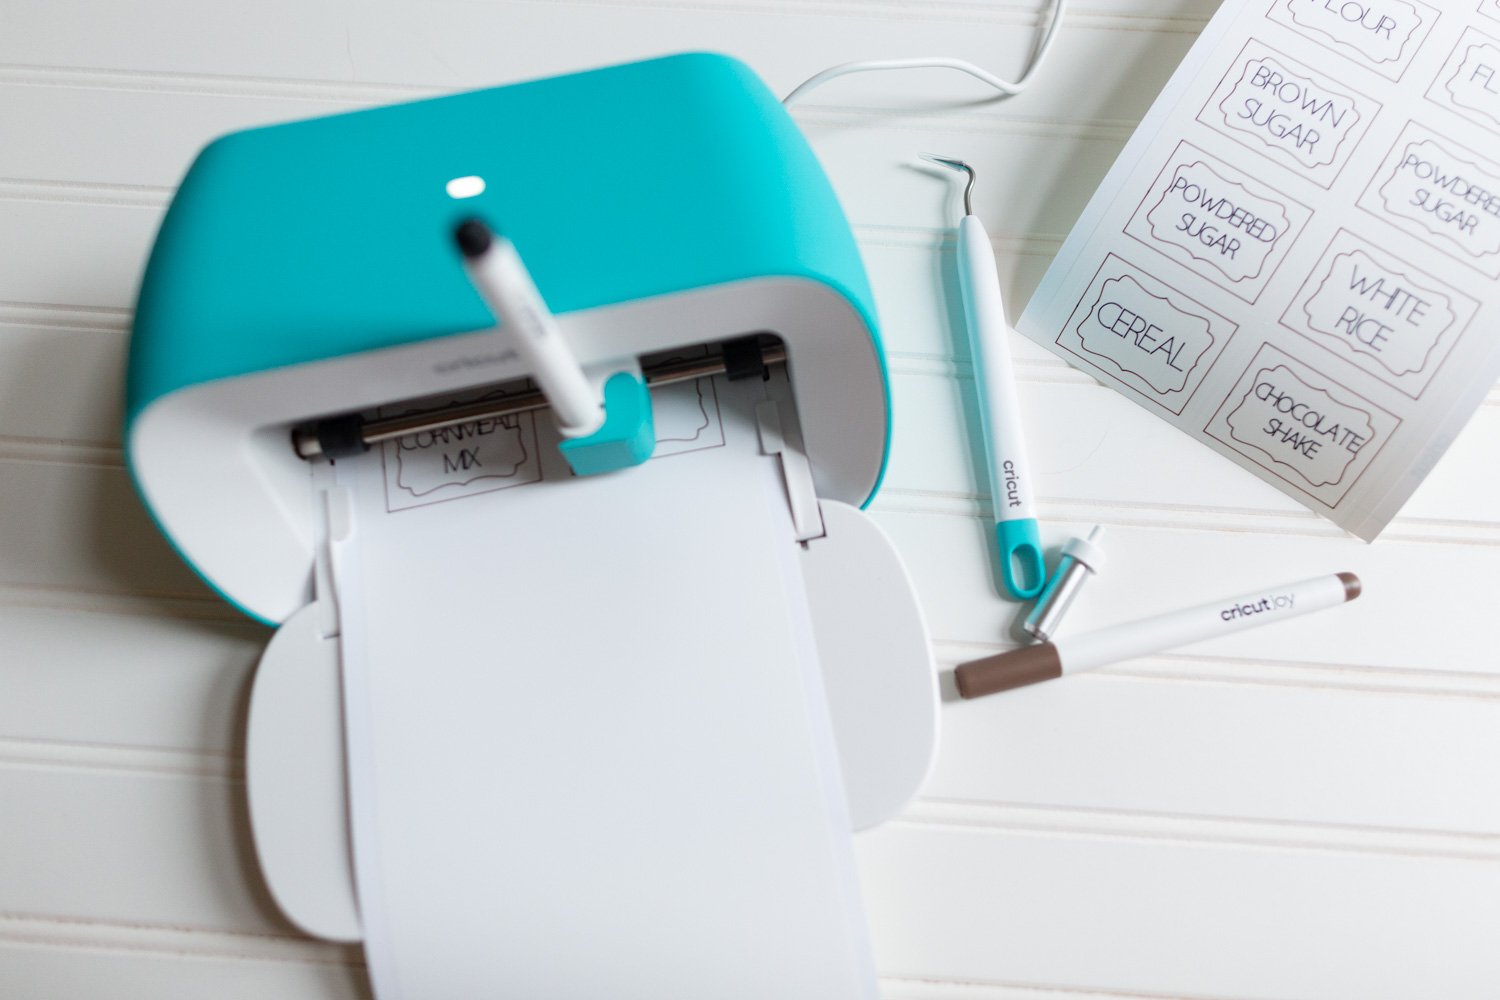
This includes the amazing Cricut Joy Smart Label Writable Vinyl. Smart Label makes it simple to design and make labels for your home because of the incredible features that it comes with. There is the Adhesive-Backed Deluxe Paper that can also be used for making labels as well as the tried and true way of making labels: using plain vinyl.
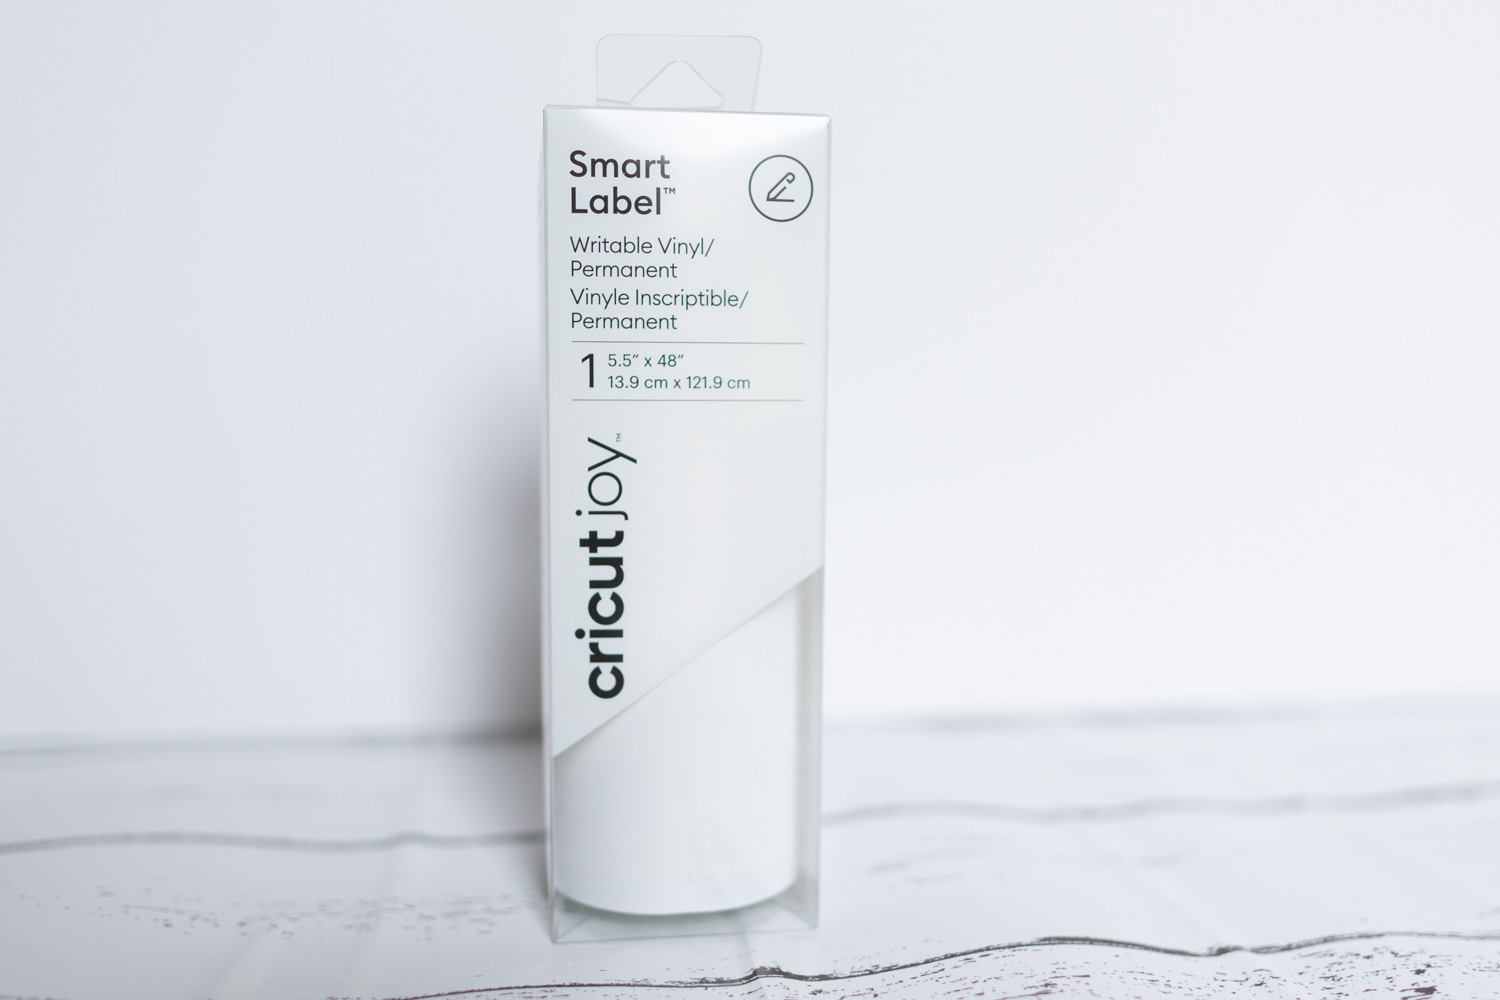
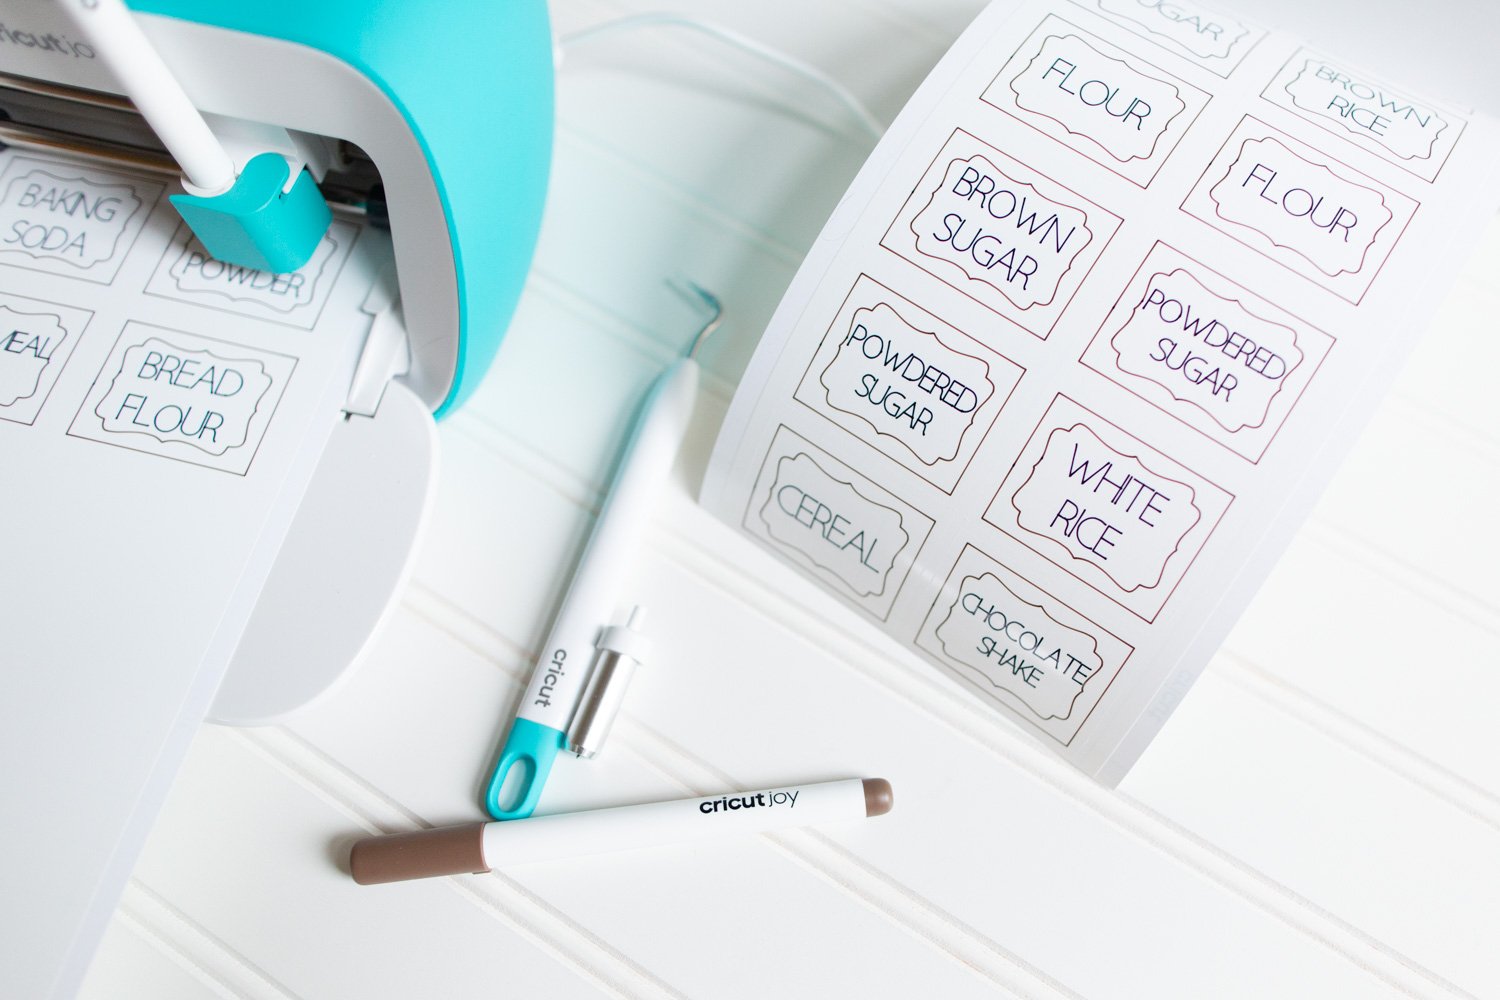
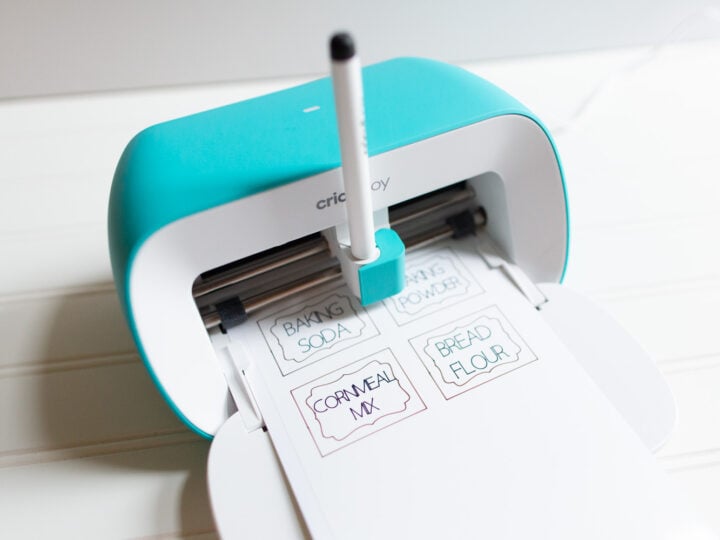
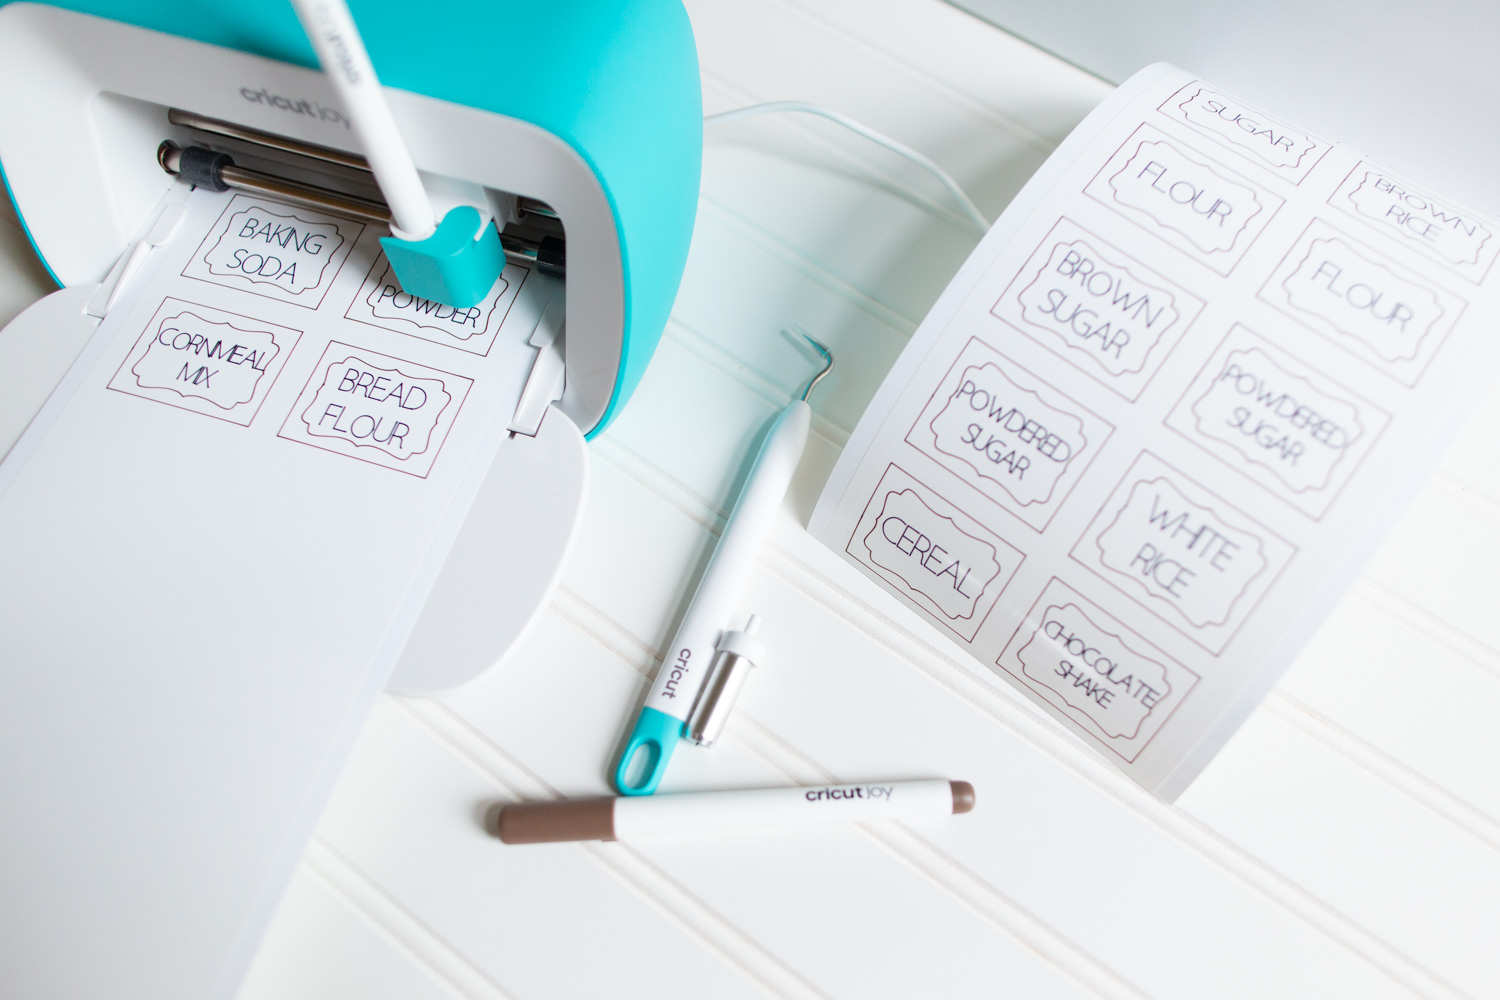
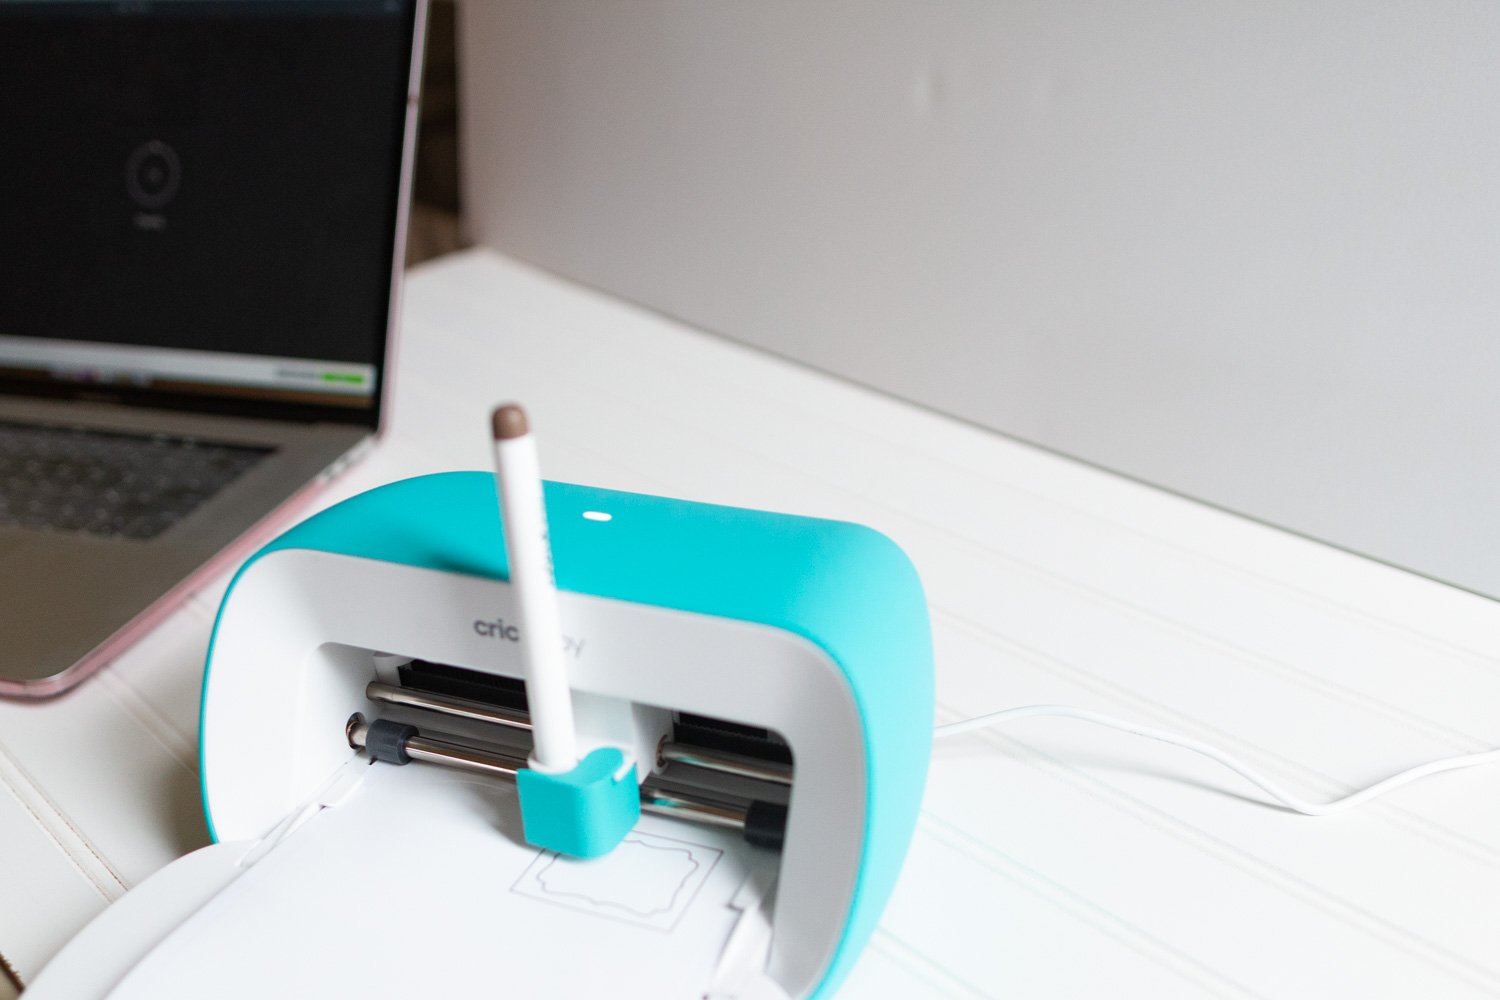
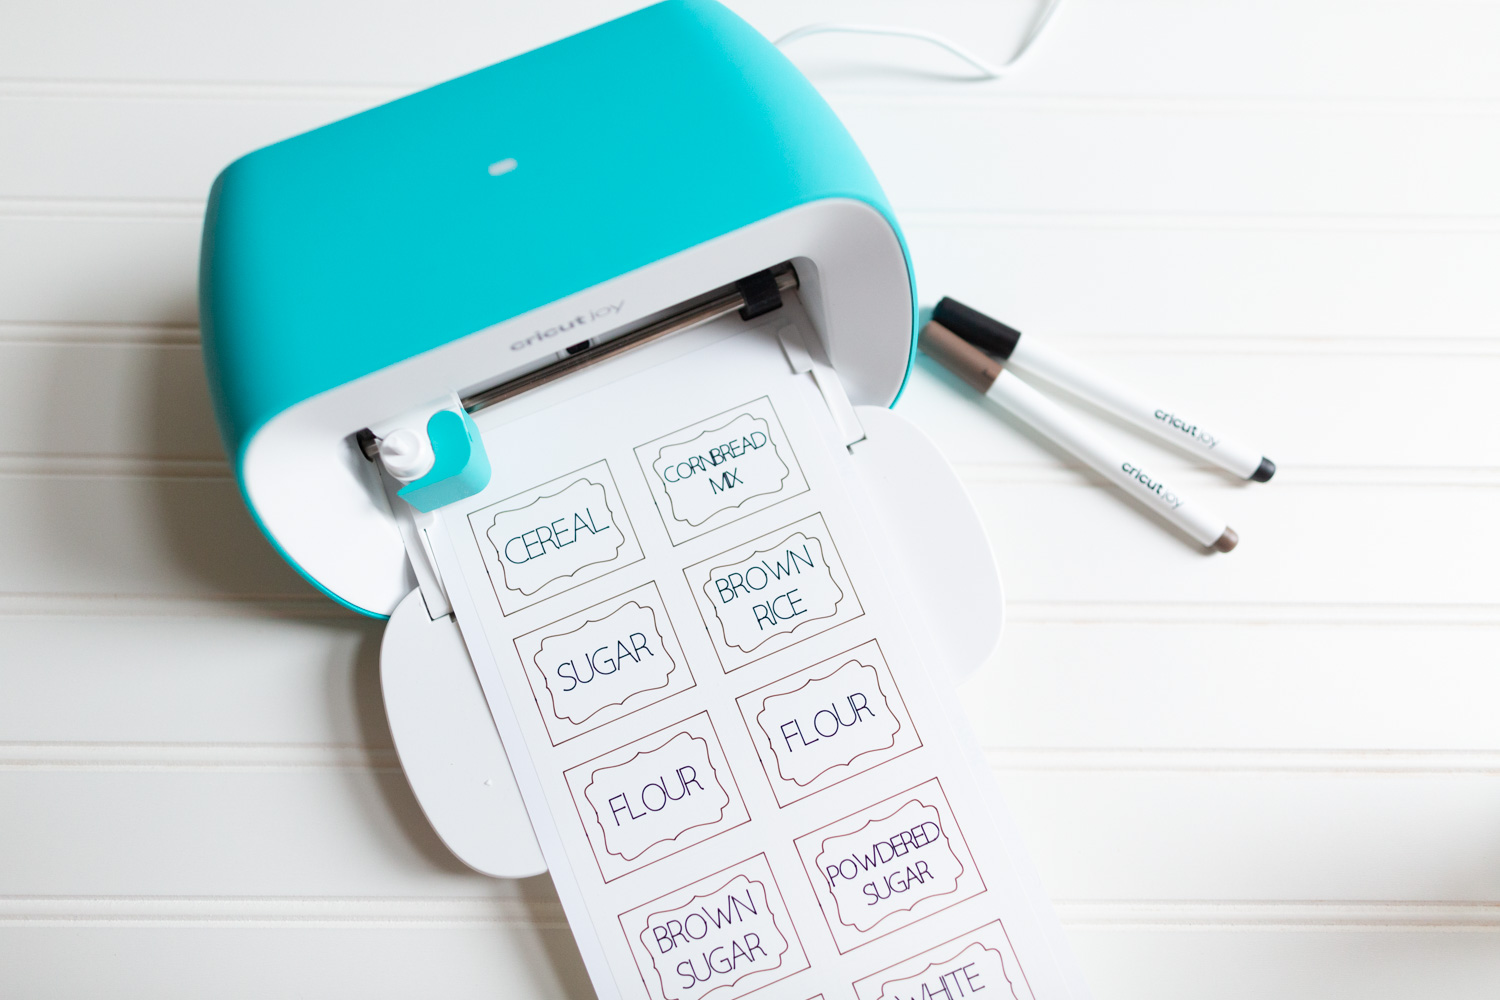
For this post, I'm specifically using the Cricut Joy Smart Label Writable Vinyl. This amazing material allows you to create pantry labels, write on them with your Cricut Joy, and take them out all without smearing or smudging. You know how you used to have to wait after writing with something in marker in order for the ink to dry? This label and pen combination that Cricut Joy uses allows the material to dry instantly.
Overview of Cricut Joy Smart Label
Cricut Joy Smart Label Writable Vinyl looks and feels like a roll of regular vinyl. However, the difference is that it feeds directly into the Cricut Joy without a mat. Furthermore, it can be written on with special Cricut Joy pens without fear of smearing or fading.
All of the products are designed to work together so that you don't have to worry about any of these issues before.
Smart Label acts more like a sticker than a vinyl (even though it is vinyl). It allows you to design a label and cut it while not requiring you to use transfer paper like with regular vinyl.

The two benefits of using Cricut Joy Smart Label is:
- No transfer paper required to move the design
- No smudging, fading, or peeling

Free Templates and Custom Designs for Pantry Labels
Free Template for Pantry Labels
Cricut uses Design Space, which is the companion software for the Cricut Joy. Design Space is what all the Cricut cutting machine users use to cut their designs.
Design Your Own Pantry Labels
It is really easy to design your own labels using Cricut's Design Space. Here's a quick step-by-step tutorial on how you can accomplish making your own custom design:
- Select any shape from the library or even the side panel for your label and add it to the canvas space.
- Designate the shape to being "cut"or "drawn" in the right hand menu.
- Using the text tool on the left hand panel, select it. Next, choose your font type (make sure that it is set to draw), text size, and whether you want it left, right, or center aligned.
- Using your cursor, place the text on top of the shape that you just drew. Click out of the shape, and hover over the area of the text until you get double arrows that make a cross. This signifies that you are able to move the text.
- Important step: Attach the text and shape together by selecting the paper clip icon called "Attached" in the right hand panel. This might be a little tricky to see, so check out the screenshot below.
Helpful Tips and Tricks When Designing Pantry Labels
When you are creating your own labels using the Cricut Joy Pens, Smart Label Writable Vinyl, and Design Space to create these pantry labels, here are some of the best pieces of advice to get you started.
Design Space Unattach and Ungroup for Modifying Text
I don't know why this is so difficult for me, but if you want to modify text, you'll want to detach it and/or ungroup the text for your pantry labels. Once you are finished modifying the text, you can attach and re-group as needed. I know, this is a pain, but has to be done.
Different Pen Colors Should Be Designated in Design Studio
Using Design Studio, if you create intricate border designs that will be used with a different color pen than the text label itself, you'll want to designate the pen color in the top toolbar. You should ultimately choose the color you are using so that when the Cricut Joy prompts you to change pens, you'll know what tool to change to.
Attach Setting
The attach setting was the hardest thing for me to understand. Hopefully, this tip and explanation helps you. Cricut Design Space is smart in that when you go to cut, draw, or print your design, it will try to "conserve" material. In order for it not to move your design to conserve material, you'll need to attach your designs together so it knows to keep it in place.
Pen Designs Always Drawn First Before Cutting with Cricut Joy Design Space
One thing to be aware of is that the pen designs will always be drawn before the material is cut. Just something to be aware of. This doesn't really impact the design aspect, just awareness before you start cutting.
Smart Label versus Adhesive-Backed Deluxe Paper
There is another type of label material that you can use, which is similar to scrapbooking paper, but has adhesive on the back. It's great to create designs on the fly and are ready to stick when you need it. Using the adhesive-backed deluxe paper will allow you to create designs without using a pen design (which, I still think you could do if you were way more creative than me). Using the Adhesive-Backed Deluxe Paper will require a mat, unlike the Smart Label.
I'm going to show you two tutorials on how to create pantry labels with each of these different materials:
- Pantry Labels Using Smart Label
- Pantry Labels Using Adhesive-Backed Deluxe Paper
- Pantry Labels Using Vinyl
Let's get organizing your space!
How to Make Pantry Labels with Cricut Joy
Learn how to make pantry labels using Cricut Joy and the Smart Label Writable Vinyl in just a few minutes with a free template.
Materials
- Smart Label Writable Vinyl
- Cricut Pantry Label Template
Tools
- Cricut Joy
- Cricut Joy Pens
- Weeding Hook
Instructions
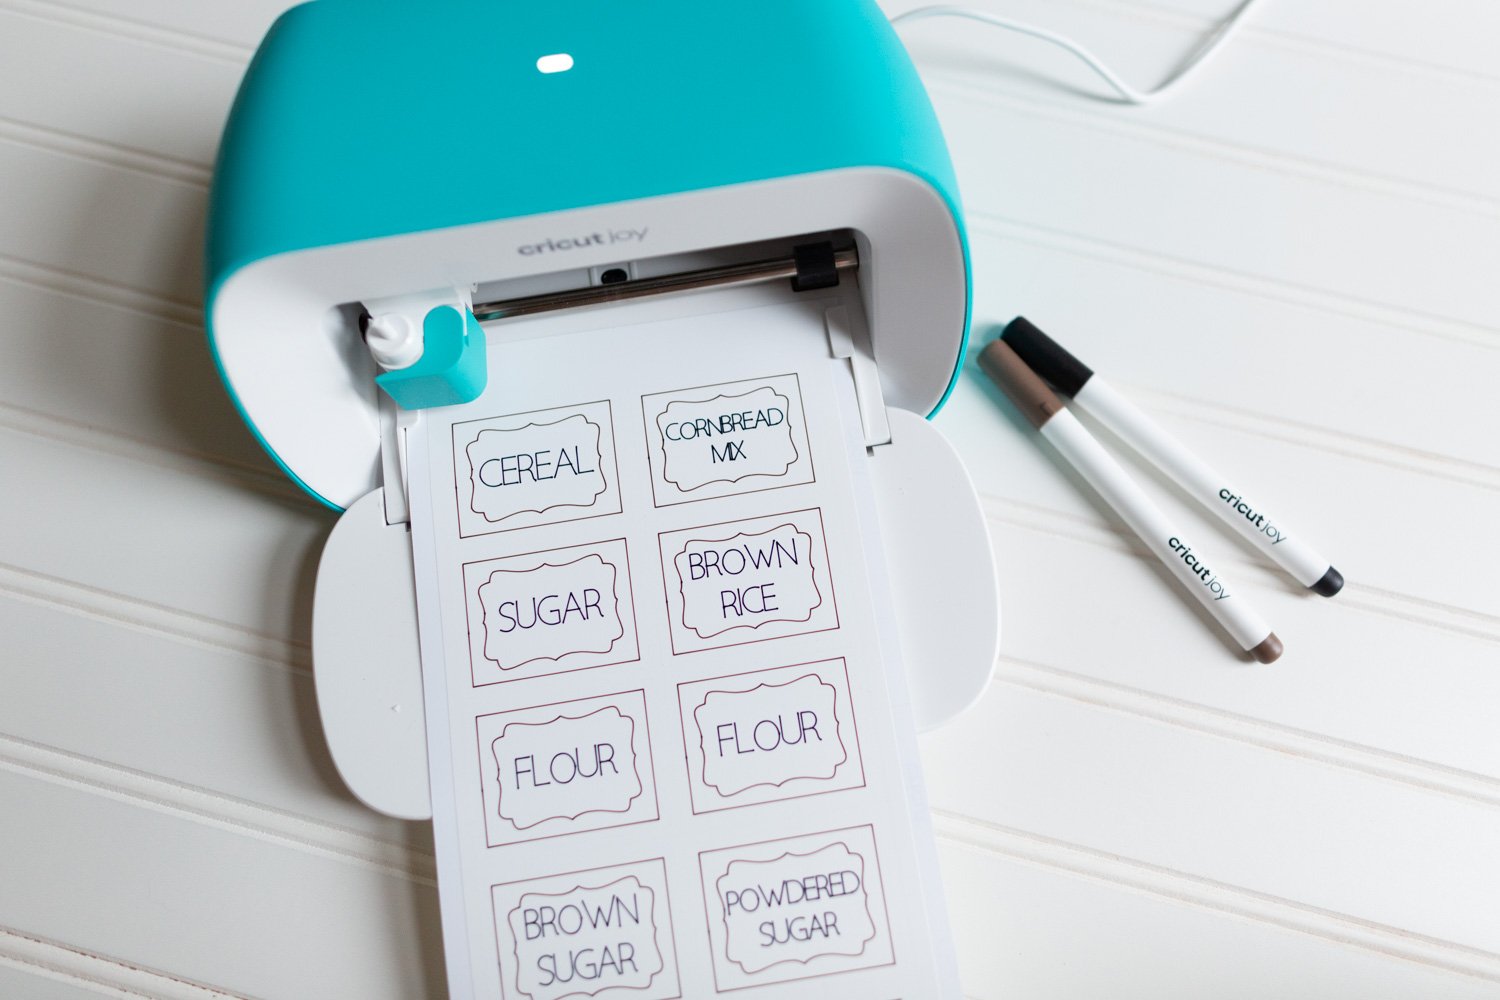
- Download or design pantry labels from Cricut using Design Space.

- Choose "Make It" button on the top left in Design Space.
- It will prompt you on you material. Choose without mat.

- Next, choose Continue.
- Move your design around as needed to conserve the material. Click continue.

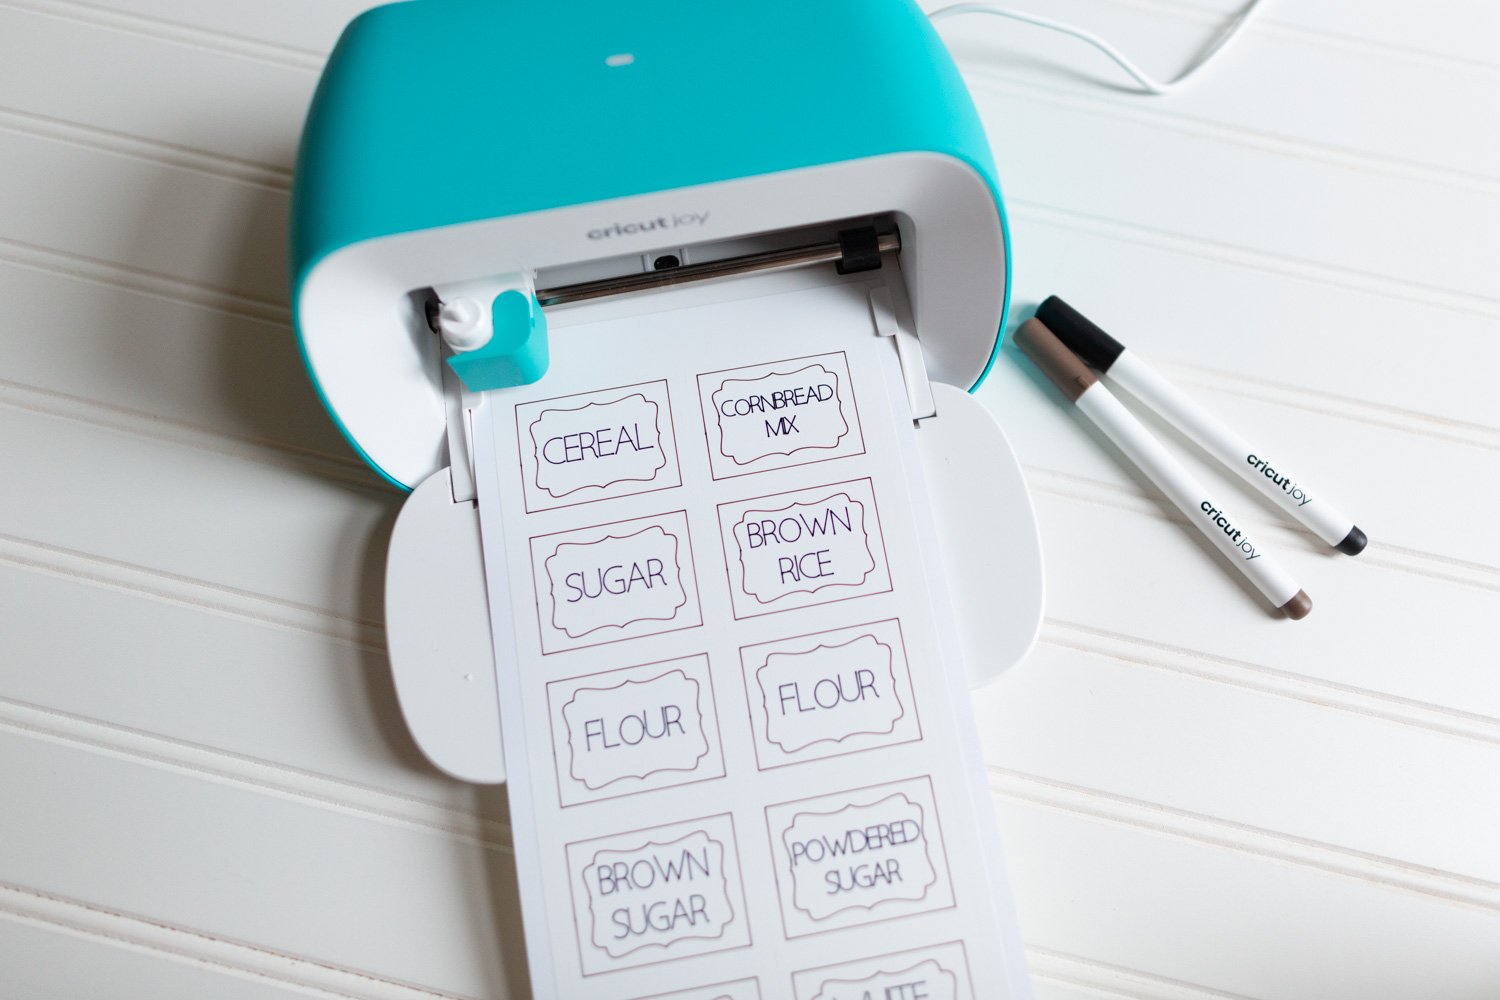
- Choose option for "Smart Label - Writable Vinyl" for the material.

- Design Space will tell you which pen to load.
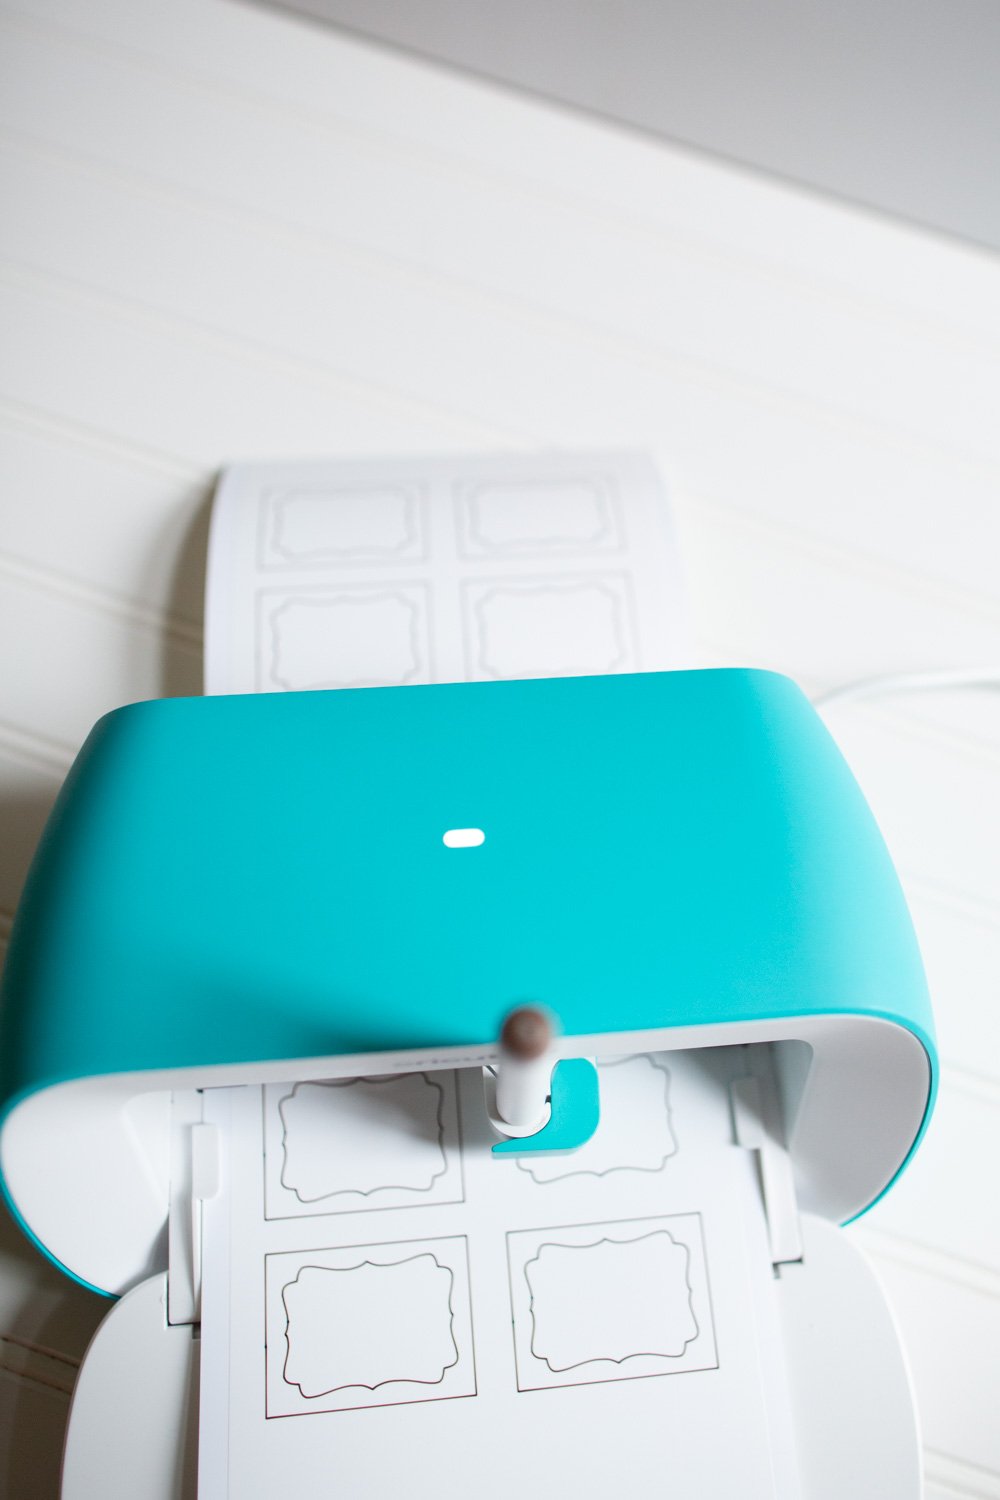
- Load the Smart Label vinyl into the Cricut Joy. Click "Go" in Design Space.

- Continue watching Design Space as it will prompt you when to load pens or blade.

- Once complete, choose "Unload" from Design Space. This will remove the vinyl from the feed.

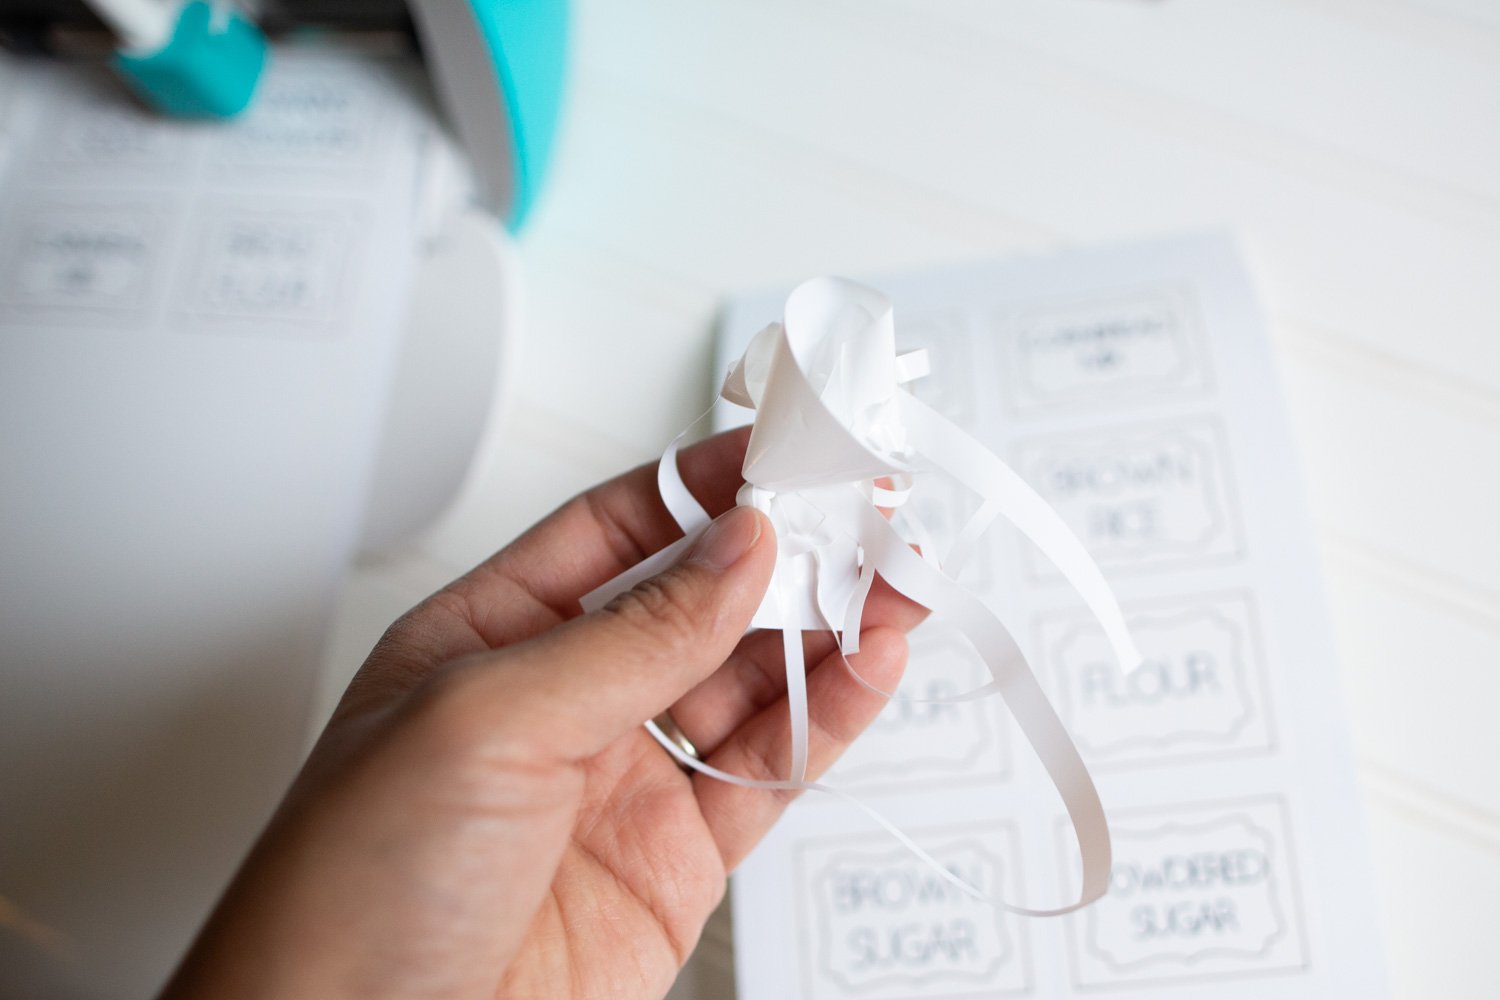
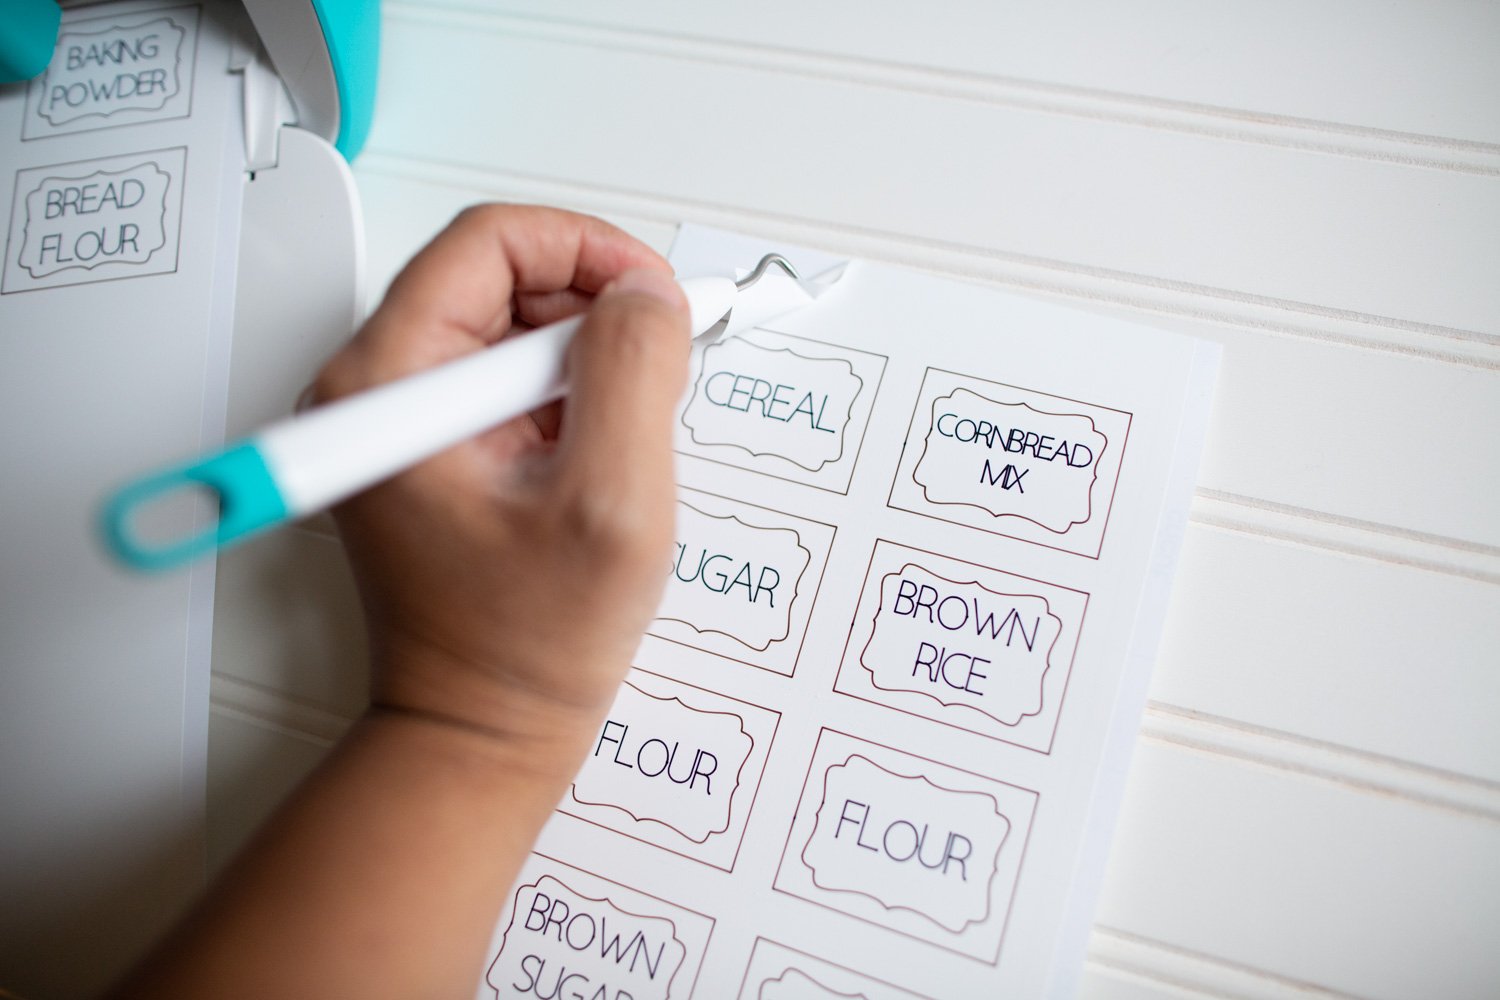
- Using a weeding hook, remove the excess vinyl.
- Peel the vinyl off and place it on your medium.

Recommended Products
As an Amazon Associate and member of other affiliate programs, I earn from qualifying purchases.


Pantry Label Tutorial Using the Cricut Joy
What You'll Need
- Cricut Joy
- Cricut Joy Smart Labels, Adhesive-Backed Deluxe Paper, or Vinyl
- Cricut Joy Pens (they are not the same as regular Cricut Pens)
For those of you who are wanting my exact kitchen canisters, this is the exact brand I absolutely love here.
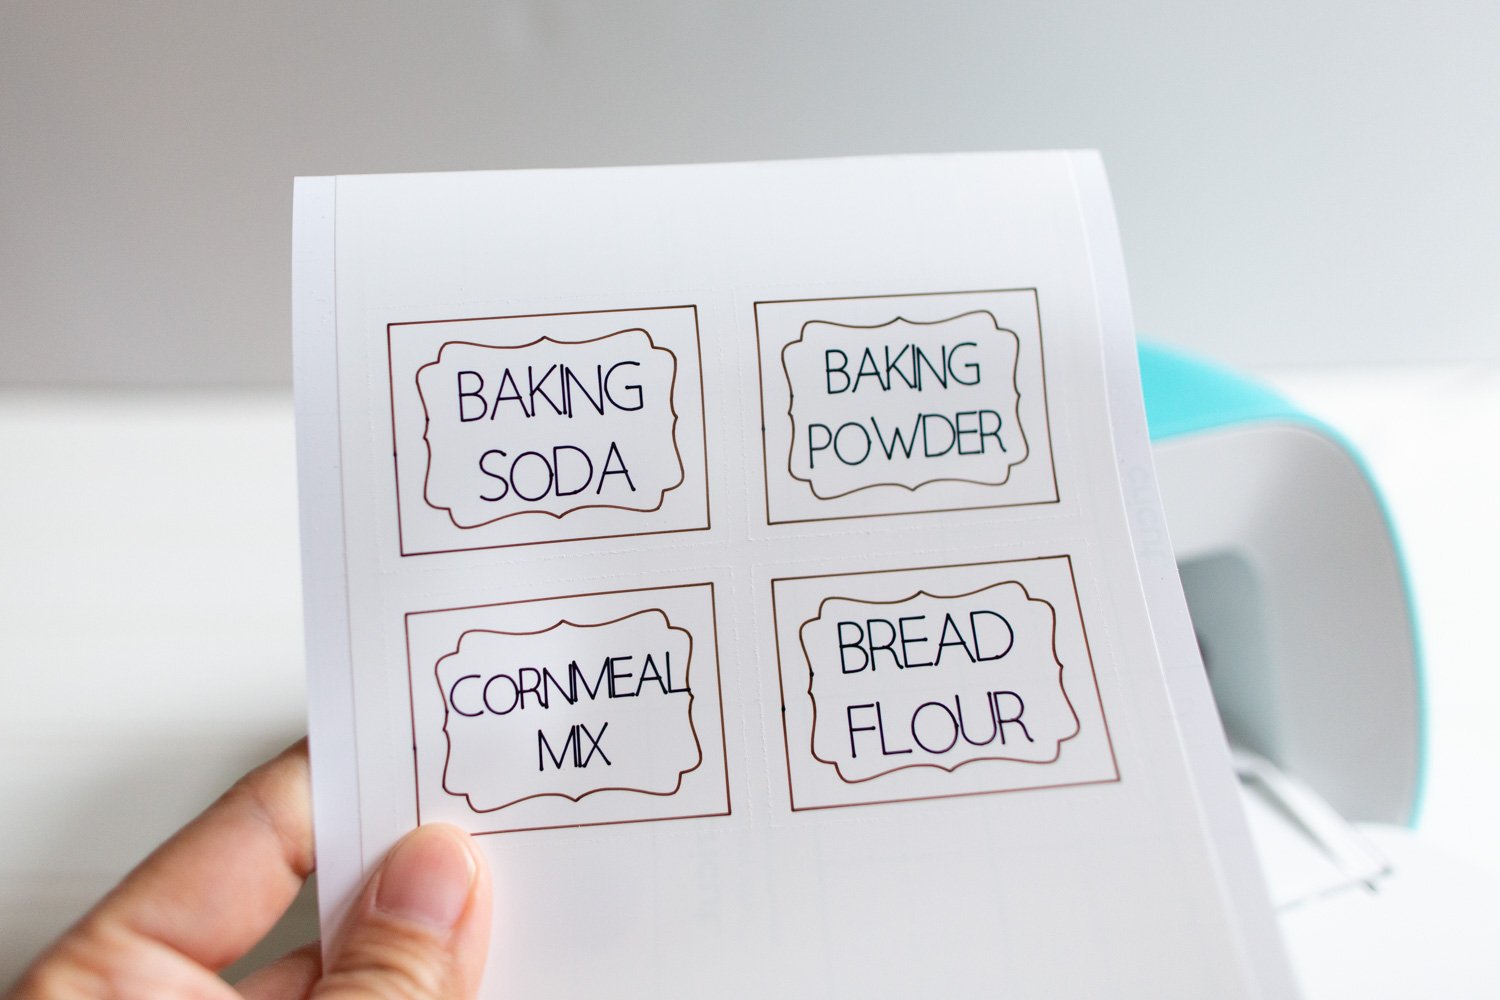
Instructions for Pantry Labels with Smart Label Using Cricut Joy
Once you design and are ready to cut the design, you'll want to choose the "Make It" button.
You'll be prompted with a "Continue" button and you'll want to choose the option for "Smart Label - Vinyl" if you are using this material.
On the next screen, you'll see the supplies needed and the Design Space software will guide you on what tools to start loading. Remember: Everything about the Cricut Joy feeds off of Design Space, there are no buttons on the machine itself.
Once your design is completed, you'll want to unload via Design Space (yes, you'll need to go back to the computer to unload).
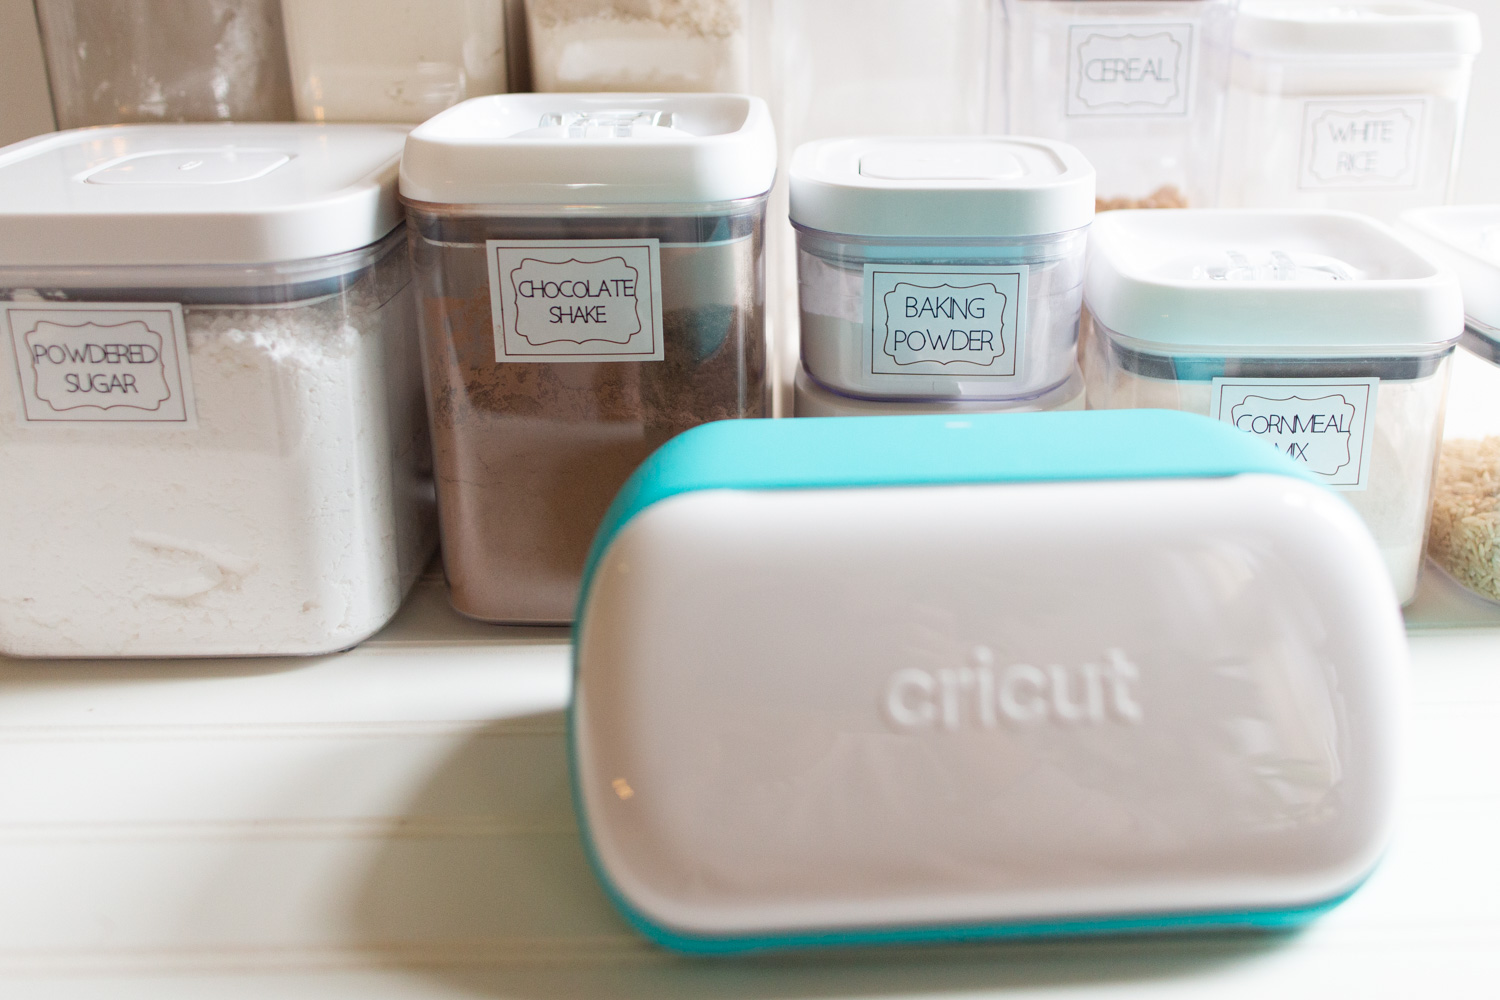
Apply the Smart Label that you made using your Cricut Joy to your pantry containers, jars, and other storage! It literally is a matter of peel and stick, unlike traditional vinyl.
You can use the hook as needed, like so:
Then peel away!
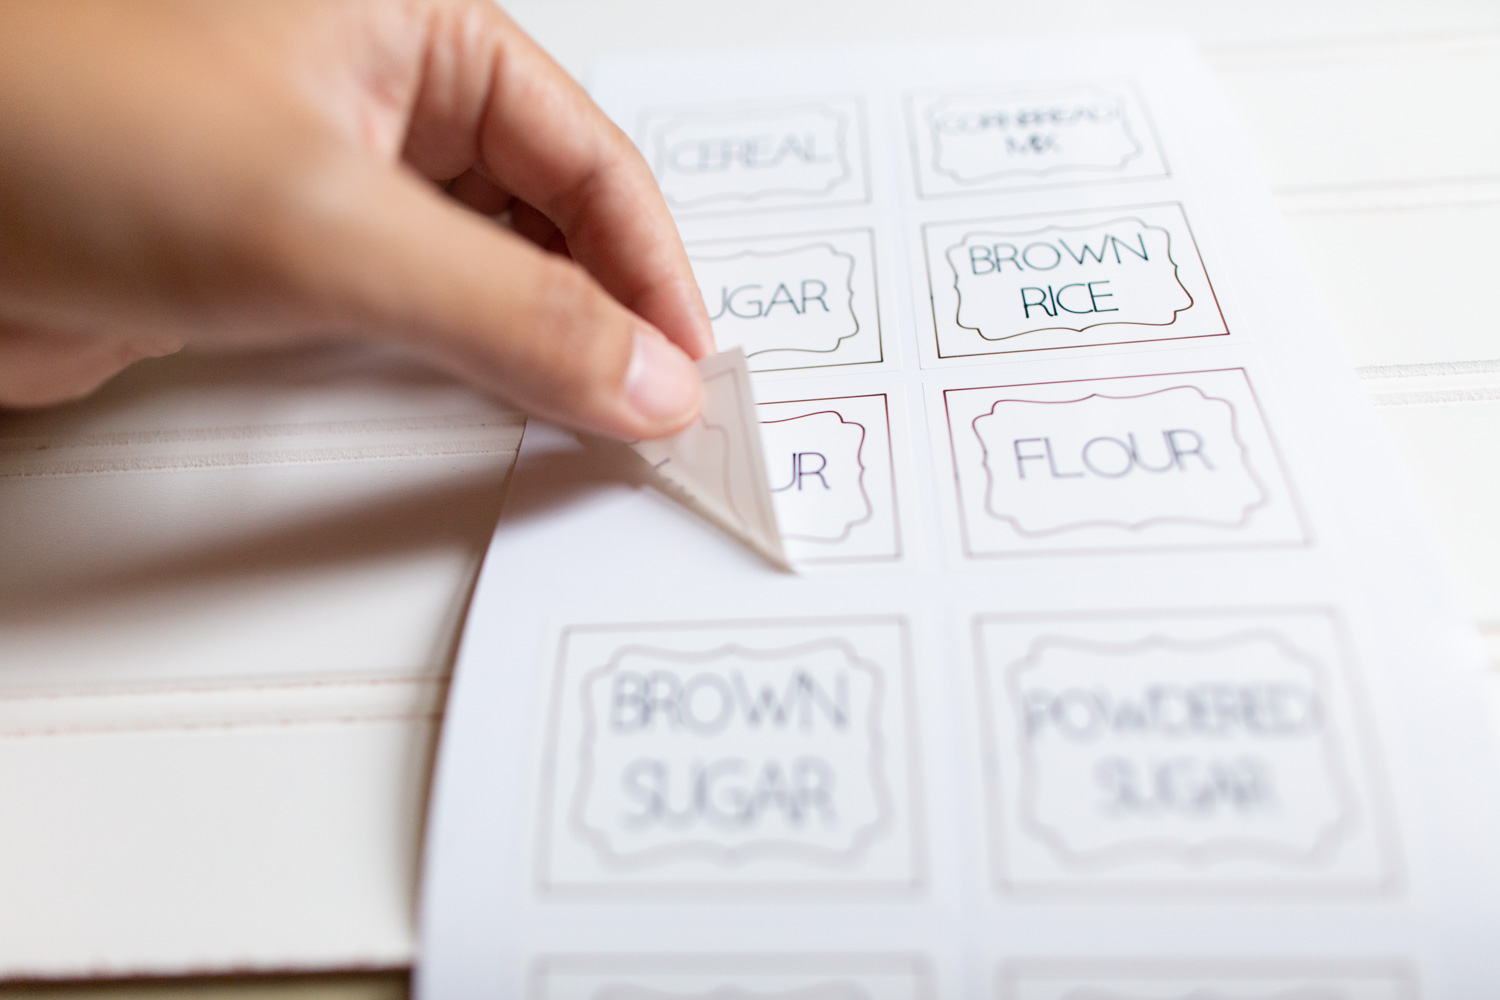
It's just like a sticker!

Here's a pro tip: weed out the excess and negative vinyl prior to peeling off the sticker to make it a smoother process.
Ensure that your containers are free of debris on the area that you want to place the stickers. Stick it on, careful not to create any bubbles.
Enjoy your newly organized and consistent storage in your pantry!
Instructions for Pantry Labels with Adhesive-Backed Deluxe Paper Using Cricut Joy
- When you get the Cricut Joy Adhesive-Backed Deluxe paper, you'll notice that you'll get 10 sheets that will fit directly in the Cricut Joy mat, pre-cut and pre-fit for your on-the-fly projects. They'll often come in similar combinations where you'll receive solids and patterns that you can use.
- Your design for pantry labels will generally have the letters CUT OUT or drawn onto the solid adhesive-backed deluxe paper. Make sure that your pen has a contrasting color.
- Choose the "Make It" button when your design is complete.
- When you choose "Continue" on the next screen, choose the option for "Smart Adhesive Deluxe Paper".
- Cricut will guide you on when to swap the tool in your Cricut Joy.
Once complete, you' can then use the label to your heart's content!
Instructions for Pantry Labels with Vinyl Using Cricut Joy
This is the traditional way of making vinyl if you are familiar whether you are using the Cricut Explore Air 2 or Silhouette Cameo, this is the most common tutorial you will see out there because it's the most common material that's been used since the release of personal crafting machines.
This type of vinyl will generally need transfer tape in order to transfer the adhesive to what you want to label.
- First, follow the instructions above to design your label. Make sure that you choose "cut" for each of the designs. Ensure that you design it into the border of the what the machine can cut.
- Place your vinyl and mat into the machine, it will autoload the mat.
- Choose the "Make It" button when your design is complete.
- When you choose "Continue" on the next screen, choose the option for "Vinyl".
- When the Cricut Joy is done cutting, in Design Space unload the material from the machine and use a tool like this one to remove the "negative" areas of the vinyl from the mat.
- If your design is small, you can generally just peel it of and stick to where you want it to go. However, if it is a big design or has intricate details, I would recommend using transfer paper to ensure the spacing is accurate to what you designed it to be. It will also reduce the amount of bubbles and creases you have when transferring it to your material.
Check out the transformation of our dining room to a kids playroom post for an idea of a big project with vinyl and transfer tape.
Cricut Smart Label Writable Vinyl for Pantry Labels in the Kitchen
My pantry labels have held up in the kitchen with my family of six. Having labels with a similar design and size provides a calmness to what usually is a chaotic cooking process in our kitchen.
Having the Cricut Joy Smart Label product line has been a lifesaver for our family who NEEDS small little home organization projects to keep the sanity in our home.
The fact that this machine can smart load, can be ported in different spaces, and has the ability to create labels without smudging has truly been an amazing tool to have in our home.

The Cricut Joy is all that and more!
This is an amazing machine. The Cricut Joy can definitely be one of the first machines you purchase if you are wanting to try out a cutting machine.
It has just been so great in our big household being able to finally label things quickly and efficiently. I hope you love this post and it provides you the inspiration to create pantry labels in your home!

More Cricut Joy Inspiration
- Definitive Guide to Ultra Portable Cutting Machine
- Cricut Joy Accessories and Starter Kits
- Home Organization with Cricut Joy
- Cricut Joy Insert Cards Tutorial
- Cricut Joy Pantry Labels Tutorial