Learn how to make a large oversized letter board. This is a simple tutorial that will allow you to decorate a wall that you can change up whenever you want.
Letter boards have been trending as a home decor item as of late, and I'm going to also be jumping on the bandwagon. These are essentially marquee signs where you can personalize phrases because they have individually movable letters.
In the tutorial below, I'm going to show you how you can make a DIY letter board that is ten times the size of the felt ones that you've been seeing people have on their shelves. It's a one time investment that will allow you to create endless amounts of design ideas by just moving the letters around.
It's going to be a statement wall treatment piece that your family will absolutely have a blast changing out and talking about. And this homemade letterboard will be less expensive for a manufactured letter board kit.

This is what the letterboard looks like unstained:

Things to Know Before Making Your Own DIY Large Letter Board
Making versus Buying Large Letters for Letter Board
Buying Large Letters
If you haven't looked into it, large acrylic letters can be super expensive to buy. The acrylic letters that are used in commercial settings are super expensive and cost hundreds of dollars.
However, you can get alternatives to them from Amazon, Etsy, Ebay, Alphabet Signs, Office Depot, and even Staples. They are less pricey than the acrylic letters, but they are still expensive. If you are the type that Googles them, they are also known as shadow box letters.
Making Large Letters
You can save some money by going the homemade route. There are several types of material that you can use to create large letters for a letter board.
- Plexiglass with vinyl (using a Cricut or a Silhouette)
- Transparency film pack with vinyl capital letters
- Print your own letters on card stock
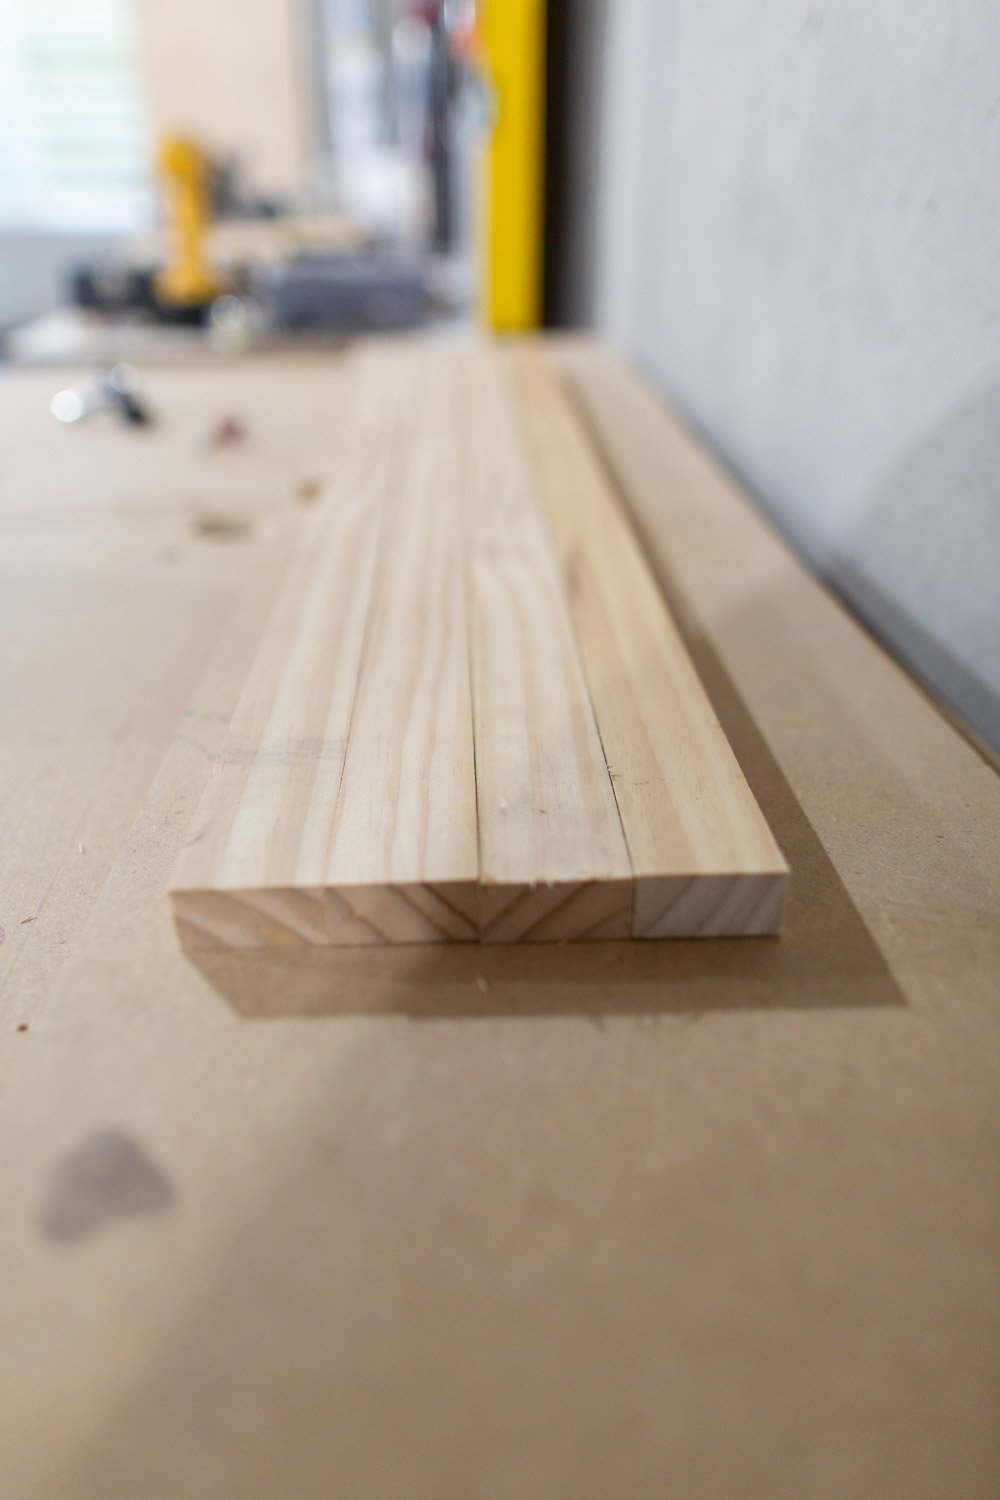
Wood for Ledge
I've seen a lot of tutorials using furring strips because they are inexpensive, low grade wood.
We upgraded a bit (not by much) using select pine.
Believe or not, you can buy something that costs a $1.00 here on Etsy.
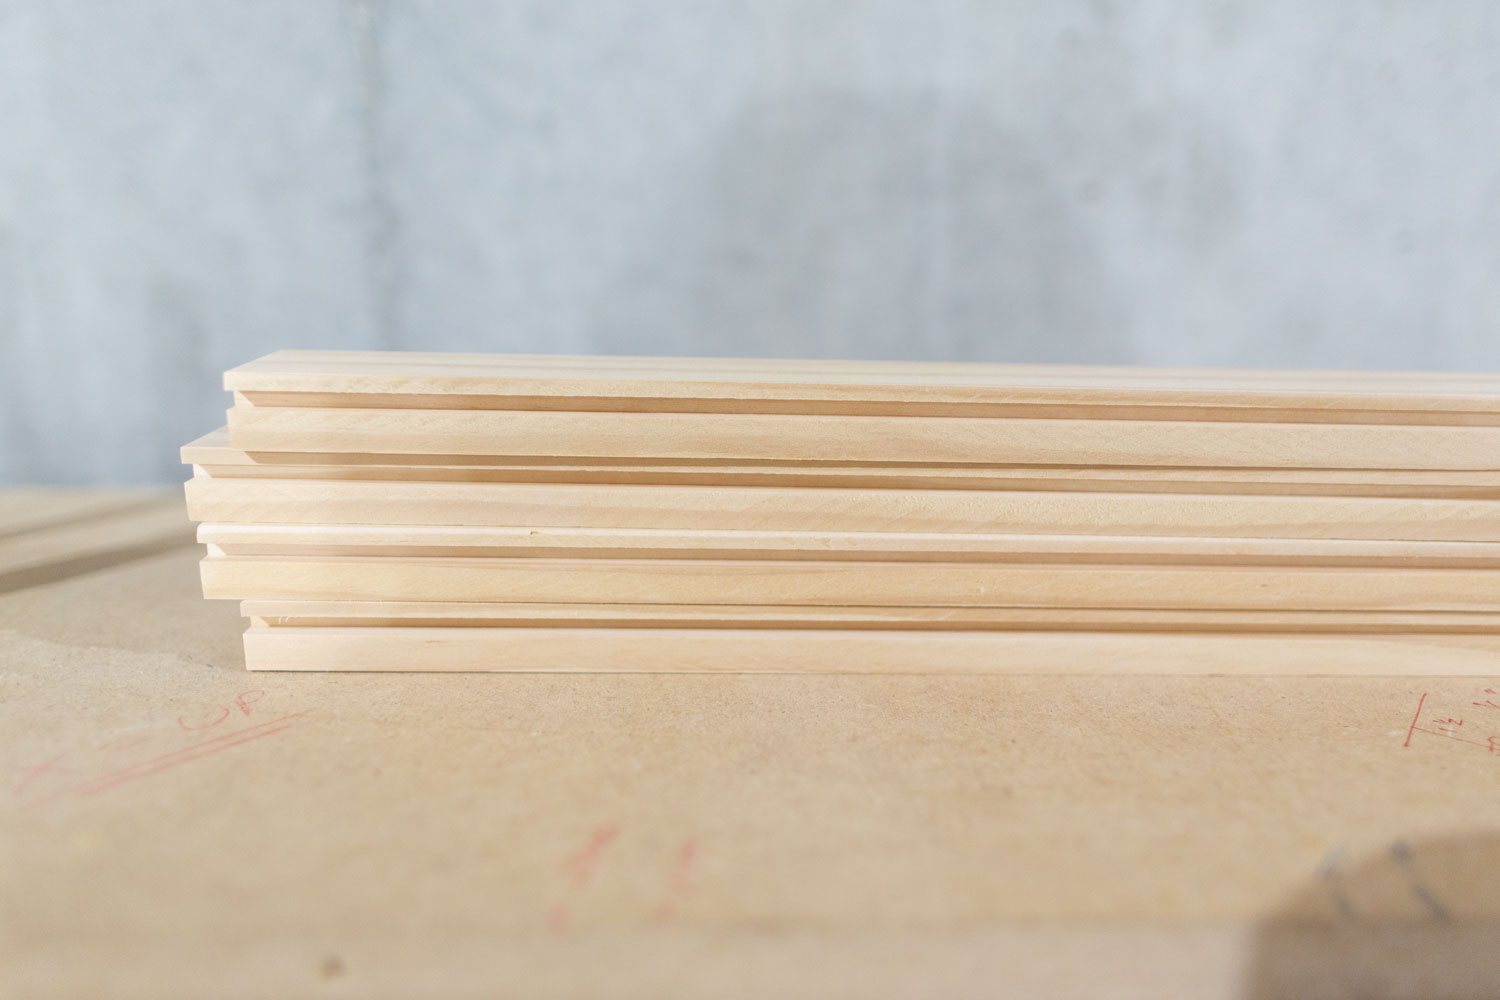
Creating Grooves and Slits for Letters
While optional, creating the grooves inside the ledge will allow your letter tiles to lean upright against the wall. Even you don't really need them, just know that your letters may slide around if you don't have the slits around.
Installation Options for Ledge for Large Letter Boards
Using Regular Screws
This probably does the most damage to the wall, but the most secure. You'll need to pre-drill the holes to the front side of the ledge, and add the screw so the holes will be exposed (or you can putty the screw hole after installing it and repaint over top of it).
Using Velcro Command Strips
No nails on the wall are necessary because it's so light. You can use three of these strips per board, and you'll have an instant letter board. In addition, it allows you the ability to move them around without too much heartache.
Soda Pop Can Tabs
You can use soda pop tops on the back to hang it off of the wall using a nail or screw.
Best Tips and Tricks for Making a Wall Letterboard
The reason why we chose Plexiglass was because I had some laying around at home already (I used it as a floor covering when I was a family photographer during a cake smash session so as not to get some photography floor drops messy).
I also have craft cutting machines (the Cricut Joy, Cricut Explore Air 2, and the Silhouette Cameo 3), I decided to use the Cricut Explore Air 2 because it was easier to cut multiple letters at a time on.
Plexiglass is hard to cut. Like really hard. I would recommend using the transparency film in the future. However, the Plexiglass does look really awesome in person. You should use a plastic sheet cutting tool as well.
How to Make an Oversized Letter Board
Follow the steps below to make your own beautiful large letter board ledge and letters for your wall.
Tools
- Cross blade
- Cricut Joy machine
- Ledge
- Saw
- Level
- Tape Measure
Materials
- 3 - 3/4" x 1 ½" x 4' pine wood
- 1 Sheet of Plexiglass
- Vinyl Capital Letters or Silhouette/Cameo Cut Out
- Stain or Paint (optional, you can leave it raw if you prefer)
- Mounting Tape (the ones I used here)
Directions on How to Make a Large Wall Letter Board
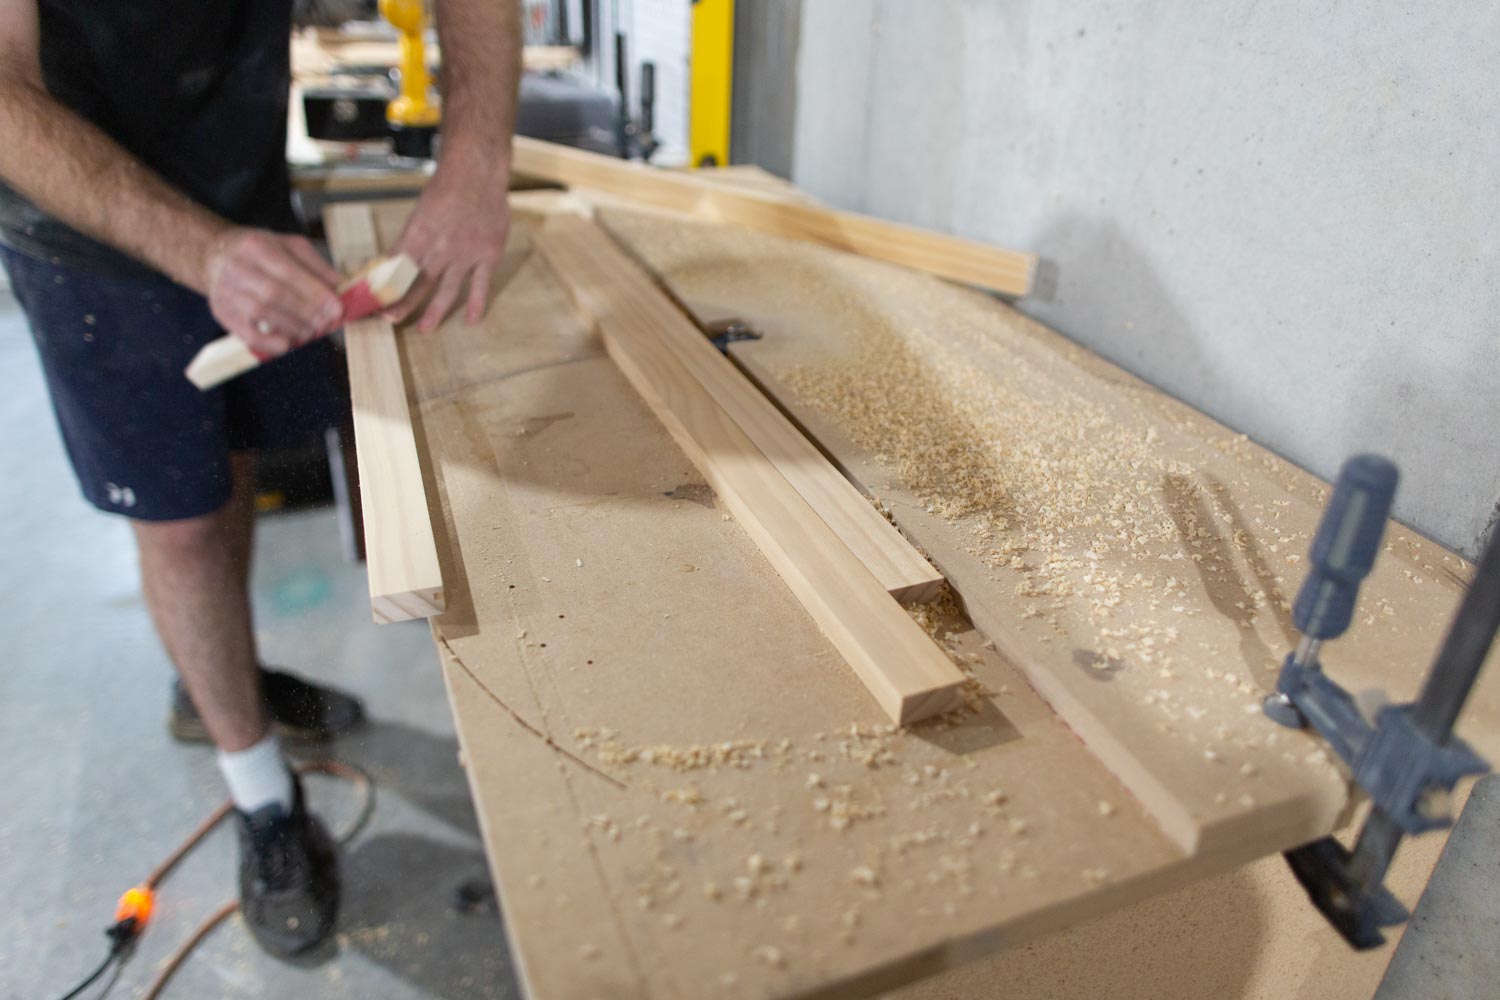
Cut the pine wood down to length you want for your wall.

Using a router, run a channel groove down the middle of the wood at 1⁄4" deep to create the grooves.

Go ahead and sand it down.

You should have the groove sit closer to one of the sides to allow the letters to lean against the wall.
Sand the wood down afterwards.
Put the two pairs of strips together, mount one side of the mounting adhesive on the pine wood.
Figure out how high you want the letters, taking into account the top of the letter height. Mark where you want the ledge to be.

Using a level, remove the adhesive from the strip and mount it on the wall.
Add the acrylic letters if you purchased them. If you want to create your own acrylic letters with Plexiglass, follow the following instructions.
Cut the Plexiglass or transparency sheets down to size. We sized them by 4" x 6".

We've tried using various methods, but we've found using this nifty tool to cut the sheet is easier. You'll want to sand all the sides around the Plexiglass.

Make some extra just to be sure you have enough for additional letters for different phrases in the future.

Stain your boards if you want to. Then, using a level and measuring tape, attach the ledge. We used these strips and it worked perfectly.

You can then use a craft cutting machine to cut the letters out using a matte removable adhesive vinyl. I used Bebas Neue font.

Using a weeder, remove the excess extra vinyl.

Use transfer tape to remove the vinyl and transfer it to the Plexiglass.

I would recommend using a cutting mat so you can see through the clear Plexiglass where the letters sit so you can line them up correctly.

Put the letters on the wood ledge and change it out when you feel like it!

Clever Sayings for Ledge Letter Board
Now that you have your ledge up, here are some cute clever sayings for different rooms in the house that you can use.

Oversized Letter Board Phrases for Living Room
- You are home
- When you are walking in your purpose, people can see it
- To plant a garden is to believe in tomorrow
- Stay awhile
- Do things that make you forget to check your phone
- Hanging with my peeps
Oversized Letter Board Phrases for Kitchen
- Home is where my people are
- I wish I was full of tacos instead of emotions
Oversized Letter Board Phrases for Office
- Doubt kills more dreams than failure ever will
- Dream, Create, Inspire, Repeat
- Don't quit your daydream
- Make it happen
- Monday should be optional
- Choose happy
- You did not wake up to be mediocre
- Think happy. Be happy.
- I swear it was Friday like five minutes ago!
Oversized Letter Board Phrases for Bedroom
- You are loved
- You are amazing and do not forget it
- Life isn't always perfect, but your outfit can be
- Whatever is good for your soul, do that!
- Be the reason someone smiles today
- Take my hand we'll make it I swear
- This just in, I love you more than before
Oversized Letter Board Phrases for Anywhere
- This #$i? is in fact bananas.

Frequently Asked Questions About Letter Boards
What are the black boards with white letters called?
Black board with white letters are generally known as letter boards, and can also be found spelled letterboards.
How do you make oversized letters?
You can use Plexiglass, transparency sheets, or cardstock using premade vinyl letters or using a craft cutting machine.
Summary
This is a really amazing statement piece that's fun, and you can place it in the living room, large empty wall space, or even at the end of the hallway. Being able to have changeable messages for seasonal decor, special occasions, holidays, and special events makes decorating easy.
More Wall Decor Ideas for Your Home
- Bathroom Wall Art Ideas
- Rustic Nursery Decor
- How to Hang Paper Flowers
- Paper Scroll Wall Decor
- Giant Photo Frame DIY
- How to Make a Wall Cock
- How to Decorate a Striped Wall
- Oversized Letter Board Tutorial
- DIY Trophy Display Case for Kids
- Patterned Wall with Same Color and Different Sheen
- Powder Room Wall Art
- DIY Wedding Vow Ideas
- DIY Faded Wall Art with Wedding Photo
How to Make DIY Oversized Letter Board

Learn how to make large oversized letter board in this simple tutorial!
Materials
- 3 - ¾" x 1 ½" x 4' pine wood
- 1 Sheet of Plexiglass
- Vinyl Capital Letters or Silhouette/Cameo Cut Out
- Stain or Paint (optional, you can leave it raw if you prefer)
- Mounting Tape
Tools
- Cross blade
- Cricut Joy machine
- Ledge
- Saw
- Level
- Tape Measure
Instructions
- Cut the pine wood down to length you want for your wall.
- Using a saw, run a channel groove down the middle of the wood at 1⁄4" deep to create the grooves.
- Put the two pairs of strips together, mount one side of the mounting adhesive on the pine wood.
- Figure out how high you want the letters, taking into account the top of the letter height. Mark where you want the ledge to be.
- Using a level, remove the adhesive from the strip and mount it on the wall.
- Add the acrylic letters and enjoy!
Recommended Products
As an Amazon Associate and member of other affiliate programs, I earn from qualifying purchases.
-
 Chartpak Self-Adhesive Vinyl Capital Letters, 4 Inches High, Black, 58 per Pack (01175)
 -
 GoldUpUSAInc-8.5 x 11 Inch Waterproof Inkjet Transparency Film for Silk Screen Printing - 1 Pack (100 Sheets)
 -
 Heidi Swapp 313735 Pack Lightbox-Mega-Black (100 Piece)
 -
 Letter Ledges; Marquee letter board; Letter Shelves; Changeable letter sign