Content may contain affiliate links. When you shop the links, we receive a small commission at no cost to you. Thanks for supporting my small business.
With four kids, I know how hard it is to keep parts and pieces of toy sets together. I wanted to share with you my favorite places to find bins as well as how I label wicker baskets and the plastic bins that I get from big box stores to provide a little bit more structure when it comes to cleaning up the space. I also want to share how I use the Cricut Joy to help create customized labels for the space.
Organizing a Playroom Considerations
I know the feeling when you spend a TON of money on toys and you really don’t want to throw them away. Trust me on this, if it doesn’t spark joy, throw it away. Once you get the main toys that you’ll be keeping here are a few things to keep in mind:
- Resale Value of Toy – If the toy is resellable, chances are, keeping the original box in tact will increase the value of the toy.
- Matching Pieces or Sets – If the toy is something where you can buy parts to expand the set, keep the sets together using containers.
- Play Space Division – Separate your playroom into centers to keep similar toys and kids crafts together.
- Storage Bins, Baskets, and Containers – If you want to hide the mess, opt for cloth bins and wicker baskets. If you want to keep the toys in view, opt for containers.
- Shelving – Having furniture that allows toys to be viewable ensures that your kids can see options that are available. Just make sure to secure any shelving on the wall to ensure there is no tipover for safety precautions.
My Favorite Storage Bins and Containers
My absolute favorite shelving for a play space has to be the Ikea Kallax system. They have so many different configurations. We opted for two of the 2 x 4 units, laid on it’s side. What I love is that there are so many type sof bins and storage that are available specifically for the dimensions of the Ikea Kallax shelves.

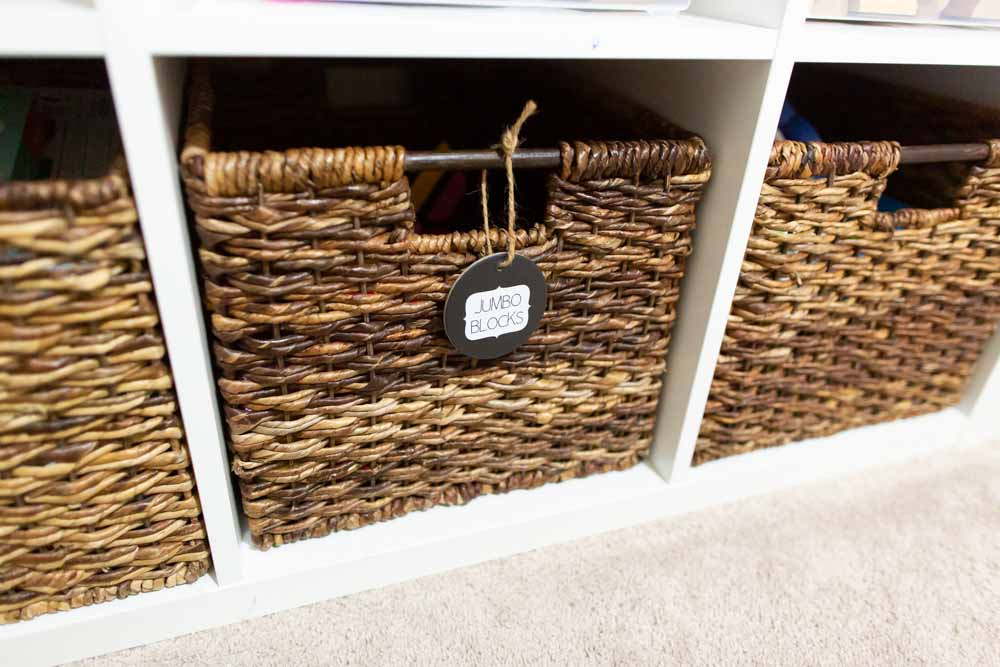
For example, I have these wicker baskets that I absolutely LOVE. They fit perfectly with the shelving and hides the mess. The downside is that you can’t see what’s inside of them without pulling them out and looking inside.

This causes kids to pull out toys and pretty much leave them out because they couldn’t find what they were looking for.

I’ll show you how I label these baskets with my portable Cricut Joy machine (and make customized labels for all of our playrooom storage) below.

Here are my absolute favorite clear containers for storing toy parts. These containers are part of an entire system, which means you can mix and match sizes for a cohesive look while also being able to customize various sizes. The largest size I use for storing scrapbooking paper. The medium size (normally used for shoes) I have a ton of in order to store toy parts. The small size is normally reserved for small craft parts.
My Favorite Way to Label Storage Bins and Containers for Playroom (Cricut Joy)
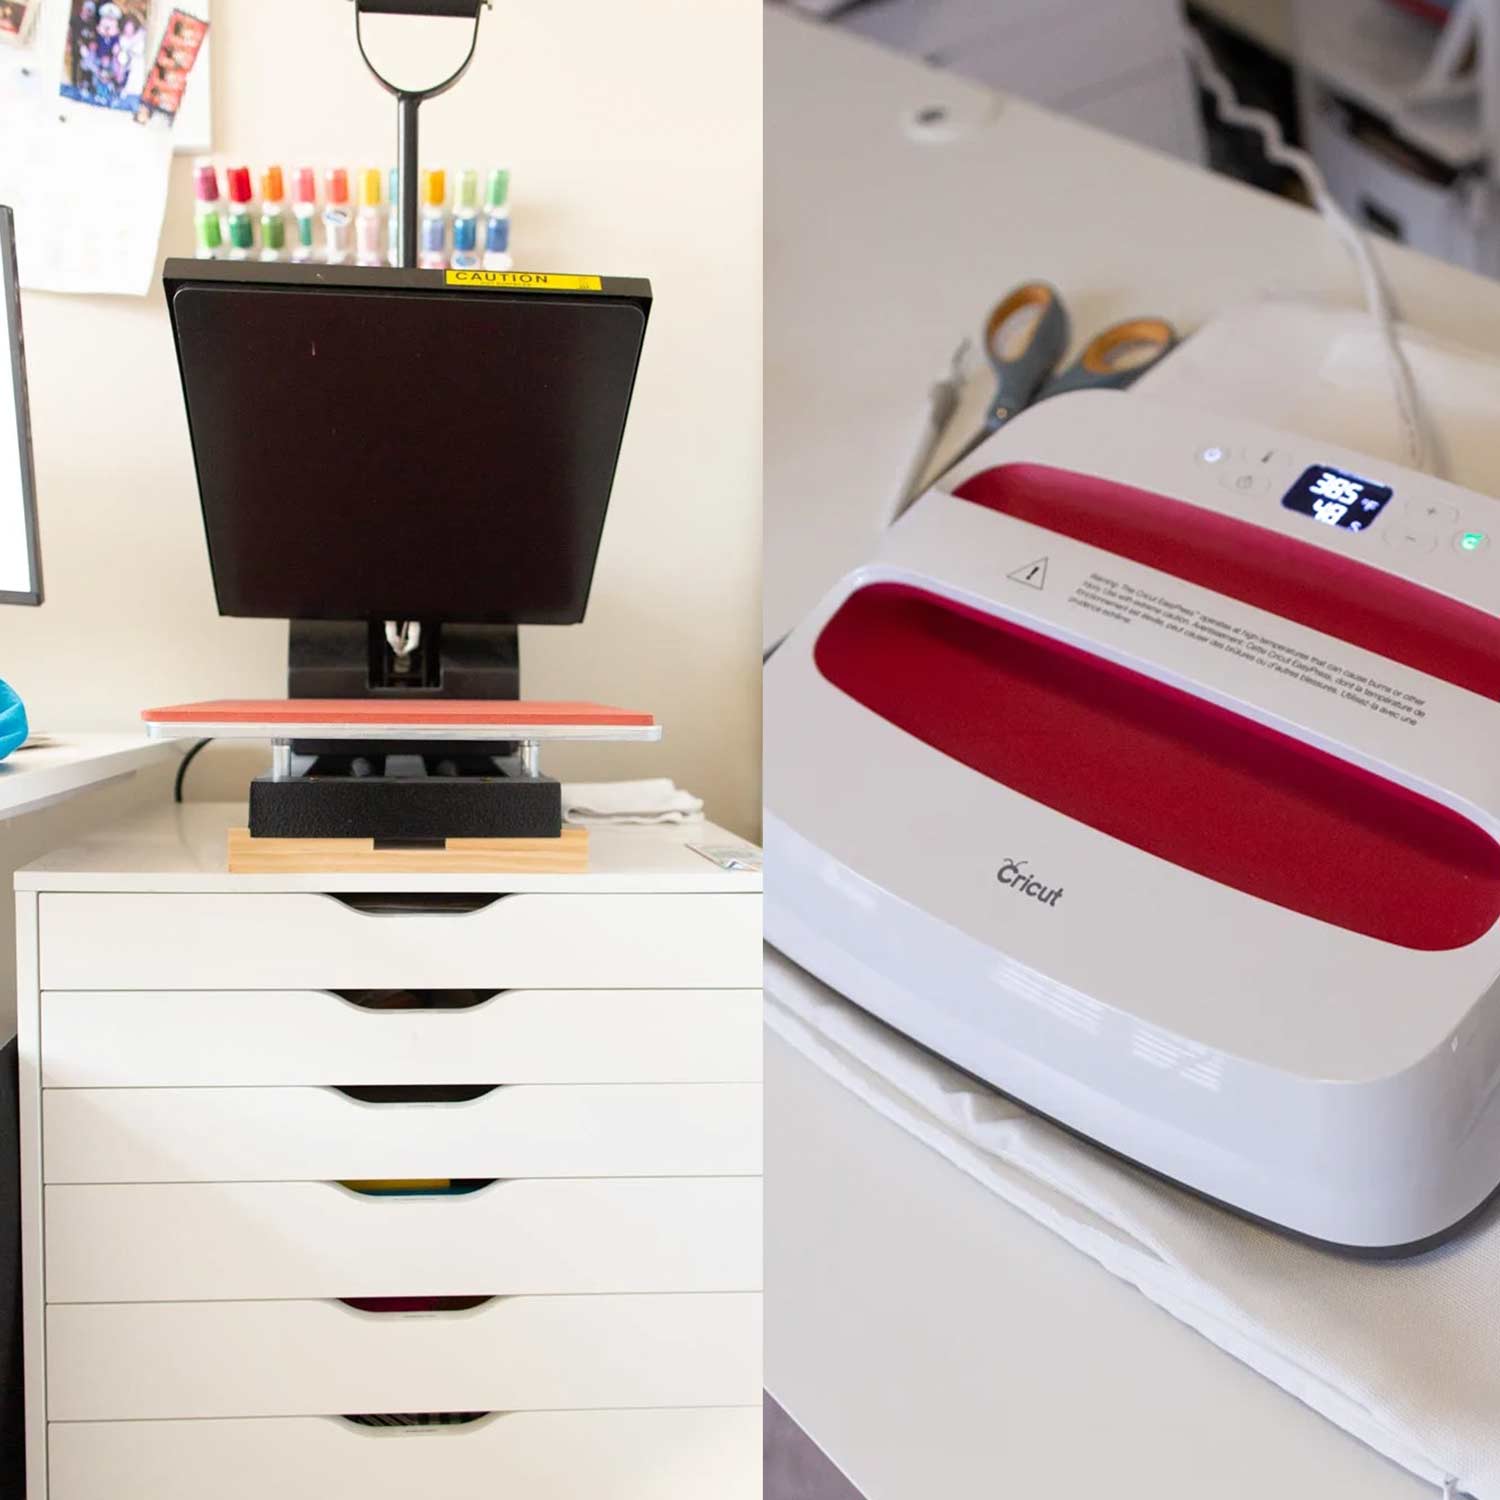
While you can definitely use a label maker to create uniform looking labels, I find them not to be as fun and customizable as using a Cricut machine. My favorite all-time Cricut machine is the Cricut Joy because it is so small and portable. Even though I have the Cricut Maker, I find that the Cricut Joy and all of the accessories that are available make it so easy to craft on the go, especially when I am on a mission to organize a space.
Best Tools to Get Started for Customized Labels for Kids Toys and Storage Bins
If you are just getting started with the Cricut Joy machine, here are some of my favorite tools of the trade. You don’t need all of these, but they sure will help you get the job done faster.

Cricut Joy - Portable Cutting Machine
This is my favorite way to have portability and crafting all in one machine. This is absolutely perfect for any space especially if you do not have a dedicated craft space due to it's ease of storage.

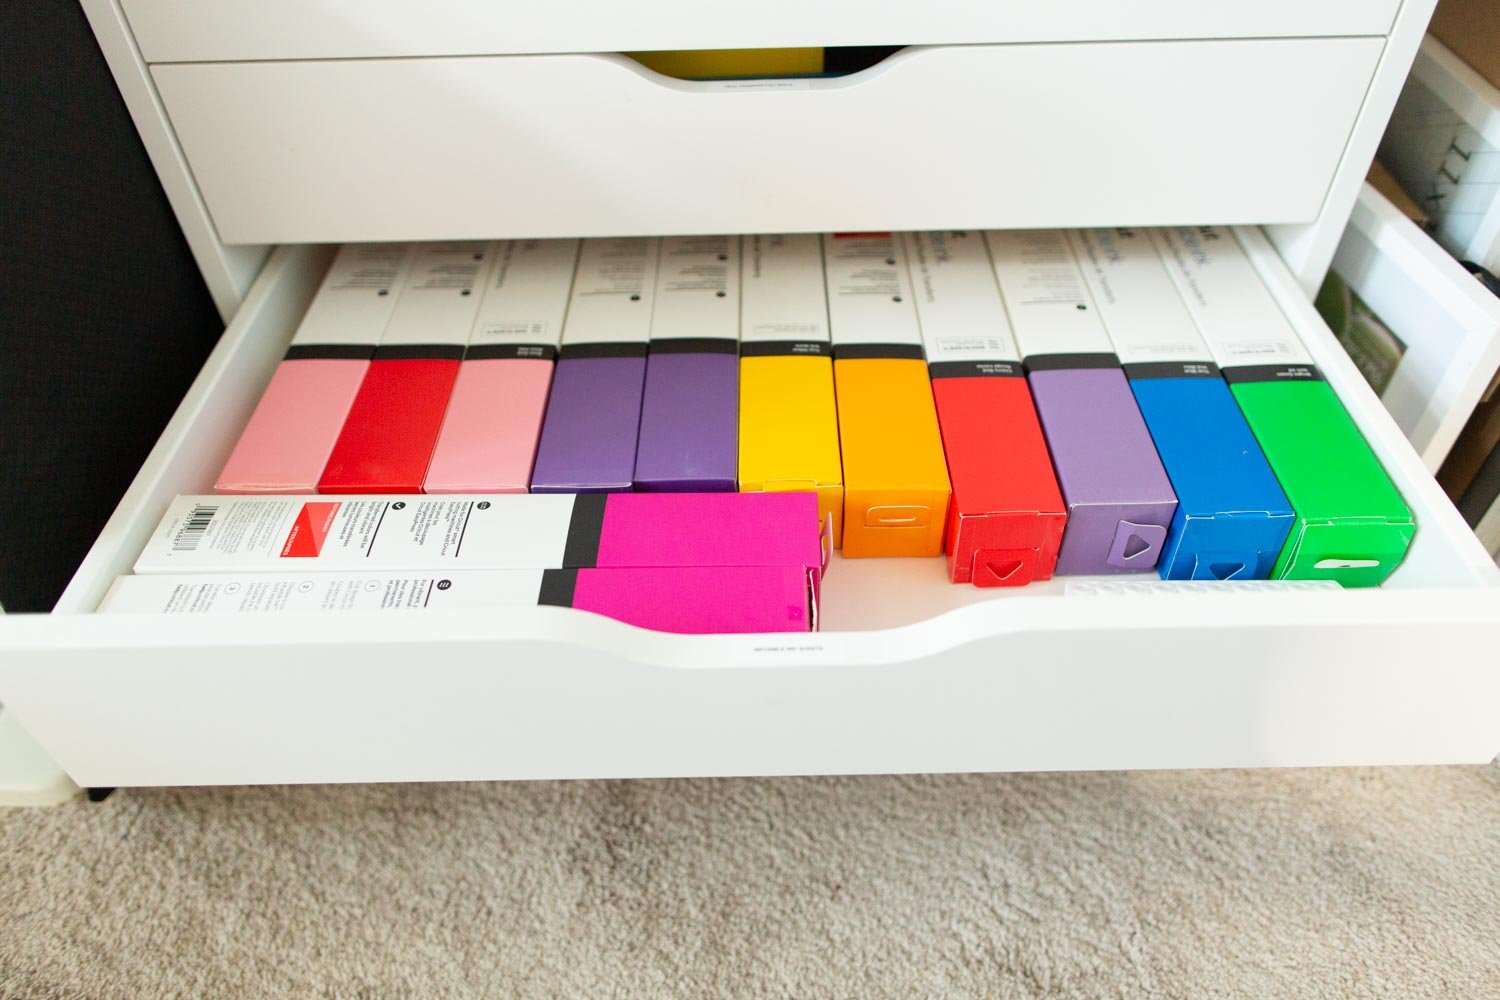
Cricut Joy Smart Label Writable Vinyl Adhesive
This is especially made for the Cricut Joy and will allow you to use the machine to write with whatever font you want, and then not have it smear all over the place. I would recommend getting a ton of these because once you start labeling, you'll want to label EVERYTHING.

Cricut Pens and DIY Cards, Party Invites, Labels
This is a great starter bundle with both pens, labels, and cards that you can get started using your Cricut Joy. If you are in doubt of getting material, get the bundle and you won't go wrong!

Cricut Joy StandardGrip Mat, 4.5" x 12"
If you are using the Cricut Joy and needed a longer mat, Cricut has one for you to be able to cut anything up to 12" long! This is great for cutting out stencils or vinyl for signs and shirts.

Cricut Joy Replacement Blade
This is a replacement blade for your Cricut Joy in the event that you are using it every day like I am. It's so great just have this on hand!

Cricut Brayer
I wish someone would have told me what a Brayer could do when I first got my machine. This allows you to roll over your material so that it is taught. This will allow the machine to feed and cut through or draw on your material much more smoother.

Cricut Joy Adhesive-Backed Deluxe Paper
This Cricut Joy Adhesive-Backed is already decorated and beautiful. If you are just wanting some art to cover up something, this is a great package you could use!
Before and After
I wanted to show you a before and after of what the space looks like with and without labeling.
As you can see, in this photo, you don’t really know what’s inside each of the wicker baskets. Sure, it looks uniform and great. But it’s not practical, functional, and probably frustrating for the kids to figure out what is in each container.

Here’s what it looks like after labeling. Now, as a modifier, if you have younger kids who can’t read yet, you can use the Cricut Joy to ultimate DRAW a picture of the toy on the label. You have the option of getting super crafty and label to your heart’s content.

Video Tutorial Using Cricut Design Space with Cricut Joy to Make Custom Labels for Your

Instead of a written tutorial, I’m going to do a quick video of what you need to do in order to get the Cricut Joy up and running. Before you get going, here are a few tips and tricks to make sure you get the most out of your labels:
- Once you get the parts of your label together, use your mouse to create a selection box over all of the layers. Use the alignment button to make sure that your layers are centered horizontally and vertically to give your labels a fine tuned crisp look.
- Ensure that you use the attach and detach feature on the bottom right of the software. If you don’t attach the layers together, Cricut will try to put your pieces in the most efficient way possible. In order to tell Cricut that you want the pieces layered together, ensure you click on the paperclip icon to attach the layers.
- On most of the Cricut Joy accessories for vinyl, they’ll have lines on the back to help guide you when you cut. Try to use this so to make sure that the next time you use the left over material, you have straight feed that the Cricut Joy can pull from.

- Make sure you have enough room, especially if you are cutting something longer. I created all my labels in one big project, so I needed to make sure that I had enough room for the paper to hang.

- If you use Deluxe Paper Adhesive like I did for some of my labeling, you’ll need to get a longer Cricut Joy mat in order to cut this.


Here’s what it looks like:

Free Downloadable Cricut Template for Labels
If you want to use my exact labels that I created for my Cricut machine, just subscribe to the newsletter to become a VIP member where you’ll get access to the vault of FREE goodies. Again, it’s free and you’ll get access to loads of stuff as I continue to release them.

Ideas on Storage to Label for a Playroom
Here are a few ideas that might inspire you to label. This isn’t comprehensive by any means, but just a start for things you can look out for to label.

Wall Containers
These are containers I got from Ikea that have been heaven sent. They allow the kids to have a place for their craft supplies.

Clear Jars
These clear jars hold just knick knack toys that I don’t have time to organize. You could use the Deluxe Paper to cut out various shapes and stick them onto these jars. It’s quite easy.

I’m sure you could do a better job of thinking of creative ways to decorate these jars, but you get the idea.

Label Clear Plastic Storage Containers
I just used 3″ x 3″ labels cut using my Cricut Joy to label these boxes. Super easy to make!

Label Tags
These tags were precut, but I just added a quick label on them and added some twine and I was good to go.
I just think it looks super amazing now that it’s organized and I can see what’s in them.

Other Areas of the Play Room
I’m bound to be asked to see other views of the playroom, so here’s a few images that I took on the other side. There’s a little kitchenette that my girls absolutley love playing with.

This is the top of the Ikea Kallax units.

As you can see above the shelving, the kids art sit on full display.

On the left of the shelf, I store some paints that we often use for crafting. These were also from Ikea and I painted them white before hanging them up. The plastic storage bin below it stores color paper with dividers by color. The push pin board is hung up using Command strips.

Summary on Toy Room Organization and Labeling
I hope this inspires you to take 1-2 hours to purge and hopefully organize your kid’s playroom. I feel as though it allows your kids to have more fun knowing that they’ll be able to find the piece to the toys they want AND they know where to put it back.
If you are excited about organizing, check out this basement labeling organization tip!

Other Playroom Posts You Might Love
If you liked this post, check out some of these other posts you might love.
- How to Organize a Playroom
- Dining Room to Playroom Idea
- Installing an IKEA Pegboard to Wall with Hacks
- Tips for a Kids Playroom
- DIY Cabinet Door Front Tutorial