Content may contain affiliate links. When you shop the links, we receive a small commission at no cost to you. Thanks for supporting my small business.
Learn how to turn a dining room into a playroom with wall murals.
When we moved into our house, we loved it at first sight. Well, at least me. I think Ryan was sick of house searching and was like, “Great!”. Anyways, we loved it – but didn’t love the paint job that was there. I thought that was going to be an easy and cheap fix. Not so much. This next project, the playroom, was a beast.


Anyway, when you walk into our house, the first room on the left is a “flex room”. It doesn’t have a closet, but it does have these three beautiful bay windows and a french door. The previous owners used it as a dining room.
I had always wanted a room like this. It has covered sockets on the floor, so it could be used as an office. I have ALWAYS wanted my own little office exactly like this. I remember going over to my very first manager’s house and seeing how she had her office set up, it was awesome. Fast forward to now as a momma with two kids, this to me was the PERFECT playroom. If guests come, we could shove all of their toys into this little room.
Dining Room Remodel Playroom
When I presented this idea of creating this “playroom” room to folks, people asked where we would have a formal dining room. First off, for folks who know Ryan and I, do we look like we would ever host a formal dining party? Secondly, when we do have people over, it would be more of buffet style. We have a breakfast nook (which is also where we have dinner every night) and a huge island that we could fit four people on. That’s enough right? We’ll see with our first BBQ in April.
I was not a fan of the previous owners’ red paint job. I mean, I know it was a fad back in the day. But they used a very flat paint that held stains. I mean it was bad. The bathroom was painted in this same flat red paint. Flat paint is not for houses with kids or messy guests. I mean, when you looked at our light switch, you could see that someone did not fully dry their hands because there were liquid stains running all the way down to the floor moulding. Gross.
I had a small vision of what this room would look like. Everything else came to mind later. This project took a good FOUR weeks to complete.
Let’s talk details. Initially, I knew what I wanted Ryan to do =)
1. Add a chair rail
2. Paint the current trim from khaki to white
3. Paint the door white
4. Chalkboard paint on bottom
Painting the Walls for the Mural
1. Add a chair rail. Ryan and I argue about the dumbest things, this being one of them. I finally caved in and let him pick the cheapest chair rail at Home Depot. It didn’t look bad. I did nix the idea of him getting some sort of level laser tool that would create a line that would mark the room evenly. I told him to use a stupid ruler. No youtubing this, Ryan figured out how to do the chair rail on his own.


2. Paint the current trim from khaki to white. In a normal house, trim color is usually white or stained wood color. Typically. Not in our house. Our house has a sort of what I like to call “khaki” tone to it. At first, I didn’t like it. So I got a quote on how much it would cost to get it professionally done. $12,000. I grew to like it.
Anyway, I thought that white would be perfect for their playroom. The hardest part about this for Ryan was painting the bottom trim where the carpet meets the trim. He got a bright idea and put manilla folders under where the carpet and the trim touched. Smart man. He put two coats on. He took so long to put two coats on that one night, I gave him a piece of my mind, took his paint brush and painted the last coat in a hurry. Needless to say, I know why it took so long.
3. Paint the door white. Ryan decided that with the door, he didn’t want to use paint brushes because you could see the streak of the brush. I agreed. So he researched and wanted to buy a $300 paint sprayer that was better than any “Wagner” paint sprayer (basically saying it was “cheap”). I told him that was the dumbest idea ever and that he would hardly even use the sprayer. So we went to Home Depot, and when he saw the price in person, he decided against it and bought the Wagner sprayer. Then, to top that off, he didn’t even use it! He used a high density roller to paint the door and it works perfect. That sprayer is now sitting out of its box in my way.
The french doors had windows – so we had to tape the edges. First, let me tell you how awesome FROG TAPE is.


It is worth every single penny. I know its more expensive that regular blue painter’s tape, but it provides results. I mean, check this out. The left side was taped with Frog Tape. The right was taped with blue painter’s tape. Amazing. We used a razor to scrape off all the excess paint.

4. Here are my tips or things you need to know:
- Make sure you prime it well. Do NOT use the Glidden grey paint primer. It sucks. I’m staying away from Glidden paint from now on. Just use regular white interior primer.
- Make sure you sand, and sand well. Or else when you use chalk, it will have ugly bumps.
- It cost $10 for the Rust-Oleum Specialty 30 oz. Flat Black Chalkboard Paint. It’s a pint can – I needed two of them (even with three coats).
- It took three coats of paint.
- Do NOT under any circumstance “condition” your chalkboard wall (e.g. rubbing a chalk sideways). Some sites tell you to do this….don’t.
- Do not use outdoor chalk. Do not use dustless chalk.


Here’s an image of Ryan using the Glidden grey primer. It was so pasty and gross. We had to sand more than we needed to because of this.

Now the fun begins on the other stuff:
5. Paint color: I didn’t know what color I wanted the section above the chair rail to be. Ryan obviously wanted blue. We argued about this again….for a long time…in the store. I had no idea what I wanted to do to that top portion. So I let him pick. It’s called “Ice Folly” by Behr. I told him it looked like it was for a boy’s room, which doesn’t make sense because we have two girls. He says blue “calms you”, I said he was dumb as he was checking out with the color (I was pissed). It was a very light blue.
Anyway, I then went home and searched Pinterest and Etsy. I found what I wanted to do – and didn’t want to tell Ryan that his paint color choice was awesome.
6. Decals. I saw decals on Pinterest, and I was in love. Most of them were for nursery decor. I wanted a more educational style room. I found a seller who had lots of different ideas and configurations in his store, picked out the graphics I wanted and said – can you put these all together? For each of the walls, I wanted:
- a farm theme
- a jungle theme
- a sea theme
The light blue paint would be the blue sky in my themes! Awesome!
Pretty sure Charles from Wall Decal Source thought I was crazy, but I wanted him to mock it up. This is what he mocked up after the 50th revision (exaggerating, but not really).

Charles and his team were really great. I would recommend using the Wall Decal Source if you need decals. The guy is fast at responding and shipped it great! The decals came in these huge sheets that we had to cut out. It was pretty easy to put up, just very tedious work.
Here are what the sheets originally looked like (yes, we still don’t have any living room furniture):

I wanted to do something cool between where the wall meets so it seemed like a seamless theme. So I asked him to do a branch that goes to the other wall and a hill from the jungle to the ocean.

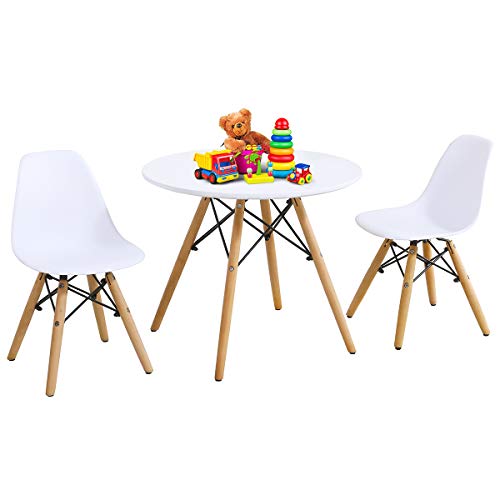
7. Furniture. I love the wing back chair and Pottery Barn toddler table.


That’s it. Pretty awesome if I do say so myself. Ansley can now pick out the owl, cow, elephant, lion. We are still working on the dolphin and giraffe. Aubrey just sticks out her tongue at the animals and stares mostly.
Kids Playroom Wall Mural Themes
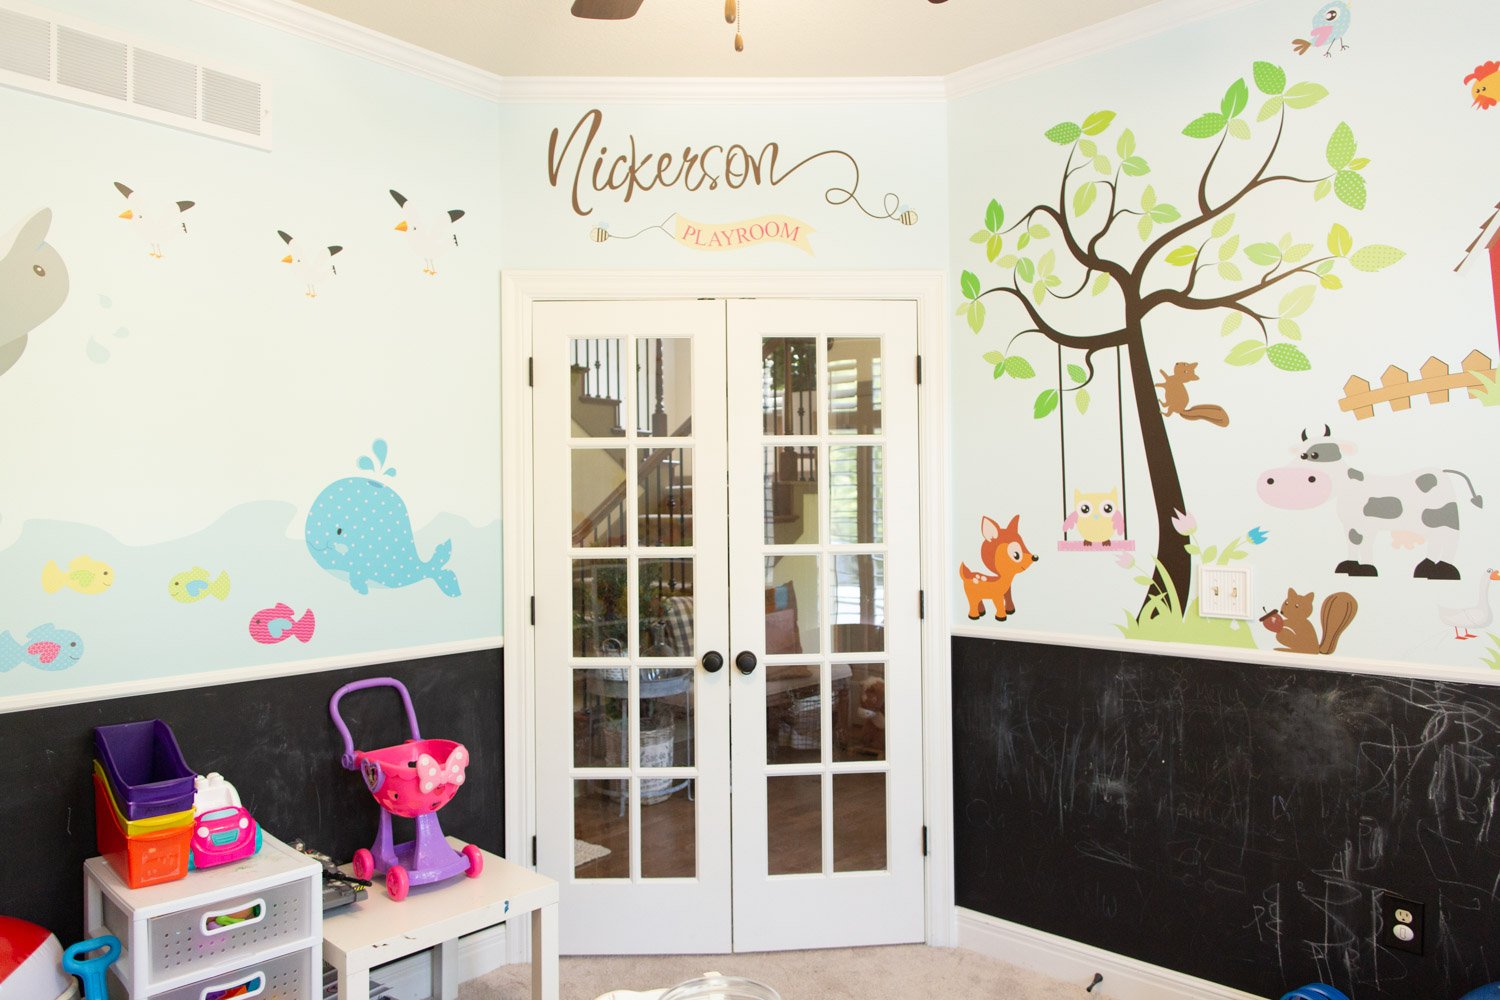
Here is a panorama shot from my iPhone (which is an awesome, easy iPhone feature by the way):

Here are the detail shots:

Room Naming

Farm Theme

Jungle Theme

Sea Theme


Who needs a formal dining room really? Great job Rynie … even if it took a few battles. We can say this room was made with a lot of love.
If you want to buy the chalkboard paint, here’s the link: Rust-Oleum Specialty 30 oz. Flat Black Chalkboard Paint.
Themed Kids Playroom Mural Idea

Learn how to use decals to decorate a kids playroom along with chalk paint ideas for your children's play space.
Materials
- Rustoleum Black Chalk Paint
- Gray Paint
- Light Blue Paint
- Wall Decals
Tools
- Brayer for Decals
- Paint Brushes
- Paint Trays
- Paint Towels
Instructions
- Add a chair rail as needed into the space to separate the chalk paint from the mural.

- Paint the trim in the space to match the room.
- Use gray paint to paint below the chair rail. Next, use the black chalkpaint to paint two coats for the wall.

- Next, paint above the chair rail a light color blue to mimic the sky. Allow it to dry overnight.

- Use decals on the wall by using the brayer to carefully peel off the sticker.
Recommended Products
As an Amazon Associate and member of other affiliate programs, I earn from qualifying purchases.
-
 Runtoo Jungle Animals Tree Wall Decals for Nursery Baby Kids Bedroom Monkey Giraffe Elephant Wall Stickers Adventure Wall Décor
 -
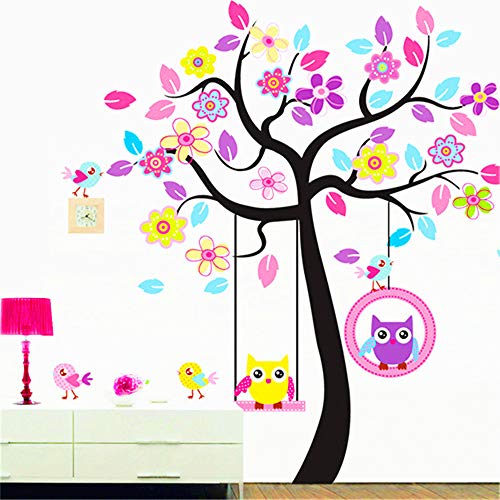 Animal Jungle Tree Wall Decal Nursery Kids Wall Decor Owl Wall Decals Jungle Theme Wall Mural Vinyl Art Wall Stickers for Nursery Kids Room Decor (Owl Decor)
 -
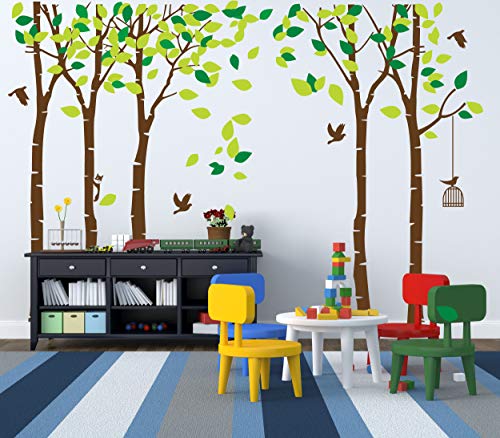 Giant Jungle Tree Wall Decal Removable Vinyl Sticker Mural Art Bedroom Nursery Baby Kids Rooms Wall Décor