Learn how to use Cricut Joy Insert Cards with your portable cutting machine. You'll be able to make beautiful and meaningful birthday cards, get well cards, congratulatory cards, baby showers, bridal showers, weddings, anniversaries, and other greeting cards quickly and easily without the mess of using scissors and glue.
You guys know my love affair about the Cricut Joy and everything it can do, including making greeting cards without a lot of hassle. If you find yourself realizing that you need to be at a birthday party in a few minutes without time to stop at a store, you can make an emergency birthday card in no time at all (maybe with an Amazon gift card or cash stuffed inside).
Custom greeting cards provides a personal connection that you can't get from just buying the cards off of the shelf. I absolutely enjoy making personalized cards and letting my kids make thoughtful cards for their friends' birthdays. However, it can be not only time consuming, but also very messy if you are doing it with just scissors and glue.

The Cricut Joy makes it so unbelievably easy to make super personalized and beautiful cards for your friends, families, and co-workers. The Cricut Joy has a huge product line for this specific purpose, including a custom card mat that allows the flap of the card to be designed on without having to be concerned with inside of the card being modified.

I'm going to share with you the details on how to use these amazing Cricut Joy insert cards and all the things you can do with them.
I'll walk through what's amazing about these insert cards, the related card mat, and how all the projects that will allow you to revolutionize the way you give the gift of a card!

Once you get the hang of how the Cricut Joy can help you, you'll never be found without a card again at a birthday party.
In my examples, I'm creating cards for the amazing men and women in healthcare including doctors, nurses, and first responders that are working around the clock to keep us all safe and healthy. Through all this trying time that we are all going through together right now at this moment, somehow, the human spirit finds a way. This can especially be seen through the heroism of the global healthcare community. These men and women are working around the hour, putting their health and their lives on the line for complete and total strangers.
I wanted to show our heartfelt appreciation from our family the best way I know how, making cards and saying THANK YOU! Somehow through all of this turmoil and hardship, there is good news and good people out there. I wanted to create personalized cards to them to let them know that we care and are thinking about our medical community and the supporting staff around them.

The Ease of Making Cards in the Cricut Joy
I'll be honest with you and let you know that I've never made cards very often before getting the Cricut Joy, even with my previous cutting machines. However, the Cricut Joy makes creating cards so fun and simple, it's actually really addicting to make.

In one machine load, you can literally get a card that has designed cuts and beautiful drawings in just a few short minutes. The Insert Card kits along with the portability of the Cricut Joy just makes projects so simple to use on the daily.
All About Cricut Joy Insert Cards
I'm going to go through the most common questions I get about the Cricut Joy Insert Cards.

What are Cricut Joy Insert Cards?
Cricut Joy Insert Cards are packages that include pre-scored cardstock for greeting cards and come with inserts for layering as well as envelopes. They are designed specifically to work with the Cricut Joy machines along with the Cricut Joy Card Mat that has a pocket sleeve that allows designs to be cut on the top of the greeting card without cutting or drawing through the bottom portion of the card.

What Comes with the Cricut Joy Insert Cards?
The Cricut Joy Insert Cards come in various cardstock types as well as different quantities, namely sets of 10 or sets of 12.
Each Cricut Joy Insert Card packages include the same amount of cards, inserts, and envelopes because they are a "set". Some crafters and bloggers call these Insert Card packages "card kits" for that reason.
Whatever they call it, it's a convenient and a great way to keep everything organized and neat.

Cricut Joy Sizes and Dimensions
The Cricut Joy Insert Cards are A2 cards that are sized at 4.25" x 5.5". The card mat allows you to make cards (with your own cardstock) a little bigger than that.
How much does a greeting card cost to make with Cricut Joy Insert Cards?
Generally, it turns out to be less than $0.50 per card with the Insert Cards, which is a lot less than some name brand greeting cards at the store that run anywhere from $1.50 to $5.99 per card.
I would say that it is absolutely worth buying the Insert Card packages. I would go further saying that having a bunch of these on-hand allows you to have options to choose from when you have parties or other occasions that creep up on you.
Types of Cricut Joy Insert Cards
The Cricut Joy Insert Cards packages and sets that have a wide array of colors and material types. There are various types of materials that the cards itself are made of and the inserts are made of which include:
- solid and pattern cardstock
- holographic
- acetate


Here are a few of the different card types that you can scroll through:
Using the Cricut Joy Card Inserts with the Cricut Joy Card Mat
The Cricut Joy Card Mat is exclusively made for the Cricut Joy right now. When you purchase the Cricut Joy, it does NOT come automatically with the card mat.

The top of the mat has a protective film cover. When you remove the protective cover, the top layer is sticky. Similar to the other Cricut mats available, the protective cover allows the card mat to be protected from debris and dust when it's not in use. You'll want to make sure you hang onto the protective cover for this reason.

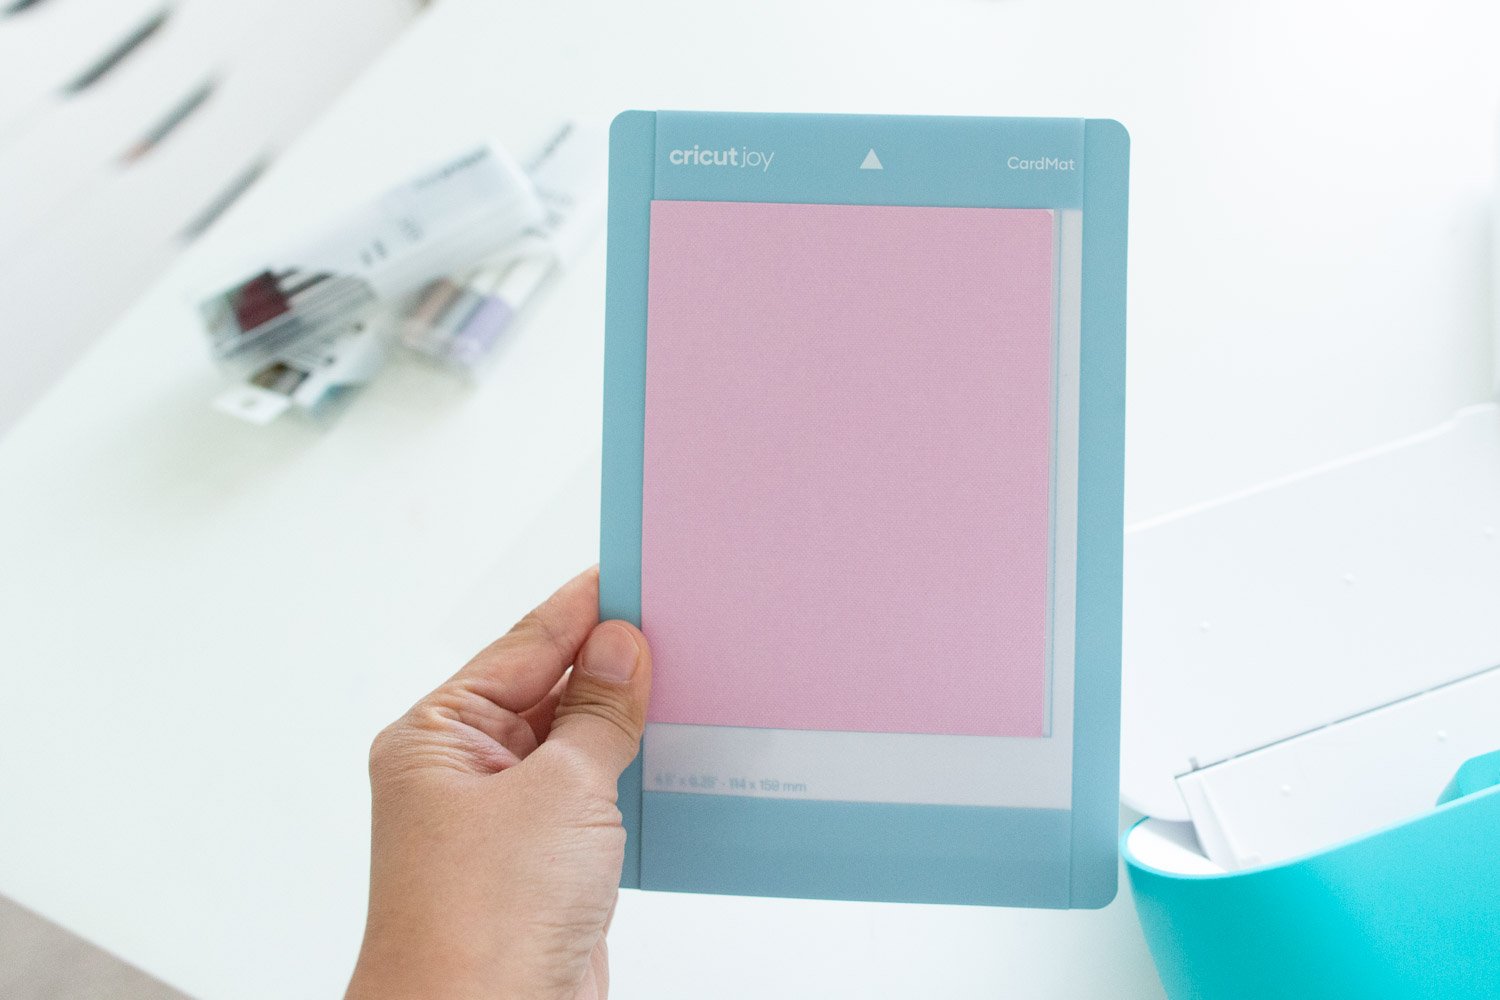
In order to use it, you'll take your pre-scored card and put it in the top left of the pocket of the card mat. The top part of the pocket is sticky to hold down the front flap of the card in order for the Cricut Joy to cut it. This will allow the Cricut Joy to cut the top of the card while leaving the bottom of the card alone.

Related: How to Use Card Mat with Cricut Explore or Cricut Maker
Project Ideas for Using Cricut Joy Cards
Cricut's product line is amazing because the library that they have for Design Space has ready-to-make projects where you can literally pick what you want, choose your material, and literally make in just a couple of minutes. They released the Cricut Joy in March of 2020, and they are continually releasing new designs. The ones that they have in there are absolutely beautiful and stunning. Some of them are really intricate in detail and design, so you must go check out their project gallery before creating your own!
If you are looking for various holidays to make cards for, check out national daily holidays.

Quick Corner Card Cuts
The Quick Corner Card Cuts refers to being able to cut out a design from the card templates, and then allowing a new type of card to be "inserted" into corner slots that were cut with with the Cricut Joy on the main card.
Think of it like a layered card. If you look in Design Space, you'll find a lot of Quick Corner Cards that Cricut has already premade for you ready to go.
You can search for these by going into "All Categories" and searching for "Quick Cuts" or checking the "Free for Cricut Joy" category.
Before Using Cricut Joy Insert Cards with the Cricut Joy Card Mat
Before you get started with making your own cards easily using Cricut Joy, here are a few educational tips and pointers to ease any frustration you might initially have.

You won't be able to customize ready made projects.
Generally, when you choose a project in Design Space, you are be able to resize it and modify it as you see fit.
With Cricut Joy Insert Cards, the cards come in one size and not having the customize button ensures that you don't accidentally modify the sizing. The Cricut software designers were smart enough to prevent you from causing more confusion for yourself. Bottomline is that the Cricut Joy ready made projects are perfect the way they are without the need to resize.
Choose "on card mat" as your material load type when using the Insert Cards.
You'll have three material load types: without mat, on mat, and on card mat. If you are using the card mat with the pocket, you'll want to choose this option.
- Without Mat: This is for using Smart materials.
- On Mat: This means you are creating a card on the green mat.
- On Card Mat: This is using the exclusive Cricut Joy card mat to allow you to fold over the part that is not being cut/drawn on.
The material setting you want is "Insert Card - Cardstock."
There are so many words with "card" like card stock, card mat, card insert, card this, card that you might be overwhelmed with the technology. I know it can be confusing, but to break it down, the "Insert Card" is the noun, and the "Cardstock" is also a noun describing what type of material is being used.
For this setting, you'll want to set your material to: Insert Card - Cardstock.
The Cricut Joy has no buttons, so you'll need to start the project via the software, Design Space.
If this is your first project with the Cricut Joy, you should know that the Cricut Joy is buttonless to keep with the seamless and innovative design. What causes a lot of confusion is that if you've had the Cricut Explore Air 2 or Maker, there's always been a button you can press to "start" the project. With the Cricut Joy, you'll need to remember to go back to Design Space and click the "go" button.
When you initially load the card mat (or any material really) into the Cricut Joy, it will automatically sense it and will start auto-loading the material. It will pull the material through to ensure it has enough material for the design you are going to be sending it in the initial load.
About this Cricut Joy Project with Card Inserts
In this project, you'll be able to follow along with making your own card.
The ones I'm making here are to share with first responders, doctors, and nurses showing our support for the work they are doing to care for those that are sick, high-risk, or currently fighting. My hope is that my little card can help them see how much we appreciate their sacrifice.

How to Use Cricut Joy Cards
Tools
Materials
Instructions
In Design Space, first thing go to Cricut Access near the middle of the page and then go to View All.

This will bring you to all the projects that you can choose from. Next, you'll want to go to Free for Cricut Joy in the drop down on the right menu and bring projects that are free that are only made for the Cricut Joy.

In the search field, search for the word card. You'll see a lot of the Quick Corner Cut Cards.

The next screen will show you details about the project including the description, finished size, materials to cut, and preparation details. Click the green Make It button.

In the next screen, you can see the details of the card. For the Material Load Type, choose On Card Mat.

Choose the material size that you want to use with the precut insert cards, usually this is 4.25" x 5.5".

Choose Continue. Design Space will look for Cricut Joy. Once it is found, you'll need to set the material to the Insert Card - Cardstock.

Follow the instructions in Design Space, replacing the blade or the pen as instructed.

Remove the plastic protective cover from the card mat. Choose your card and insert the one that you want to use for this project. Open up the card with one hand. With another hand, separate the clear plastic front and place the card back and push it up and to the left. Make sure the top of the card is secure. The front should be pressed down to the sticky part of the mat.
Gently guide the card mat with the card insert into the Cricut Joy. The Cricut Joy will automatically pull the card into the machine.
In Design Space, choose Go.

The machine will start the drawing portion first (if your design requires it) and then will instruct you on switching the blade. It will take less than 45 seconds, depending on how intricate your card is. Once it's 100% complete, a prompt will appear. Choose Unload to remove the card from the machine.

Carefully remove the card from the machine and weed the negative areas.
Next, you can then write a personalized message in the machine. Design what you want to write inside of the card in Design Space.

Click Make It. In the window that prompts, choose On Card Mat. Click Done.

Click Continue.
You'll get the following screen. On the left, choose Material Load Type as On Card Mat. The Material Size should be set to 4.5" x 5.25". Next, use the card layout display to move the text where you want it. Click Continue.

On the next screen, choose Insert - Card Stock. Follow the prompts for Load Tools and Materials.

Next, insert the card mat with the insert card into the Cricut Joy. Ensure that it is secure via the tackiness of the card mat. Click Go. It will start drawing on the card.

The machine will go and then ask you to unload.
Remove the card from the card mat.

Slide the insert card piece into the four corner slots.
Enjoy the card!

Summary of Cricut Joy Insert Cards
Cricut Joy Insert Cards make celebrating any day a snap! It has never been easier to make gorgeous handmade cards for all of the occasions you celebrate every day.

Here's another tip: You can buy a bunch of insert cards and create a bunch of all occasion cards so that whenever a party or holiday sneaks up on you, you have cards on hand ready to go.
Make sure you check out Design Space to find absolutely free cut designs for Grandparents Day, Mother's Day, Father's day, Teacher Day, Boss Day, weddings, newborns and so much more!
More Cricut Joy Inspiration
- Definitive Guide to Ultra Portable Cutting Machine
- Cricut Joy Accessories and Starter Kits
- Home Organization with Cricut Joy
- Cricut Joy Insert Cards Tutorial
- Cricut Joy Pantry Labels Tutorial
Cricut Joy Insert Card Tutorial

Learn how to use Cricut Joy Insert Cards with your portable cutting machine. You'll be able to make beautiful and meaningful birthday cards, get well cards, congratulatory cards, baby showers, bridal showers, weddings, anniversaries, and other greeting cards quickly and easily without the mess of using scissors and glue.
Materials
- Cricut Joy Insert Cards
Tools
- Cricut Joy
- Cricut Joy Card Mat
- Cricut Joy Pens
- Cricut Joy Starter Tool Set
Instructions
- In Design Space, first thing go to Cricut Access near the middle of the page and then go to View All.
- This will bring you to all the projects that you can choose from. Next, you'll want to go to Free for Cricut Joy in the drop down on the right menu and bring projects that are free that are only made for the Cricut Joy.
- In the search field, search for the word card. You'll see a lot of the Quick Corner Cut Cards.
- The next screen will show you details about the project including the description, finished size, materials to cut, and preparation details. Click the green Make It button.
- In the next screen, you can see the details of the card. For the Material Load Type, choose On Card Mat.
- Choose the material size that you want to use with the precut insert cards, usually this is 4.25" x 5.5".
- Choose Continue. Design Space will look for Cricut Joy. Once it is found, you'll need to set the material to the Insert Card - Cardstock.
- Follow the instructions in Design Space, replacing the blade or the pen as instructed.
- Remove the plastic protective cover from the card mat. Choose your card and insert the one that you want to use for this project. Open up the card with one hand. With another hand, separate the clear plastic front and place the card back and push it up and to the left. Make sure the top of the card is secure. The front should be pressed down to the sticky part of the mat.
- Gently guide the card mat with the card insert into the Cricut Joy. The Cricut Joy will automatically pull the card into the machine.
- In Design Space, choose Go.
- The machine will start the drawing portion first (if your design requires it) and then will instruct you on switching the blade. It will take less than 45 seconds, depending on how intricate your card is. Once it's 100% complete, a prompt will appear. Choose Unload to remove the card from the machine.
- Carefully remove the card from the machine and weed the negative areas. Next, you can then write a personalized message in the machine. Design what you want to write inside of the card in Design Space.
- Click Make It. In the window that prompts, choose On Card Mat. Click Done.
- Click Continue.
- You'll get the following screen. On the left, choose Material Load Type as On Card Mat. The Material Size should be set to 4.5" x 5.25". Next, use the card layout display to move the text where you want it. Click Continue.
- On the next screen, choose Insert - Card Stock. Follow the prompts for Load Tools and Materials.
- Next, insert the card mat with the insert card into the Cricut Joy. Ensure that it is secure via the tackiness of the card mat. Click Go. It will start drawing on the card.
- The machine will go and then ask you to unload.
- Remove the card from the card mat.
- Slide the insert card piece into the four corner slots.
- Enjoy the card!
Recommended Products
As an Amazon Associate and member of other affiliate programs, I earn from qualifying purchases.
-
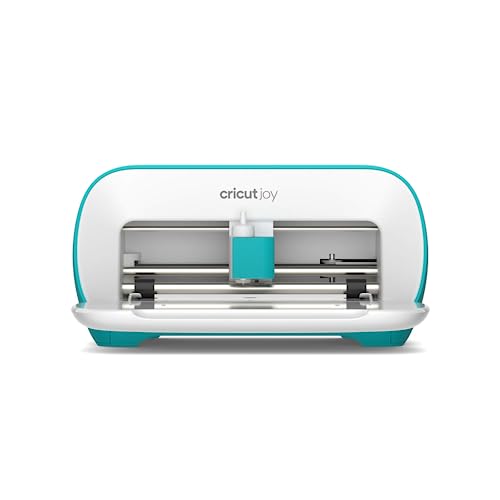 Cricut Joy Machine - Compact and Portable DIY Machine For Quick Vinyl, HTV Iron On and Paper Projects | Makes Custom Decals, Custom T Shirt Designs, Personalized Greeting Cards, and Label Maker
 -
 Cricut Card Mat, Joy, Blue
 -
 Cricut Joy Fine Point Pens, 0.4 mm (3) Black, Brown, Gray
 -
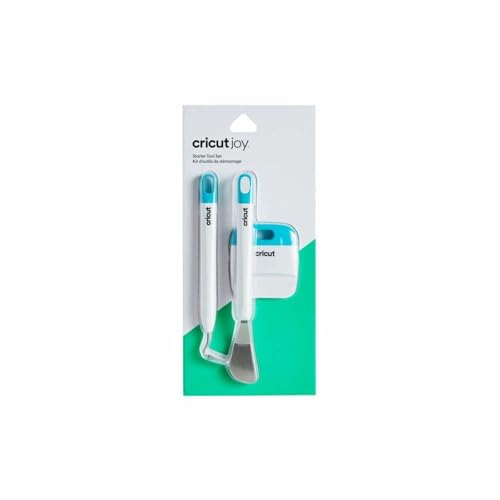 Cricut Joy Starter Tool Set
 -
 Cricut Joy Insert Cards - DIY greeting card for Baby Shower, Birthday, and Wedding - Macarons Sampler, 12 ct


