Content may contain affiliate links. When you shop the links, we receive a small commission at no cost to you. Thanks for supporting my small business.
I’m so excited about our DIY dresser to buffet project reveal. About two weeks ago, I was clicks away from purchasing this brand new buffet and sideboard from Pottery Barn. That was until I convinced my husband to renovate a bedroom dresser and move it to the living room! Leave it up to me to think of the crazy DIY ideas and my husband to layout a game plan to make it work for the space.
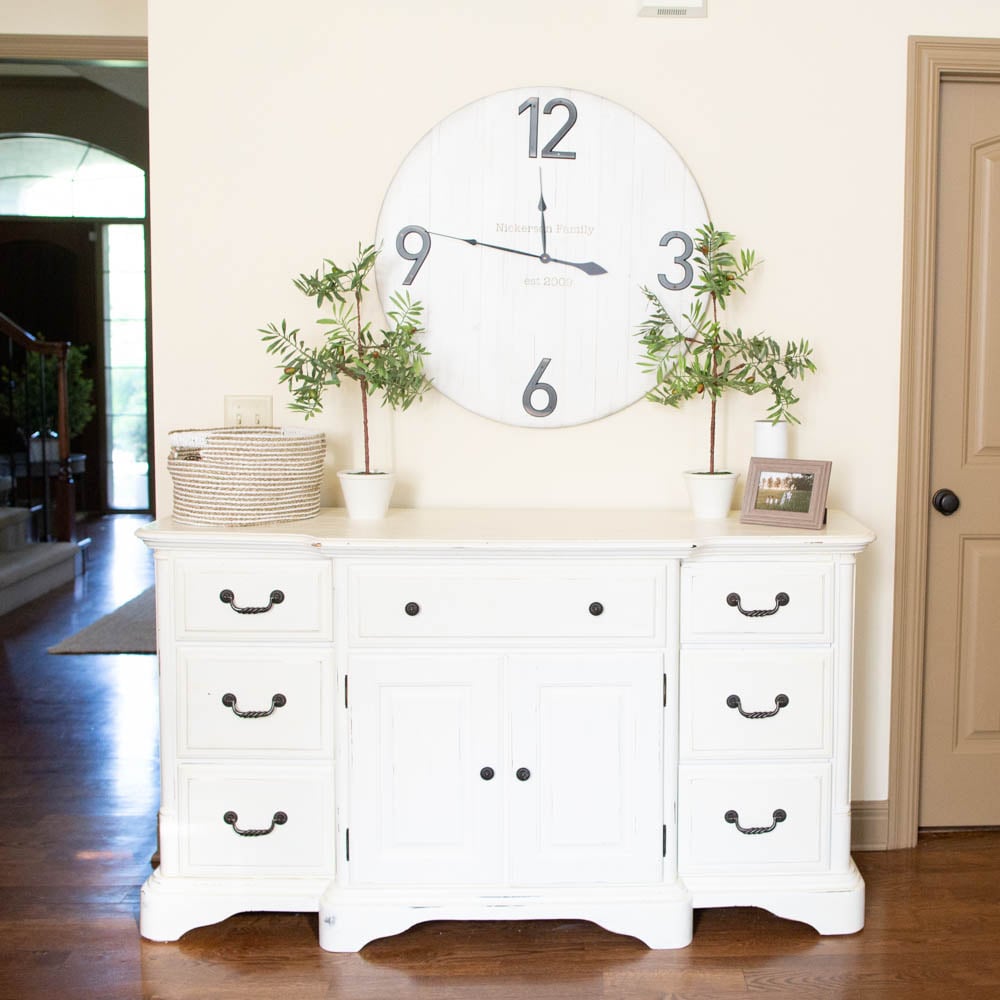
After Photo of Dresser to Buffet Transformation

I got this dresser back in 2006 for $800. At the time, it was the most expensive piece of furniture I owned and purchased with my first grown-up job. Ten years later, I still am in love with the style of the dresser.
When we moved the dresser into the living room as a buffet, the height of the dresser in the living room hid the light switch. The husband decided that we should hack off the first set of drawers at the top to make it shorter.
Materials and Tools Needed for Sizing the Dresser to Buffet
Steps for Sizing the Dresser:
1) Take the top off. The first step was to take the top off in one piece.

The top was just held with glue and a few screws, so it was super easy to take off using a joint knife.

Here’s what it looks like with the top off.

2) Remove the hardware, side detail and panel. The next step was to remove the side detail. This was held also by glue. Again, we used the joint knife to pry off the side piece. The plan is to move the panel down to the appropriate spot once we hacked off the top so it looked original.

We had to wedge the joint knife in there a few times.


This is what it looks like once the side panel is off.

3) Cut the dresser down to size. Next, we got out his new jigsaw. Ryan was so excited to use it! Its been sitting in the garage. He dusted it off and got to work.

It was definitely tricky to cut a straight line, as you can tell in the image below. But we got there! Tip: Use another person to hold the dresser as you cut it!

Boom, shorter.
The dresser to buffet is halfway done!
Here is the top section off:
4) Put it back together. Next, we glued and screwed in the top of the soon-to-be-buffet.
5) Prep really well for painting. While I have heard that you do not need to sand before using chalk paint (recipe below), we decided to anyway after a few hard lessons learned in the past. We did not prime because we wanted the brown to see through after we roughed it up for an aged look.
Materials and Tools Needed for DIY Chalk Paint (and generally painting the buffet)
- Calcium Carbonate
- Latex Paint (Your Color Choice)
- Minwax Polyurethane Sealer (optional)
- Foam/Sponge Brushes
- Paint rag
- Spray Paint
Steps for Painting the Buffet
1) Make the chalk paint. We made some chalk paint with the left over paint that we had from the playroom paint color we used on the trim. For the chalk paint, we used the following easy directions: mix 1 tablespoon of calcium carbonate with 1 tablespoon of water until the calcium carbonate dissolves. Next, mix that with your targeted paint color. I used a a semi-gloss sheen on mine because that’s the paint I had left over from trim.

It took us about 4 coats to go from dark to white. However, I have heard from others that it shouldn’t take this long going from light to dark.
Since we went with white, we used spray paint to paint the inside of the cabinet with two coats.

2) Make it look old by sanding it down. You need to let the buffet harden before doing this (2 days). To scuff it up for an aged look, we used a combination of a fine sand block and razor to knock off some of the paint.

We did it in areas where they would normally have wear and tear.

2) Seal it (optional). Next, I was tasked with putting a sealer on it because we have kids and know that they love touching and putting their fingerprints on basically everything. We used clear sealer to allow us to wipe down the grime.
My lesson learned putting on the sealer: Do not use the foam/sponge brush for this! Instead, use a rag. I was so upset because clear sealer is obviously clear and you can’t really see it and it will bubble up like this! So I had to re-sand and paint another coat!

Here’s another close up of the sealer gone bad. That’s why I put sealing as optional!

3) Add back hardware. Next, we added back the hinges and door knobs. Done!

4) Decorate. I love that I can use this table as a functional and seasonal decor area!

Another side profile so you can see the aging done on it:

I love how our dresser to buffet transformation turned out!

If you don’t want to DIY one and would rather buy one, check out these items below:
For more inspiration, check me out on Facebook and pin the below image!

More Easy DIY Projects