Content may contain affiliate links. When you shop the links, we receive a small commission at no cost to you. Thanks for supporting my small business.
Custom framing is one of those things that sounds reasonable until you get the quote. When I priced out framing our kids’ 16×20 portraits at a frame shop, it was going to run $150 to $300 per picture. We had three to frame. That math ends the conversation fast.
So we started framing our own pictures with open back frames instead, and the total came out to a fraction of a single custom-framing quote. This post walks through exactly how we did it — the frames, the one tool that makes it possible, and every step from shipping box to the gallery going up our staircase.
What Is an Open Back Frame?
An open back frame is exactly what it sounds like: just the frame itself — no glass, no mat, no backing board. Because you’re not paying someone to assemble those layers, open back frames cost far less than pre-made framed sets, especially in the big sizes where custom framing gets painful. You add the glass, mat, and backing yourself, and that’s the entire trick to framing large family photos inexpensively.

Ours are ornate champagne-gold frames, and they ship flat with corner protectors on. We ordered from Framers Brand, a made-in-the-USA framing supplier — the mats and backing came from the same order, cut to size.

The One Tool You Need: a Point Driver
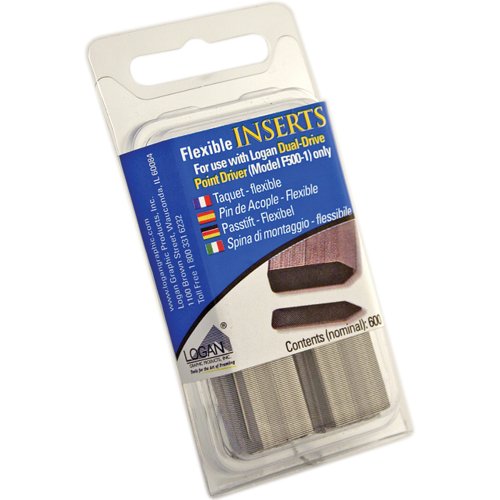
This is the piece of equipment that makes DIY framing work: the Logan point driver. It shoots flat metal points into the inside edge of the frame — that’s what holds the glass, mat, photo, and backing board in place. It’s the same tool frame shops use, and it has framed the large family photo above our door, Ryan’s deer puzzle (don’t get me started), and all of the kids’ portraits going up to the second floor. It has paid for itself over and over.

Supplies for Framing Your Own Pictures
- Open back frame, sized to your print + mat
- Mat board (we used a double mat with a thin gold line — it reads custom without the custom price)
- Glass or acrylic, cut to the frame opening
- Backing board (foam core or corrugated framing board)
- Logan point driver + framing points
- Glass cleaner and a lint-free cloth
- D-ring hangers or picture wire
If you’d rather skip a step, most online framing suppliers will sell the frame, mat, and backing as one order — you just tell them your print size. Your only jobs are cleaning, stacking, and pointing.
How to Frame Your Own Pictures: Step by Step
1. Measure your print and order the frame and mat
Decide what you’re framing first, then order the frame around it — not the other way around. The print size determines the mat opening, and the mat’s outside edge determines the frame size. Our portraits are large prints, and the double mat adds a few inches of breathing room on every side, which is what makes a big photo look intentional on a tall wall instead of swallowed by it.

2. Clean the glass — both sides, before assembly
Clean the glass while you can still reach both sides, because the moment everything is sealed in, that one smudge becomes permanent. Spray the cleaner on the cloth (not the glass) so nothing drips between your layers.
3. Stack the layers into the frame
Lay the frame face down and stack in this order: glass, mat, photo, backing board. Flip it and check the front once before you lock anything in — this is when you catch the crooked mat or the speck of dust sitting right on your child’s face.
4. Secure everything with the point driver
Hold the backing snug with one hand, press the point driver flat against it, and squeeze. Drive a point every 4 to 6 inches around all four sides. It takes more squeeze than a regular staple gun, so brace the frame against something solid — and yes, the kids will want to watch this part.


5. Add the hanging hardware
Screw D-ring hangers into the back on both sides, about a third of the way down from the top. For heavier frames like these, two D-rings straight onto two wall hooks holds more securely than a wire — and the frame stays level instead of tipping forward.

6. Done — for a fraction of the custom framing price
Here’s one of the finished portraits: double mat, gold line, ornate frame. Nobody has ever looked at it and asked whether we framed it ourselves.

Hanging Them: Our Staircase Gallery
We hung all three going up the staircase, stepping each frame up with the stair line. Matching frames and matching mats are doing the heavy lifting here — the wall reads as one intentional display instead of three separate pictures. If you’re planning a bigger arrangement, my trick for hanging a wall collage without extra nail holes works exactly the same way on a staircase.


FAQ: Framing Your Own Pictures
Is glass or acrylic better for DIY framing?
Acrylic is lighter and doesn’t shatter, which matters on a staircase or anywhere kids run. Glass is cheaper, scratches less, and looks a touch clearer. We used glass here; on a kid-height wall I’d go acrylic.
Do I really need a mat?
Need, no. But the mat is most of why DIY framing looks custom instead of dorm-room. It’s a few dollars per picture, and a double mat with a contrast line is the single cheapest upgrade in this whole project.
Is a point driver worth it for one project?
If you’re framing one small photo, glazier points and a flathead screwdriver will get you through. But at three or more frames — or anything large — the point driver turns the fiddliest step into a squeeze, and you’ll keep finding things to frame with it. Ours has been going strong since 2016.