Content may contain affiliate links. When you shop the links, we receive a small commission at no cost to you. Thanks for supporting my small business.
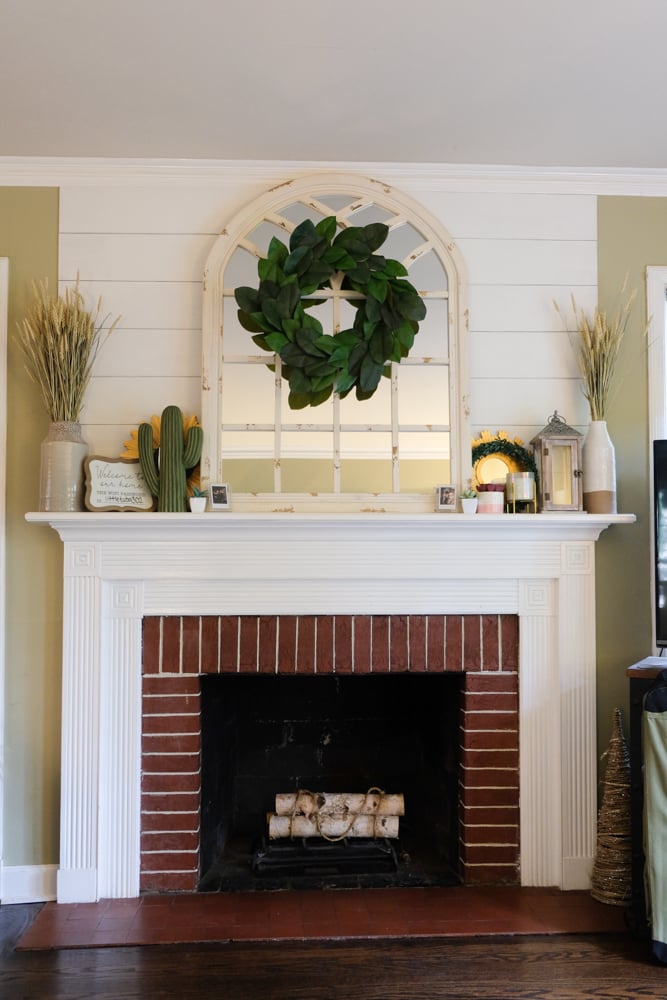
This simple tutorial will show you the easiest way to upgrade your fireplace from drab to fab with a shiplap fireplace step by step guide to get that cozy, cottage, farmhouse style look that is definitely on trend this season!

For all those who love that neutral, cozy cottage and farmhouse style decor (think Fixer Upper), I’m sharing with you a super easy and fun tutorial on how to make a shiplap fireplace! This can all be done for under $40 in material if you have all of the tools!
This project incorporates real shiplap planked walls and not a faux peel and stick shiplap.
Shiplap planked walls are a classic feature that can be incorporated as an accent wall in any home. If you are needing to upgrade your fireplace, adding the look of an accent shiplap accent wall is an inexpensive way to elevate the look of your space.
With this simple tutorial, you’ll be able to add some charm, character, and beauty to your space with a few materials that you can easily grab from your local hardware store.
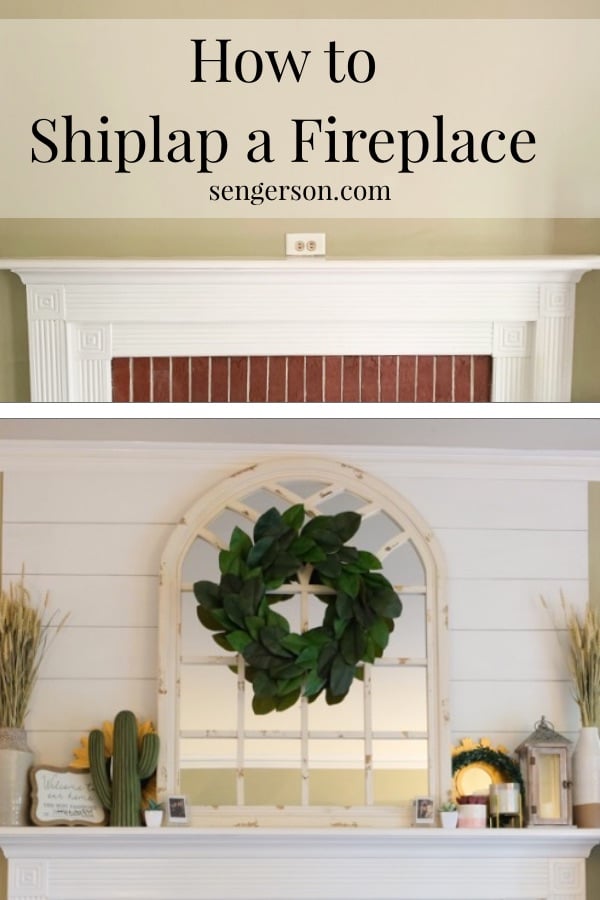
Before I go into the tutorial, I wanted to show you this amazing before and after!

This is an absolutely GORGEOUS renovation that you can do over just one weekend. Once it’s done, you can sit back and relax. This fireplace transformation can change your entire living space by adding just a few boards above the fireplace. Shiplap has been around for a long time and has a classic look that stands the test of time.
Challenges That You’ll Face with a Shiplap Fireplace
Before embarking on this easy project, I wanted to share with you some considerations before planking that accent wall for your fireplace.

Angled Walls
If you have angled walls around your fireplace, this might cause you to have to do more addition and subtraction to get the angles right!
Adding a Television
You’ll need to make sure you account for adding in the holes for the outlets and ensuring you also use a stud finder to ensure you are hitting studs and not the electrical cords on the wall.
Color of Shiplap
In most traditional installation of shiplap over a fireplace, most often people will paint it white. I absolutely love Benjamin Moore’s White Dove because it’s a gorgeous, white non-yellow cream color that goes well with shiplap.
A contrasting color that is also used is black. If you are going for the modern farmhouse look with a few modern day twists and your home has a few dark iron accents, black shiplap is a great alternative. If you plan on adding a television against that wall, black shiplap actually would look amazing in this space as well.
Painting Inside Shiplap Grooves
There are three approaches to painting the shiplap.
The first is that you can paint the shiplap before even adding them to the walls. That also means that you should paint the wall the same color so that it doesn’t peek through the gap.
The second approach is that you paint the shiplap after adding each board, so that you ensure that you add paint inside the grooves, which I think this might be the better option.
The third approach is that you paint after the shiplap is in place, but taking extra care to add paint inside the gaps. This might cause you a lot of headache because if you are not careful, you might get paint globs all over!
Let’s talk about how you can achieve this traditional and classic look of a shiplap fireplace.
How to Make a Shiplap Fireplace

Tools Needed for a Shiplap Fireplace
circular saw or table saw
compound miter saw
air compressor
brad nail gun
tape measure
stud finder
long level
tile spacer (you can also use nickels)
Supplies For a Shiplap Accent Wall
(2) 4′ x 8′ x 3/8″ sanded pine plywood
primer
paint (recommended: Benjamin Moore White Dove)
brad nails
sand paper
wood filler
Step by Step Instructions for Installing Shiplap Around a Fireplace
Step 1 – Measure Your Space
Measure the height of the space you are wanting to plank the shiplap. You’ll want to decide what size width of shiplap you want. The recommendation is 6.5″ to 8″ wide planks. You’ll want to get the strips of shiplap to sizes close as possible so you don’t have any obviously narrower pieces that stick out visually from the fireplace.
Step 2 – Cut the Plywood
Once you decide on the width, you’ll want to cut the plywood using the circular saw. Pro tip: You can have your local hardware store cut these strips for you for FREE. Lightly sand the edges so they are smooth.
Step 3 – Mark the Studs on the Wall
Next, you’ll want to use a stud finder to mark the area of the wall where the stud sits. This is where you will be nailing the plywood to in order to have a good foundation for it to sit on.
Step 4 – Start from the Top
Start from the top and work your way downwards. The reason why is because you’ll want to start from the top is because the visual line is most prominet at the top. Near the bottom of the mantle, people tend to add decor, so that area is typically hidden.
Step 5 – Level Your First Board
Use a level and place one of the shiplap boards on the wall. Make sure it is LEVEL! This is so important because you don’t want to add the last board and find out everything is uneven.
Once it is level, nail the board to the wall against a stud with the nail gun. You can certainly add it to areas without a stud, but ensure that there is a foundational stud every so often.
Step 6 – Use Tile Spacers or Nickels
You can use tile spacers or two nickels stacked on top of each other. Two nickels stacked on top of each other measure out to be 1/8 of an inch. Place the second board below the bottom of the first board. Level it up again (you’ll do this for all of the boards.)
Nail the second row against the studs like you did before. The larger the gap between the boards, teh darker of a shadow that is cast for that space. The two nickels stacked together provide a lot of definition to a planked wall as compared to one nickel overall.
Step 8 – Repeat Until the Last Row
You’ll want to repeat until the boards meet the bottom of the top of the fireplace!
Step 9 – Use Wood Filler and Paint
Use wood filler to paint where you added the nails. Next, go ahead and paint the shiplap! Add another coat as necessary.
You’ll want to make sure that you add paint in the grooves.

Enjoy how amazing your new wall looks!
Cut the 4′ by 8′ sheets of sanded pine plywood into anywhere between 6.5″ to 8″ wide planks.

Summary of Shiplap Over a Fireplace
Shiplap wooden panels are a gorgeous and easy install and are an increasingly popular and classic style to add to elevate your fireplace. Using 3/8 inch plywood planks are an easy way to achieve the shiplap fireplace look. Plywood is super light to handle and are flexible enough to work with.

Adding a farmhouse, rustic character to your home with a shiplap fireplace can give your home the look of a reclaimed wood wall by channeling your inner Joanna Gaines by shiplapping your accent wall the easy and simple way. It provides the perfect, subtle texture to your space.
Shiplap can help take an otherwise standard fireplace really standout and provide small spaces a fresh and inviting look.
Have you added shiplap to your home? Let me know what you used to attach the shiplap to your now planked fireplace! I absolutely love how this fireplace turned out! Check out some other modern farmhouse style living room ideas.
Shiplap Fireplace - Easy Wood Panel Planked Accent Wall Tutorial

Adding a farmhouse, rustic character to your home with a shiplap fireplace can give your home the look of a reclaimed wood wall by channeling your inner Joanna Gaines by shiplapping your accent wall the easy and simple way. It provides the perfect, subtle texture to your space.
Materials
- (2) 4' x 8' x 3/8" sanded pine plywood
- primer
- paint
- brad nails
- sand paper
- wood filler
Tools
- circular saw or table saw
- compound miter saw
- air compressor
- brad nail gun
- tape measure
- stud finder
- long level
- tile spacers or nickels
Instructions
- Measure the space for the shiplap. Measure the height of the space you are wanting to plank the shiplap. You'll want to decide what size width of shiplap you want. The recommendation is 6.5" to 8" wide planks. You'll want to get the strips of shiplap to sizes close as possible so you don't have any obviously narrower pieces that stick out visually from the fireplace.
- Cut your smooth plywood. Once you decide on the width, you'll want to cut the plywood using the circular saw. Pro tip: You can have your local hardware store cut these strips for you for FREE. Lightly sand the edges so they are smooth.
- Identify the studs on the wall. Next, you'll want to use a stud finder to mark the area of the wall where the stud sits. This is where you will be nailing the plywood to in order to have a good foundation for it to sit on.
- Level the first board. Use a level and place one of the shiplap boards on the wall. Make sure it is LEVEL! This is so important because you don't want to add the last board and find out everything is uneven. Once it is level, nail the board to the wall against a stud starting at the top, working your way down with the nail gun. You can certainly add it to areas without a stud, but ensure that there is a foundational stud every so often.
- For the next rows, use spacers. You can use tile spacers or two nickels stacked on top of each other. Two nickels stacked on top of each other measure out to be 1/8 of an inch. Place the second board below the bottom of the first board. Level it up again (you'll do this for all of the boards.) Nail the second row against the studs like you did before. The larger the gap between the boards, the darker of a shadow that is cast for that space. The two nickels stacked together provide a lot of definition to a planked wall as compared to one nickel overall.
- Repeat until the entire wall is complete. You'll want to repeat until the boards meet the bottom of the top of the fireplace!
- Use wood filler and paint. Use wood filler to paint where you added the nails. Next, go ahead and paint the shiplap! Add another coat as necessary. You'll want to make sure that you add paint in the grooves.
Notes
There are three approaches to painting the shiplap.
The first is that you can paint the shiplap before even adding them to the walls. That also means that you should paint the wall the same color so that it doesn't peek through the gap.
The second approach is that you paint the shiplap after adding each board, so that you ensure that you add paint inside the grooves, which I think this might be the better option.
The third approach is that you paint after the shiplap is in place, but taking extra care to add paint inside the gaps. This might cause you a lot of headache because if you are not careful, you might get paint globs all over!
Recommended Products
As an Amazon Associate and member of other affiliate programs, I earn from qualifying purchases.


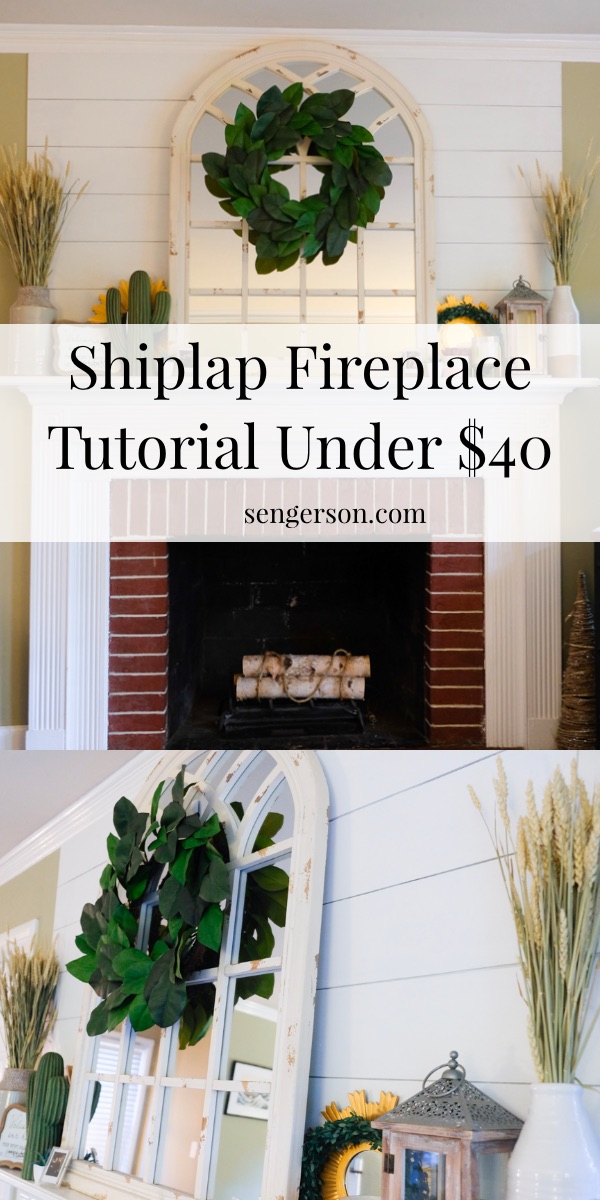
Pin this image below to your DIY project board!